First let me say thanks to the folks that helped me by answering questions and offering advice in my introduction thread.
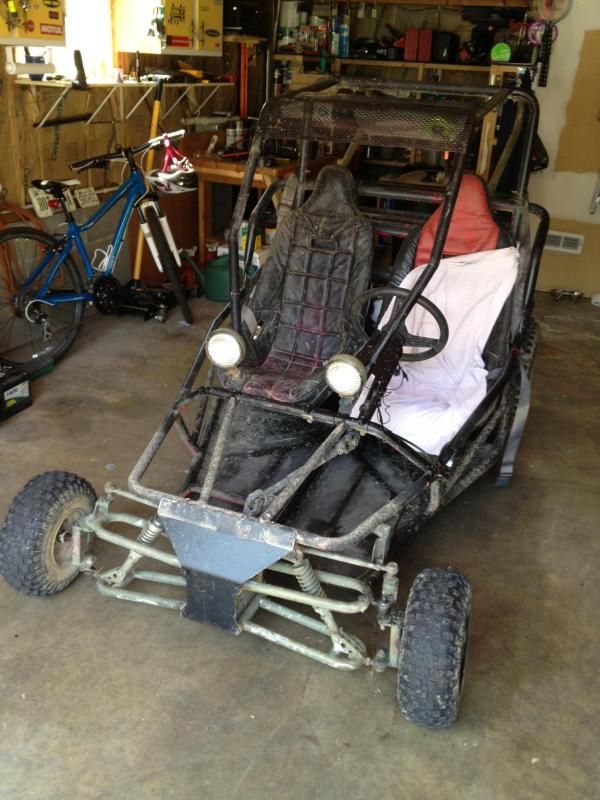
We picked up this 2005ish Yerfdog Spiderbox GX150 from a guy locally for $165.00. It would only idle and we looked at it in the evening with fading light, but I figured for $165.00 and it runs it was a bargain. My wife had a small go-kart as a kid and she loved it and has wanted our daughter, now 10 to have one of her own. Every time we saw one of the big buggies she would comment on getting one...so we put it on the trailer and brought it home.
The daylight inspection turned up a few "repairs" that left a bit to be desired, I will call it redneck engineering.
The a-arms suffered the typical fate of broken off tabs at some point and had unknown tie rod ends welded in and bolted to the spindles, each one was different from the next and they were all completely worn out. Front shocks where done. Front wheel bearings were shot. Had a carb installed from a 40 year old lawn tractor and was using the gas tank from the same tractor. Rear wheels were from a Dingo which uses a 4 on 4" pattern and had been modified to fit the 4 on 110mm pattern. One rear tire was a 21 and the other was a 22...not good on a live axle.
So I ordered a new carb, stock airbox and gas tank so I could verify the motor was in decent shape. It purred like a sewing machine so I began the process of a rebuild.
Tore the entire thing down to each individual component and did the following:
-A-arms sent to BDX for 1/4" tabs
-BDX HD ball joints
-New front shocks
-New rack and pinion
-BDX HD spindles
-Wheel bearings
-Stock rear rims and tires from BMI
-New master cylinder
-New chain
-Rebuilt the entire wiring harness
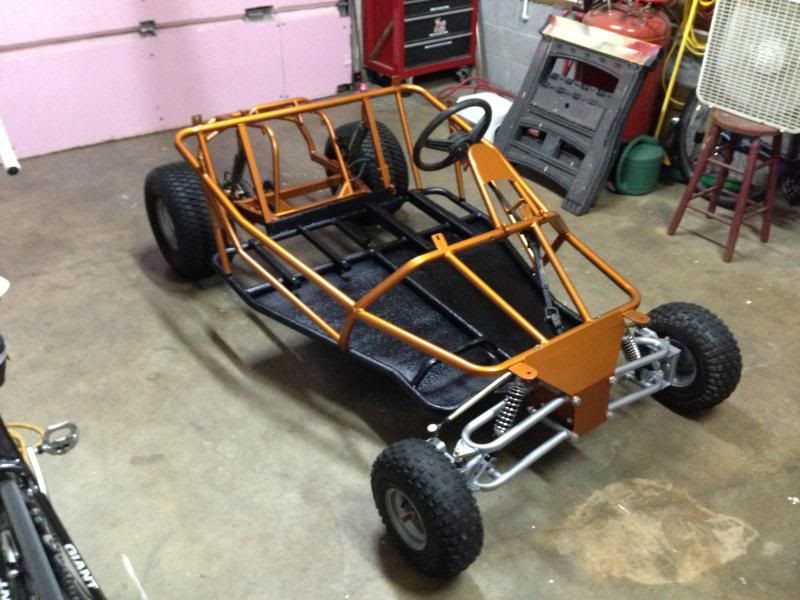
-Sand blasted the entire frame, swing arm, front rims down to metal
-Added braces to the front box frame mount
-Welded up the entire front box and added 1/8" washers to the a arm mount holes (welded on of course)
-Welded bracing to the factory battery holder
-Welded some light tabs to the frame
-Shot the entire buggy in the Dupli-Color Paint Shop lacquer system, primer, color and clear (Burnt orange metallic)
-Sprayed bed liner on the floor top and bottom
-Put it all back together with all new grade 8 hardware
So the little project was a bit more than initially expected, but it turned out great and the good news is that our daughter helped and we had a great time doing it and she is addicted to the buggy (so is my wife...).
Upon dis-assembly I did find that the axle had broken on the left side stub at some point and been welded back together. It looks like a fairly good job so I left it for now but I think I may replace the axle sometime soon.
This little machine purrs and runs so well. I left the engine completely stock because it is for a 10 year old and she doesn't need a race or even modified engine right now. Heck, it is probably capable of hitting close to 30 as it sits (my seat of the pants speedometer) so that is more than she needs. With the 20" rear tires it has plenty of torque.
May look into some more forgiving front and rear shocks and a hub conversion for the front with some larger tires.
I am terrible at documenting things, so I don't have a bunch of pictures but here are a couple of as purchased pictures and a couple of as now pictures. I plan to take a few more today. She has really not stopped the thing long enough to take pictures in the last 3 days...
Front view as purchased
Rear
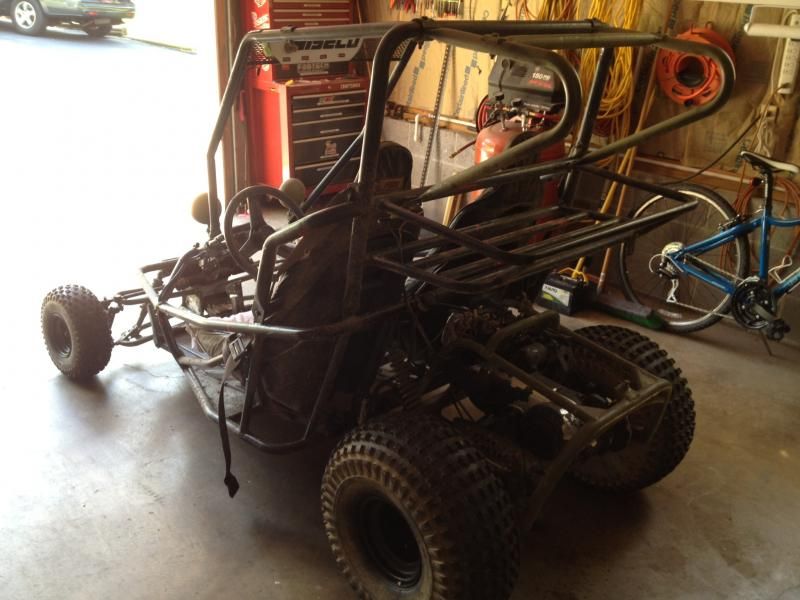
Partially assembled
First drive
