

 |

|
|
|||||||
| FrankenBuggy Tech Unconventional and Home Built Buggy Tech Forum |

|
|
Thread Tools |
|
#1
|
|||
|
|||
|
Decided to lengthen our current go cart untill we can settle on a buggy.
We have an old Yerf dog 3203 mostly stock. Since i'm pushing 6'4" it's not comfortable riding with the kids. After a few fit test measurements I decided to start out with 10" extension plans figuring if it turns out to be too long it can easily be shortened. Cut floor off first, decided it was shot 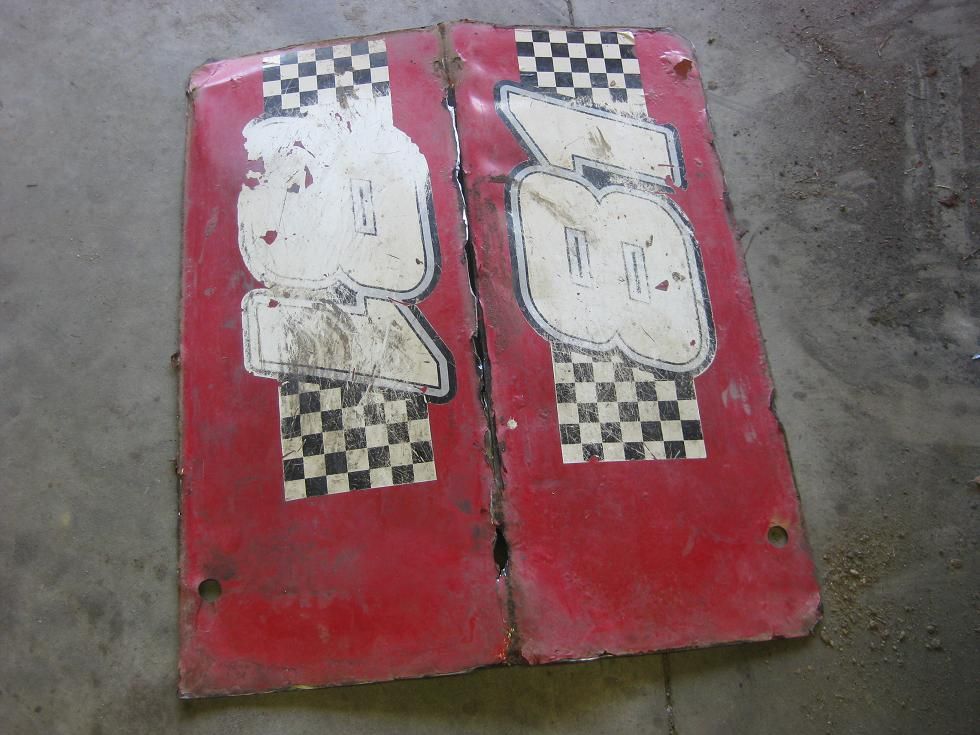 First cut. I used a regular cut off wheel. 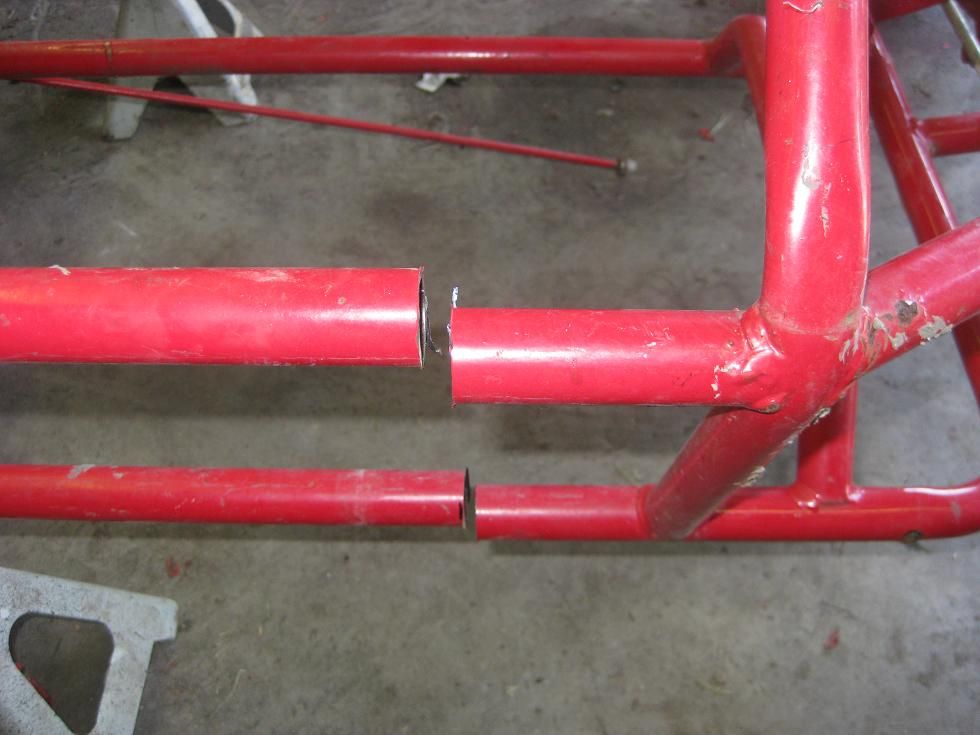 Two piece go cart. 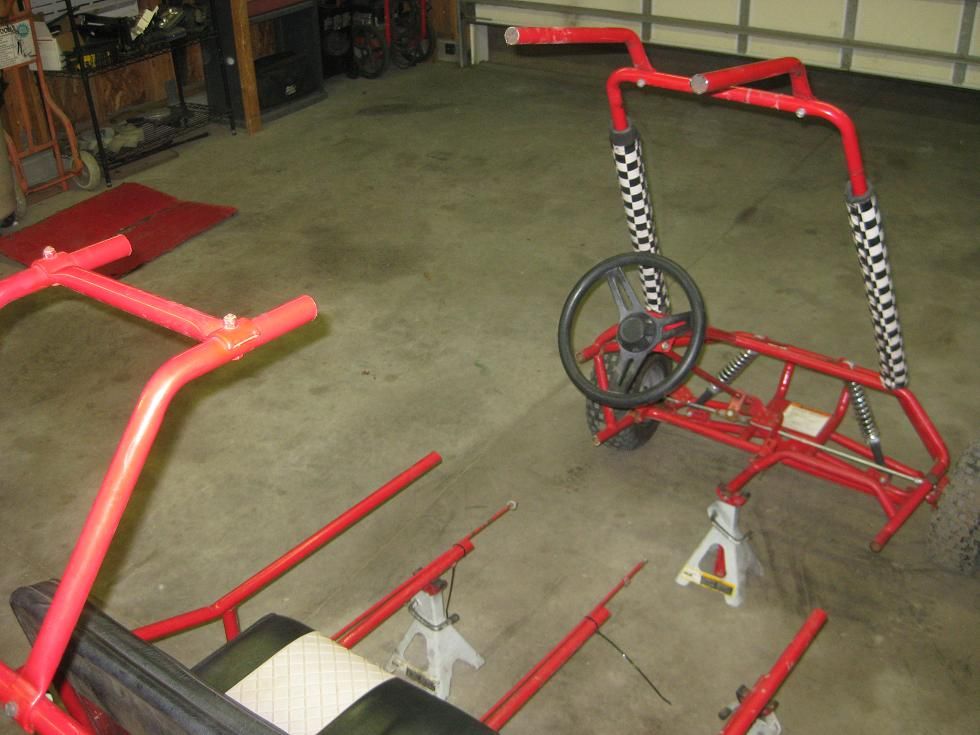 Done for today, more to come. Last edited by Kartjet52; 02-10-2013 at 08:58 AM. |
|
#2
|
||||
|
||||
|
looks good.it would be a good idea to weld the roll bars at all points on the buggy wile your at it.that would help to make the buggy stiffer.good luck
__________________
http://www.youtube.com/watch?v=IUgir...ature=g-t=2668 FABRICATION ITS HARDER THAN YOU THINK |
|
#3
|
|||
|
|||
|
Quote:
I'll keep that in mind, I also thought about adding a few extra bars in the roll bar since it will also be 10" longer. |
|
#4
|
|||
|
|||
|
Got all the slugs and tubes cut to size. I plan on drilling holes in the frame to plug weld the slugs along with welding at the seams.
Slug's to be used. 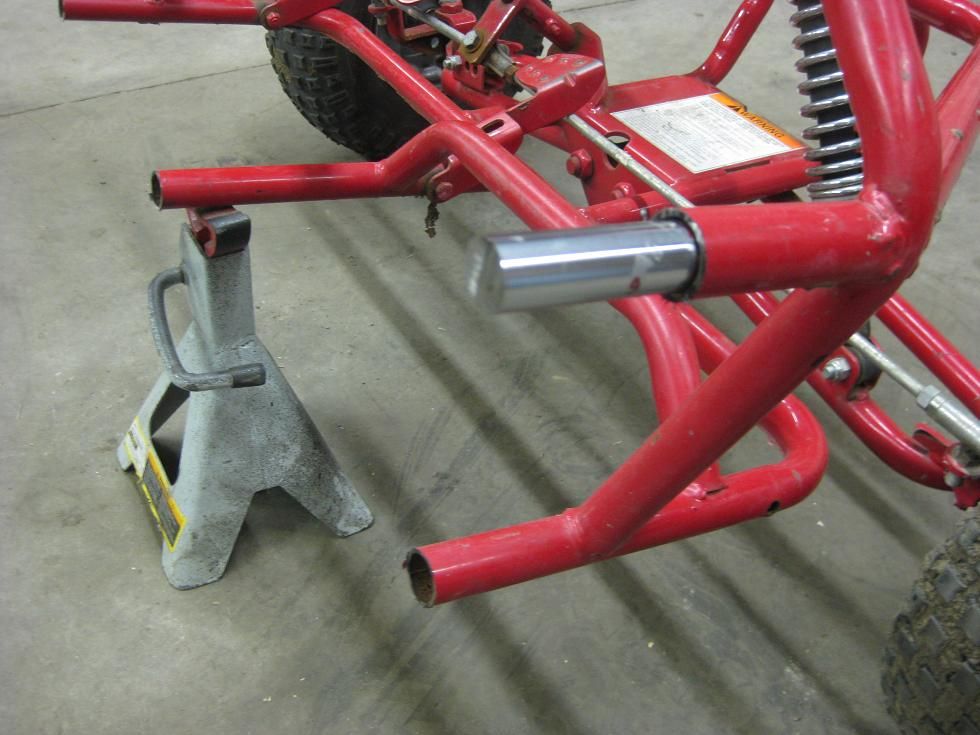 Held together with ratchet straps. Sat in it, I think 10" will be perfect. Obviously the steering wheel is to far from the seat. That will be adjusted once the frame work is done. 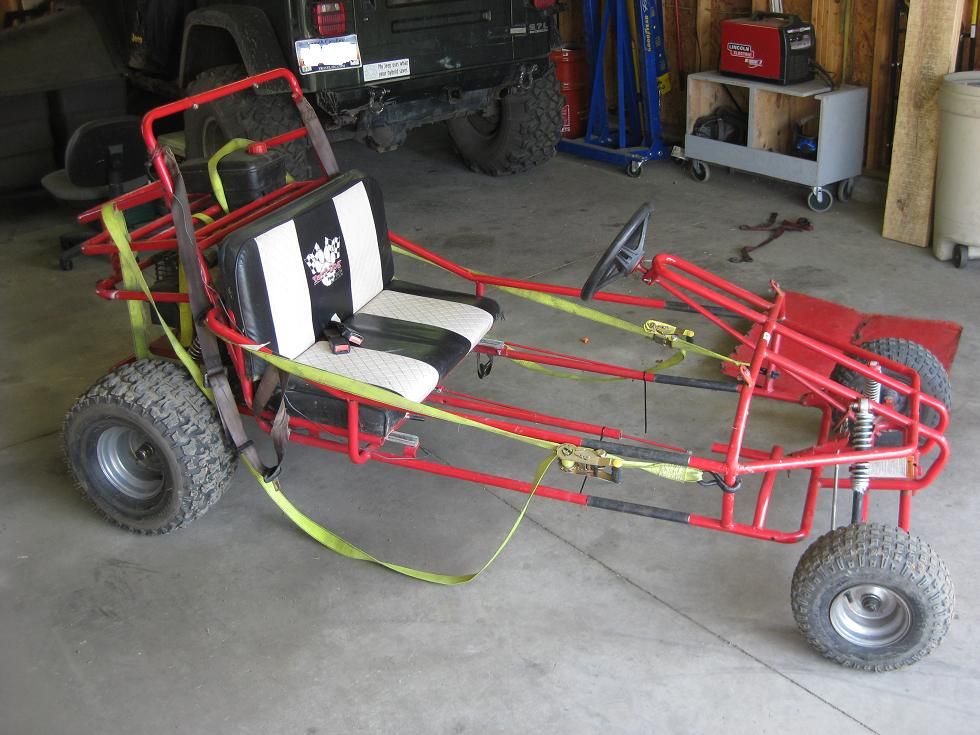 Full mock up....Keep in mind nothing welded yet just strapped together. 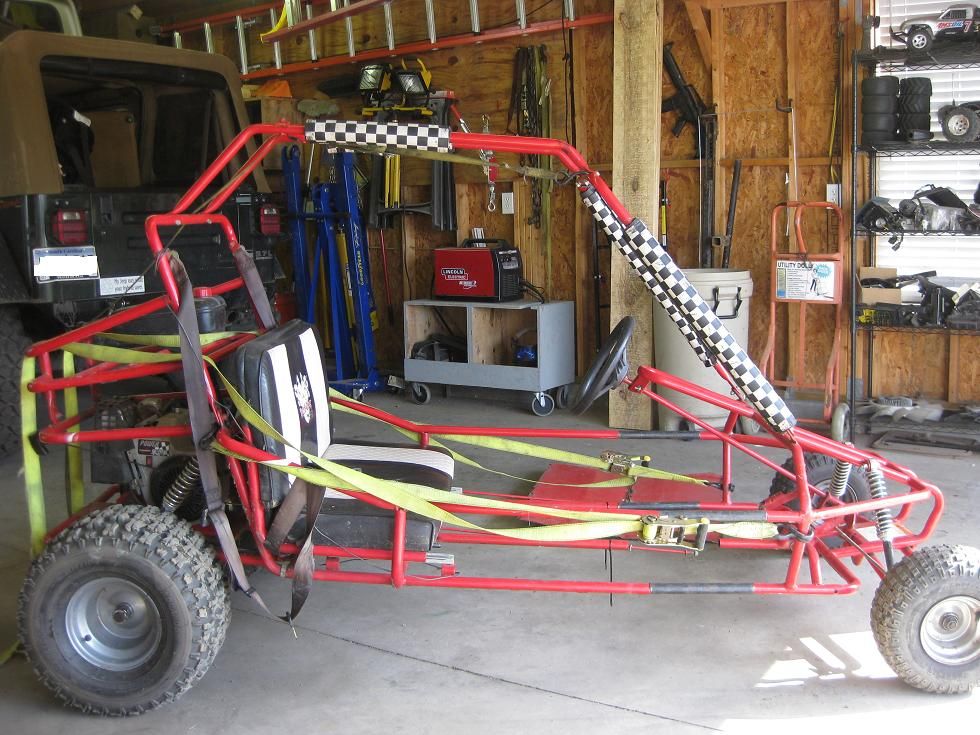 Next will be plug welding the slugs.... all 14 of them. Last edited by Kartjet52; 02-10-2013 at 09:06 AM. |
|
#5
|
||||
|
||||
|
Stretched Limo, comes to mind... add some 20" front tires, 22" rears, oh yeah! I'm liking this project.
__________________
kliff |
|
#6
|
|||
|
|||
|
I would add a bit of webbing in there but it looks good. I figure this aint your first time working with metal
|
|
#7
|
||||
|
||||
|
def need diagonial braces added
as you go along
__________________
olderthan 2008 tomberline punisher 1500 spring 12g sliders 30mm cv pumper carb uni filter no rev cdi polaris xlt snowmobile shocks for front w/550 magnum springs & blaster fronts on rear and another buggy built working on mods gk-13 white spring 17 gram sliders so far |
|
#8
|
||||
|
||||
|
very cool........
|
|
#9
|
|||
|
|||
|
Quote:
Quote:
I finished up all the plug welds on the slugs and decided to go ahead and start the steering shaft stretch. I'll post some more pics later on today. Not to change the subject but I picked up another cart yesterday, it's exactly the same as the 3203 except it's yellow (3205). No plans on stretching it, it's for my Wife and younger Son. Last edited by Kartjet52; 02-25-2016 at 10:18 AM. |
|
#10
|
|||
|
|||
|
Could you do some wheel spacers on the front? When a guy uses words like plug weld he probly has an idea whats what
|
|
#11
|
|||
|
|||
|
Quote:
Thought about spacing out the wheels but didn't want to affect the steering geometry. Maybe stretching out the control arms, along with the tie rods might be the answer. I haven't really got that far in the project yet, something to think about down the road if I go with larger front tires. |
|
#12
|
|||
|
|||
|
Frame slugs plugged
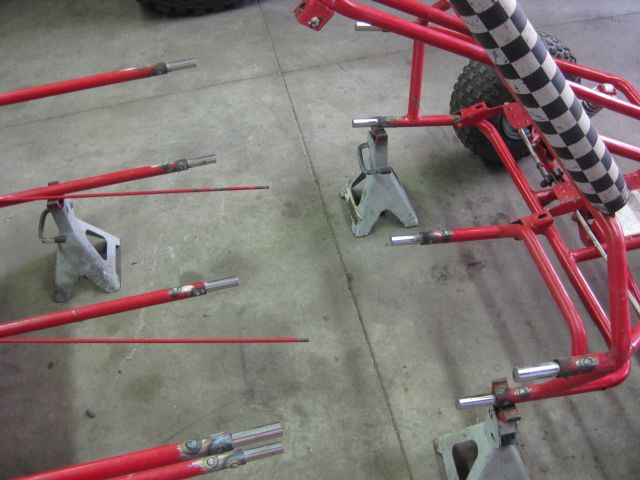 Decided to work on the steering wheel early, chopped in half and will be adding a 7" extension. The steering hoop will stay the same, the wheel and shaft will be sticking further out. Next the frame will be going back together. Still haven't decided where to add the extra support, maybe you guys could give me a few ideas. 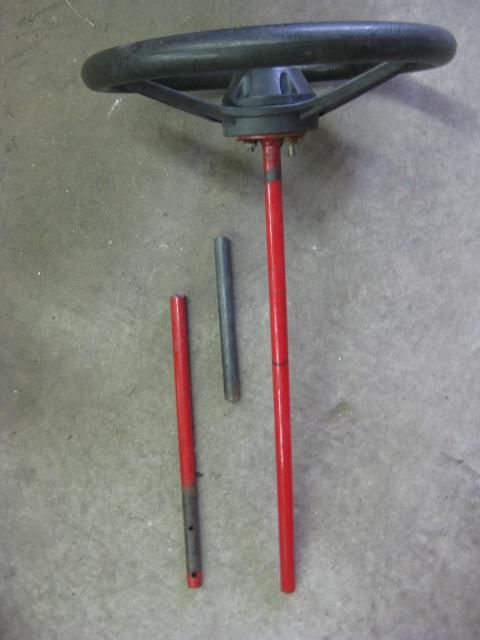 And here's a pic of the Yerf we picked up yesterday. 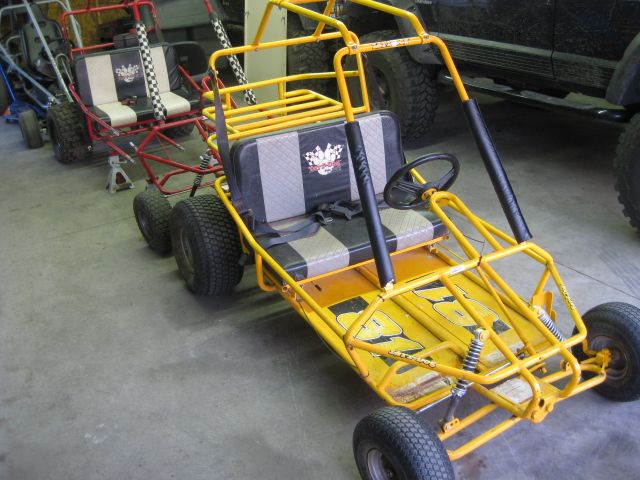
Last edited by Kartjet52; 02-10-2013 at 09:10 AM. |
|
#13
|
|||
|
|||
|
Getting ready to weld the steering shaft.
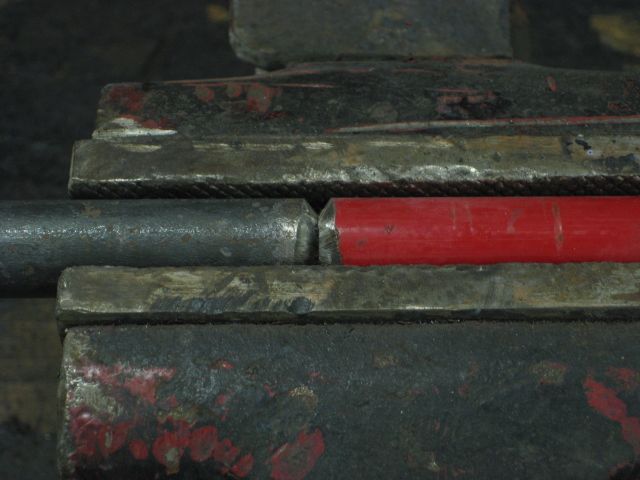 Steering extension completed. 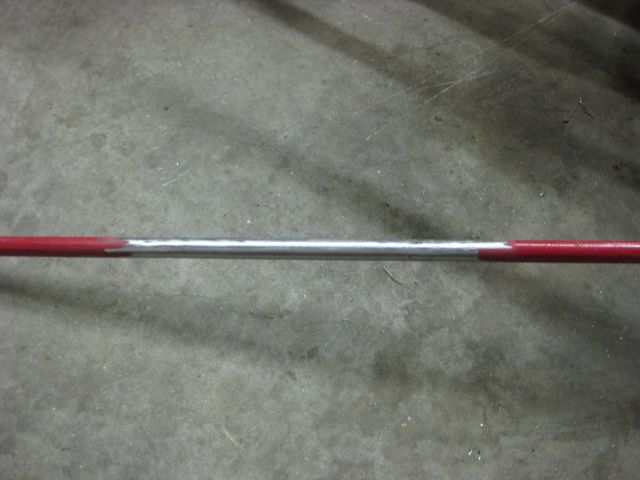 I've had this laying around the garage for years, it's a steel door from an electronics cabinet. I'll be using it for the new floor....it's slightly thicker than what was there. 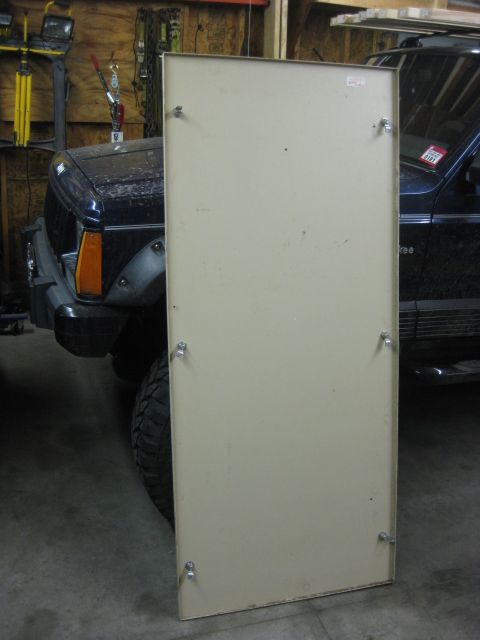 Need ideas on the extra supports for the lower frame. I painted the yellow lines where I think might be good reinforcement. I want to try to keep it simple yet safe. Let me know. 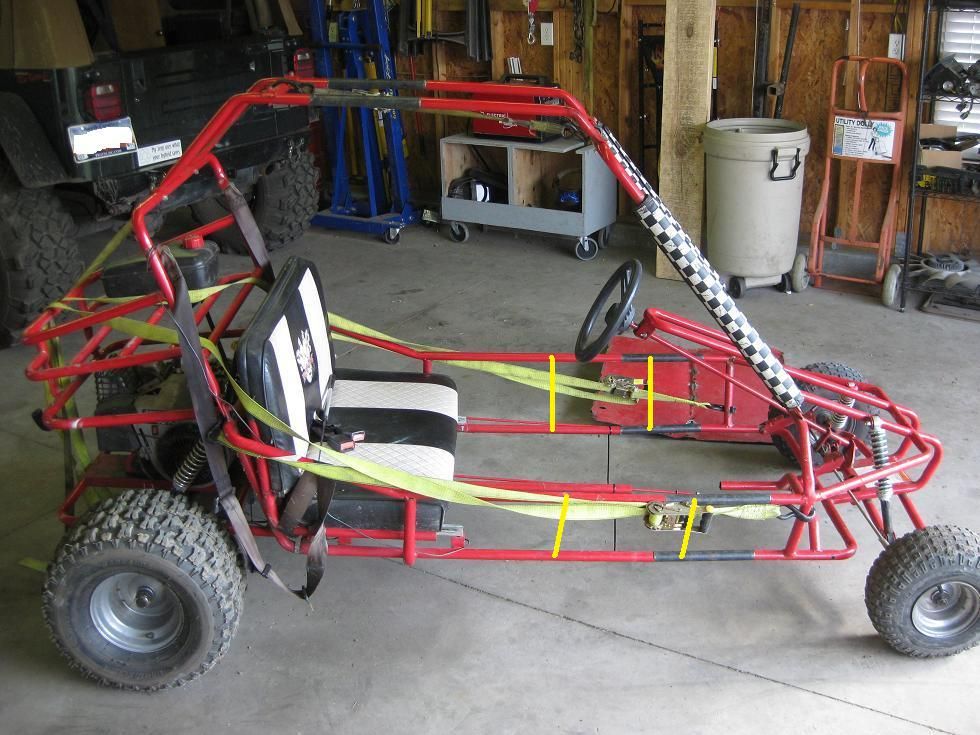 As far as progress goes, everything except the roll bars have been welded, welds just need to be cleaned up. I cut the new floor from the door. Installed the longer steering shaft. With it being 7" longer it feels a little flexy, I believe it'll be fine....If not i'll extend the steering hoop. I also ordered a set of oil filled coilovers from Surplus center, they were less than $12 each. Figured i give 'em a try, if they work out good i'll replace all the mechanical shocks on both carts. Last edited by Kartjet52; 02-10-2013 at 09:50 AM. |
|
#14
|
|||
|
|||
|
The stock down bar right next to the seat and the one that runs from the pan around for the stearing... Notch a tube to go from the lower corner on both and up to the center of the upper bar. That way as the frame flex's down in the center it will transfer the pressure down and into the cage. Then if you got the steel run from the center ,or close to it, of the top bar and run one up to the windsheild area.
|
|
#15
|
||||
|
||||
|
looking good
__________________
olderthan 2008 tomberline punisher 1500 spring 12g sliders 30mm cv pumper carb uni filter no rev cdi polaris xlt snowmobile shocks for front w/550 magnum springs & blaster fronts on rear and another buggy built working on mods gk-13 white spring 17 gram sliders so far |
|
#16
|
|||
|
|||
|
Thanks
Quote:
Something like this? 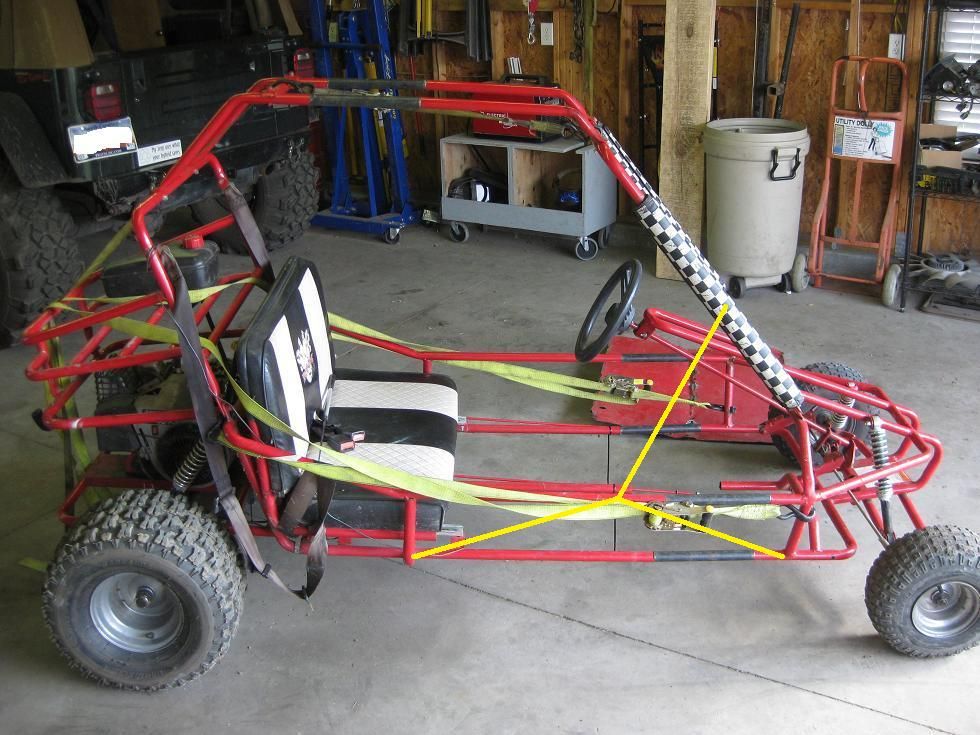
Last edited by Kartjet52; 02-10-2013 at 09:27 AM. |
|
#17
|
||||
|
||||
|
add that bracing will help
__________________
olderthan 2008 tomberline punisher 1500 spring 12g sliders 30mm cv pumper carb uni filter no rev cdi polaris xlt snowmobile shocks for front w/550 magnum springs & blaster fronts on rear and another buggy built working on mods gk-13 white spring 17 gram sliders so far |
|
#18
|
||||
|
||||
|
And sorta remove, reshape, and soften the radius on that lower frame rail....then some bigger wheels and tires should go in there, maybe.
__________________
kliff |
|
#19
|
||||
|
||||
|
kliff is right if you trim the lower rails
you will get more room for bigger front tires
__________________
olderthan 2008 tomberline punisher 1500 spring 12g sliders 30mm cv pumper carb uni filter no rev cdi polaris xlt snowmobile shocks for front w/550 magnum springs & blaster fronts on rear and another buggy built working on mods gk-13 white spring 17 gram sliders so far |
|
#20
|
|||
|
|||
|
That was my next ideas guy's. Cut out that bend and put some big meats on it.
Thats basicly what I was thinking. That way regardless of the impact angle it will transfer the weight to another area of the frame |
|
#21
|
|||
|
|||
|
I'll save the front tire upgrade for later, I'll start a new project thread for it.
For right now I want to finish the frame stretch and do some riding. Thanks Chuck for the frame advise. I do work with metal, just not go-cart chassis design. Stay tuned, new pics soon. Last edited by Kartjet52; 08-07-2010 at 10:43 PM. |
|
#22
|
||||
|
||||
|
Nice work

|
|
#23
|
|||
|
|||
|
Thanks Rarerat!
Ok, just about completed the frame work except for the extra supports and some finish sanding to make the seams blend better before painting. 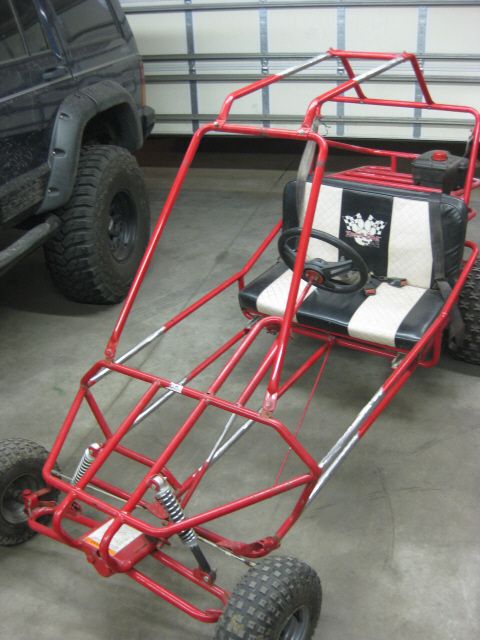 Here's a good shot of the extended steering. 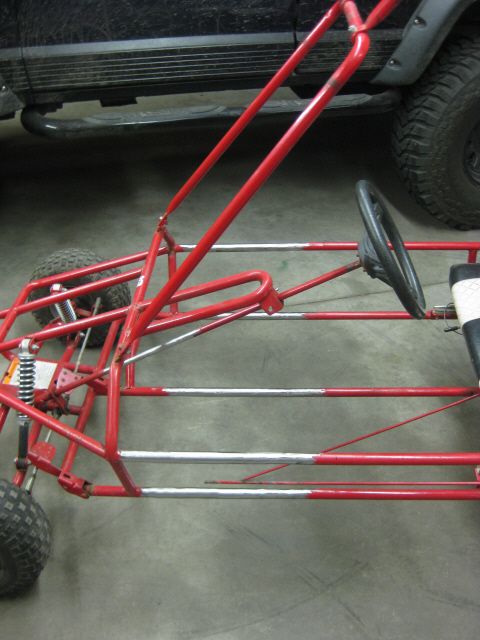 Rolls bars and where I might be adding extra cross bars. 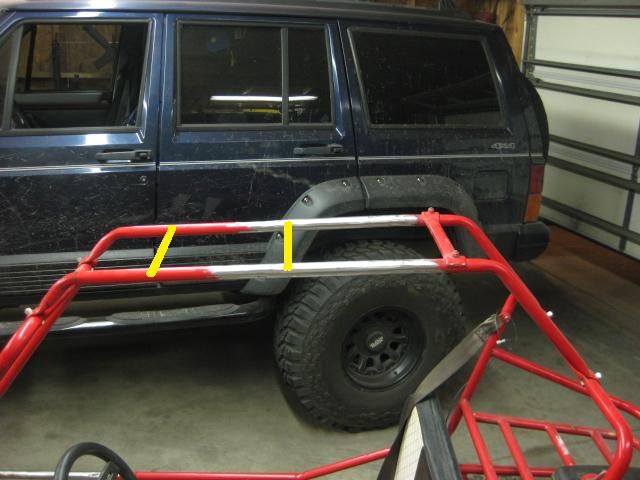 Next on the list is Chuck's idea for frame support, then i'll be installing the floor. Last edited by Kartjet52; 02-10-2013 at 09:40 AM. |
|
#24
|
||||
|
||||
|
coming along good
__________________
olderthan 2008 tomberline punisher 1500 spring 12g sliders 30mm cv pumper carb uni filter no rev cdi polaris xlt snowmobile shocks for front w/550 magnum springs & blaster fronts on rear and another buggy built working on mods gk-13 white spring 17 gram sliders so far |
|
#25
|
|||
|
|||
|
I would add either aa lateral support going forward or back on the roof. I know I'm looking at it more like a race machine but week points bother me. Maybe from the back yellow line back towards the seats. Notched into the down bar in the main hoop
Looks great though. |
|
#26
|
|||
|
|||
|
Quote:
I also like the idea of being able to remove the roll bar if needed. I think (not sure yet) i'll stick with the 2 or 3 cross bars. If it does roll the impact will be transfered over to the other bar then to the side bar idea you came up with. Thanks for the input! |
|
#27
|
|||
|
|||
|
Started on the frame supports tonight, got all the cuts on one side finished and taped in place. Quite pleased with the turnout, kinda gives it a buggy look, thanks again Chuck.
My trusty Harbor freight tubing notcher....Worth every penny. 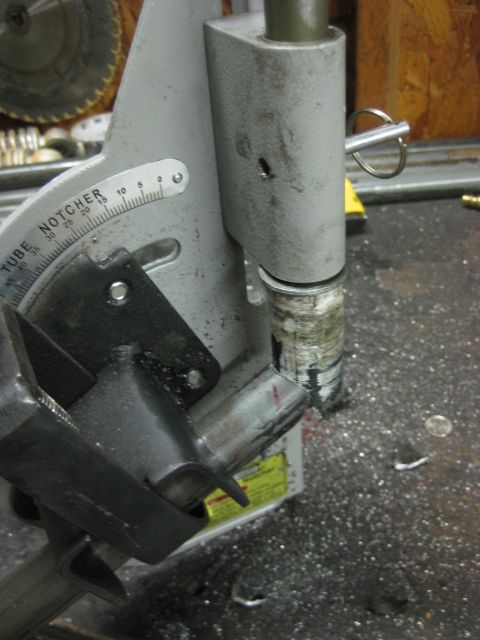 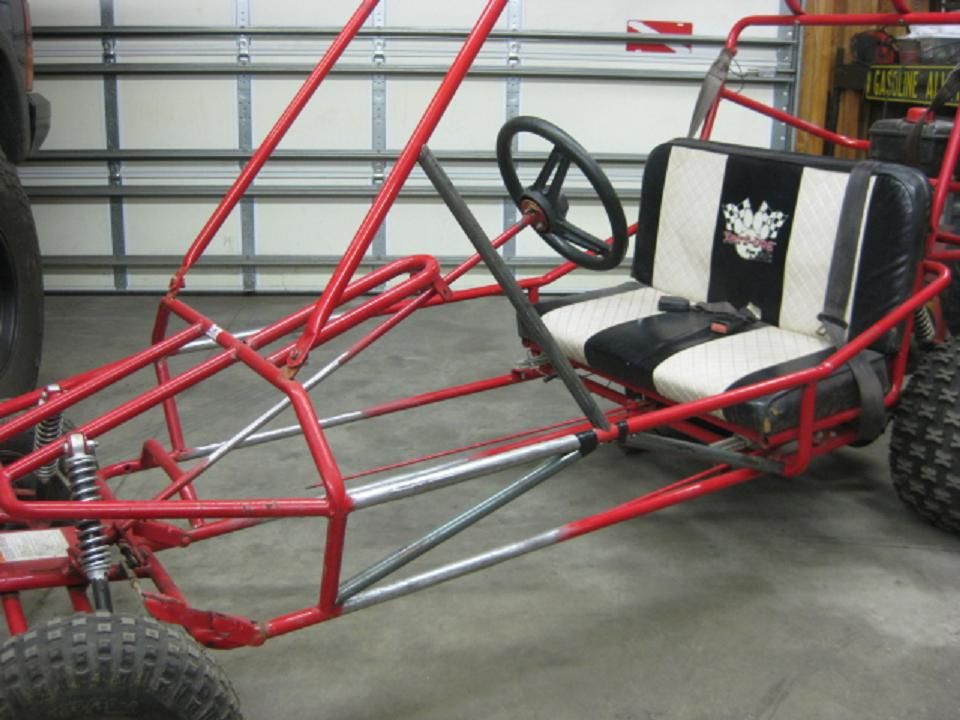 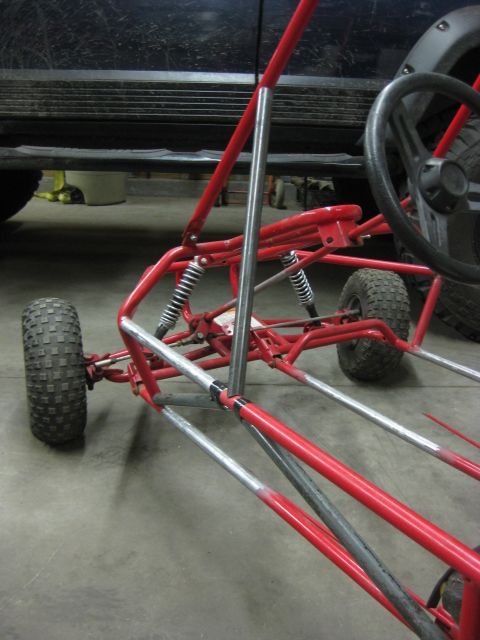 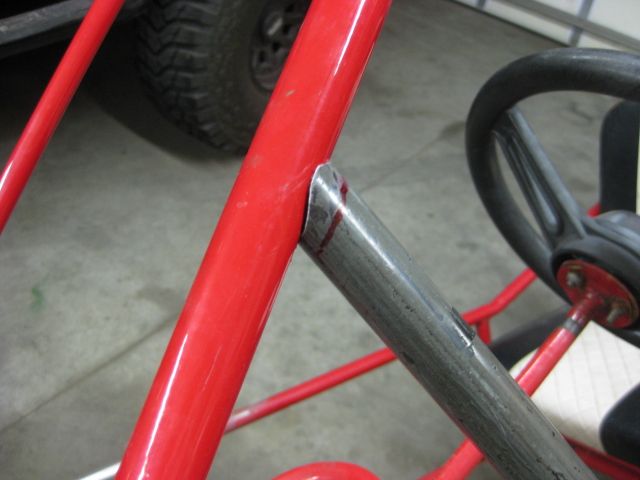
Last edited by Kartjet52; 02-10-2013 at 09:49 AM. |
|
#28
|
|||
|
|||
|
Awsome man. That should really take care of frame flex right there. I'm gonna get me one of them notchers as well. Not bad for the price
|
|
#29
|
|||
|
|||
|
Thanks!
Yeah the notcher comes in handy, makes cutting & welding tubes 10 times faster. I was just on the Harbor Freight website and noticed the 6.5 clones are going for $110. That's almost free, I eyeball them things every time I go there. Last edited by Kartjet52; 02-10-2013 at 09:49 AM. |
|
#30
|
|||
|
|||
|
It's coming along......Got the driver's side frame supports welded in place, finished cutting and installed the floor & started on the roll bars.
Once the floor was welded I decided to take it for a spin. It feels like a different go cart. It's smoother on the bumps, overall handling has improved, especially hard cornering. Chuck, I could tell a difference when cornering left & right since only one side has the frame supports. On pavement right turns felt very ridgid, left turns almost had a sloppy/tipsy feel. Seems backwards since I was sitting on the left side. I couldn't visually see the frame flexing but I could definitely tell a difference. Just need to finish the pass side supports, weld the roll bars, clean all the welding and paint. I plan to stay with the same color red or close as possible. 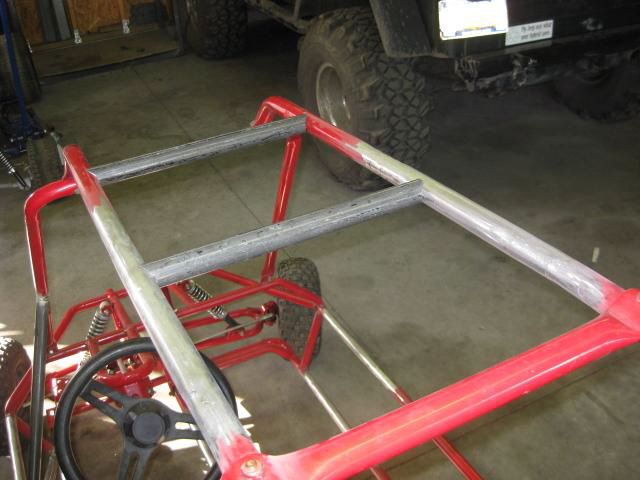 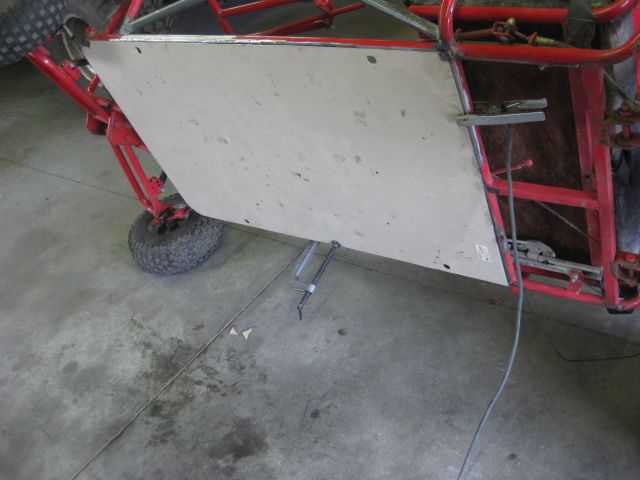
Last edited by Kartjet52; 02-10-2013 at 09:58 AM. |
|
#31
|
|||
|
|||
|
Good deal. Get that other side done and she should be good to go. Top notch work man
|
|
#32
|
||||
|
||||
|
you are doing a great job
post pics when finished
__________________
olderthan 2008 tomberline punisher 1500 spring 12g sliders 30mm cv pumper carb uni filter no rev cdi polaris xlt snowmobile shocks for front w/550 magnum springs & blaster fronts on rear and another buggy built working on mods gk-13 white spring 17 gram sliders so far |
|
#33
|
|||
|
|||
|
in that last pic you work makes the factory bar at the bottom left look cheap and flimsy. nice work
|
|
#34
|
|||
|
|||
|
Quote:
I've been unable to work on the cart since my last post due to my busy schedule, but i'll be back at it tomorrow night. The HF 6.5s dropped to $99, couldn't resist, I bought one............. Last edited by Kartjet52; 09-01-2010 at 03:21 AM. |
|
#35
|
|||
|
|||
|
Finished up all the extra supports, took the seat off, cleaned everything......time for paint.
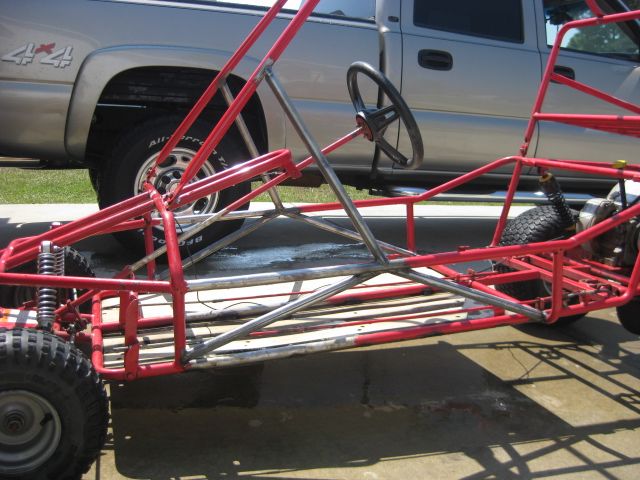 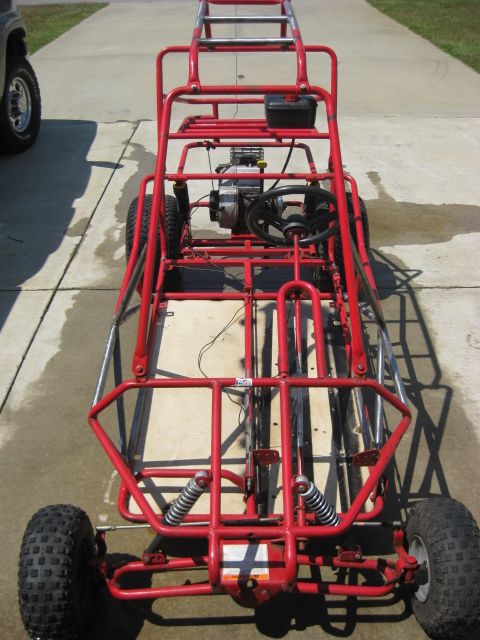 (If anyone is wondering why the gas tank is mounted up on the back rack, it's because the motor is not the original. It was removed from a Murray Kilowatt which has a different shaped tank which caused it to hit the frame behind the seat when the suspension was compressed.) Last edited by Kartjet52; 02-10-2013 at 10:01 AM. |
|
#36
|
||||
|
||||
|
it realy looks good
__________________
olderthan 2008 tomberline punisher 1500 spring 12g sliders 30mm cv pumper carb uni filter no rev cdi polaris xlt snowmobile shocks for front w/550 magnum springs & blaster fronts on rear and another buggy built working on mods gk-13 white spring 17 gram sliders so far |
|
#37
|
|||
|
|||
|
I bet thats the strongest part on the whole ride. Top notch work brother.
|
|
#38
|
||||
|
||||
|
Beautiful work man! Should be stronger than original.
Now, go find a YD 3206 SpiderBox, and start modding. Bettin' you could join the Cult, and really fit in well doing it!
__________________
kliff |
|
#39
|
|||
|
|||
|
Thanks for all the compliments!
The frame feels very ridgid. With the extra length and strength it handles 10 times better than before. For some odd reason I can hard corner this thing at full speed without it coming up on two wheels anymore. It'll still lift one of the rears, the front stays planted. I've been looking for a pair of Spiderboxes for some time now. They're either more than 4 hours away, priced too high or in bad shape. I'm still checking CL and Ebay every now and then. I'll start painting it Monday night, I'll just be painting the bare tubes and floor, not the whole cart. Most of the bars will have padding anyway. I'd like to put a set of rear fenders on it, something to keep the mud spray down. I'm thinking some kind of plastic I can mold myself. I've seen body kits for these carts somewhere, forgot where. |
|
#40
|
|||
|
|||
|
Got around to painting it. Turned out nice, almost looks like it was made this way.
I used Rustoleum sunshine red. It was very close to the original red. 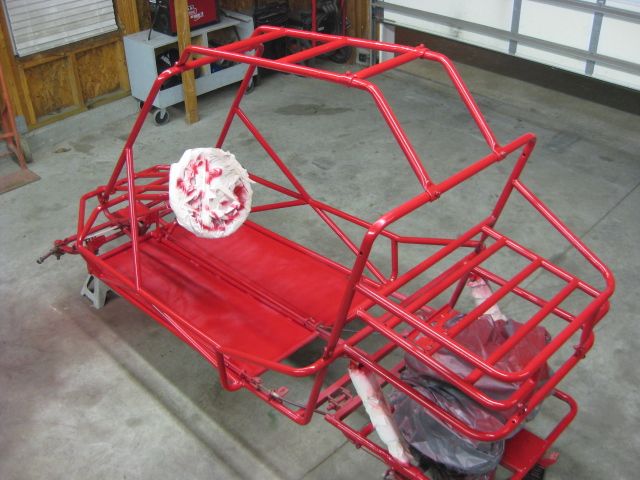 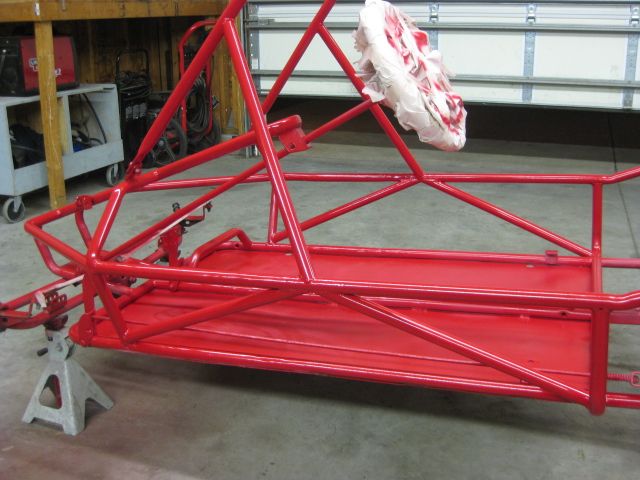 Here's a comparison to our other Yerf, they used to be exactly the same cart. Check out the extra leg room. 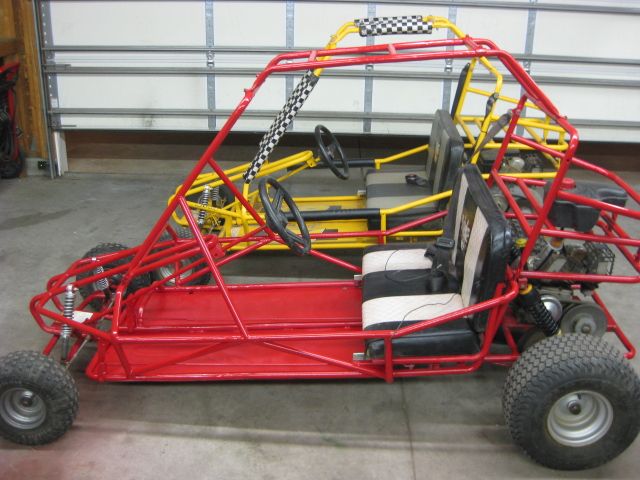 Still need to add grip tape to the floor, bar padding and run the kill switch wire. Last edited by Kartjet52; 02-10-2013 at 10:06 AM. |
|
#41
|
||||
|
||||
|
looking good as usual
__________________
olderthan 2008 tomberline punisher 1500 spring 12g sliders 30mm cv pumper carb uni filter no rev cdi polaris xlt snowmobile shocks for front w/550 magnum springs & blaster fronts on rear and another buggy built working on mods gk-13 white spring 17 gram sliders so far |
|
#42
|
|||
|
|||
|
is it complete yet or are you still finishing up?
|
|
#43
|
|||
|
|||
|
Post some new photos,looks awesome.I have the same cart I'm planning on changing some things in future just bought it a few weeks ago.I'm thinking starting with the motor and doing a Batman mod.
|
|
#44
|
|||
|
|||
|
It is complete....For now, as far as the frame stretch goes. I'll post some pics up in a few days, very busy with work right now.
I have rode it a few times. I've added grip tape to the floor and bar padding to the roll cage top and sides. It's very comfortable, more than enough leg room. Quote:
I think my next upgrade will be the clone motor I recently bought. I'll have to do some rear swing arm work before I can start. Yerf really did a poor job on the engine mount design, it's needs to be beefed up. Both of my 3203/3205s have bent mounts due to engine torque, that's with the tec 6.5, Not bad, but enough to notice, maybe .15 -.20 out. |
|
#45
|
||||
|
||||
|
keep posting pics
__________________
olderthan 2008 tomberline punisher 1500 spring 12g sliders 30mm cv pumper carb uni filter no rev cdi polaris xlt snowmobile shocks for front w/550 magnum springs & blaster fronts on rear and another buggy built working on mods gk-13 white spring 17 gram sliders so far |
|
#46
|
|||
|
|||
|
I thought about the clone but a motor guy said no replacement parts carb etc.I'm still thinking Batman mod but I think I'm going to start fresh with a new motor.already pulled old one off bought a new clutch,new chain,new belt.there just sitting in a bag waiting on my decision on a motor.I can't decide looking for one with least mod needed to work.if I had all your equipment would be no problem actually looked at a gasless MIG welder at harbour freight but wasn't to sure about the gasless setup and it was 110 the two together scares me maybe if was 220 .motor choices so far a briggs 8 HP 3/4 shaft a honda 6.5 robin 7 HP I could mod the Honda the most,the briggs would almost be a direct fit ,and people say the robin motor best off all.I'm still in the air but winters here so I'm in no hurry,maybe ill get a welder so I could go wild like you lol.
|
|
#47
|
|||
|
|||
|
Quote:
Be sure to reinforce the swing arm if you do decide to go with the larger engines. For all the welding on this project I used a 110 volt lincoln pro core 125 wire fed welder with .030 flux core wire (gasless), it can be used as a MIG but works fine for projects like this without gas. It can easily handle the work, I had the power setting on low the whole time. This is the welder I have. I picked it up about a year ago. I also have a AC/DC lincoln stick welder I used for big jobs. http://www.lowes.com/pd_2961-1703-K2...ntity_sold%7C1 As far as tools all I really used was a Harbor Freight tube notcher, hand grinder with cutoff, sanding & grinding wheels and your usual basic hand tools Last edited by Kartjet52; 10-04-2010 at 04:31 PM. |
|
#48
|
|||
|
|||
|
|
|
#49
|
|||
|
|||
|
Thanks for the reply I'm glad to hear that the gasless welder works ill have to look into getting one.I wonder how well the one at harbour freight would work? I went to look at clone motor this weekend there was a guy there that owned a small engine repair shop that warned me against getting one said not very good.I have a guy with a cr125 motor for 250 but I don't know if rear axle would withstand the torque.how much of a difference is the clone motor just more torque or speed also?
|
|
#50
|
||||
|
||||
|
Another opinion- Tecumsehs vs honda clones
I've found the Tec's have more torque the clones since they are so easy to remove the governor makes them faster rpm wise. My kid's have raced both engines side by side and there isn't enough difference to brag about. Cost of the clone (very cheap) kills the Tec's all day long. I'm one of the few that dissagrees with the reliabilty of the two. My Tec's have run circles around my clones for length of life,starting ability,over-heating,ect... (excluding the only Robin engine we have that never let's us down) |
|
#51
|
|||
|
|||
|
Ok so I guess a clone wouldn't really be worth it then if reading right.I would just like a little more power and maybe 40 mph right now with tec motor lucky if it does 25mph.so how about a briggs 8 HP has 3/4 shaft any experience with those motors.
|
|
#52
|
|||
|
|||
|
Quote:
Do some research on the clones, go thru the forums. Alot of people are very happy with them, some are not. I really can't say since mine is still in the box, but i'll find out sometime soon. A cr125 is alot of power & speed for that cart. You would need to basically redesign the swing arm. Do it right and you'd have one badass Yerf. As far as more speed with the clone, with the 6.5 is probably about the same, but it's a new motor for $100. I'm really not looking for high power and speed since I ride with my 5 & 2 yr old. The larger clones will obviously be faster. Check this kid out on you tube, he put a 13hp HF on his 3203 Yerf. http://www.youtube.com/watch?v=NFxGif61PsA http://www.youtube.com/watch?v=bdksNsjc0tY |
|
#53
|
|||
|
|||
|
Here are the final pics. Project is complete. It's now called a Yerf 3203HD-XL.
Padding and grip tape. 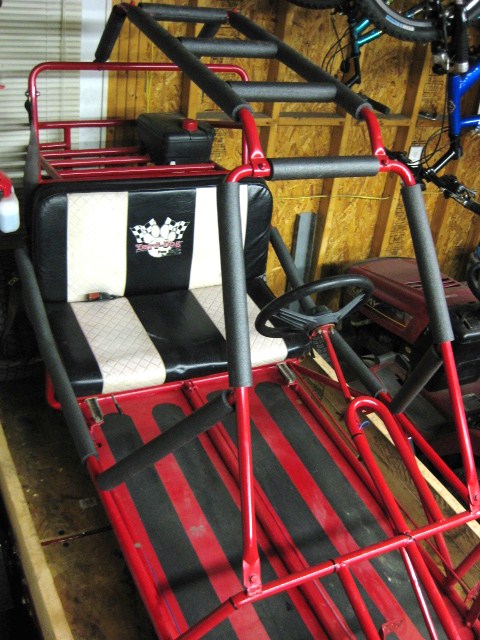 The cart fits snug on the 4x8 trailer. (HF special- $209) 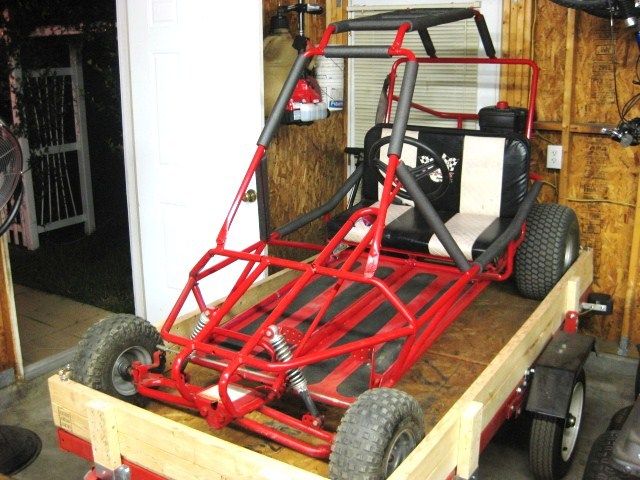 This is how I extended the throttle/brake rod. Just threaded rod with a coupling. 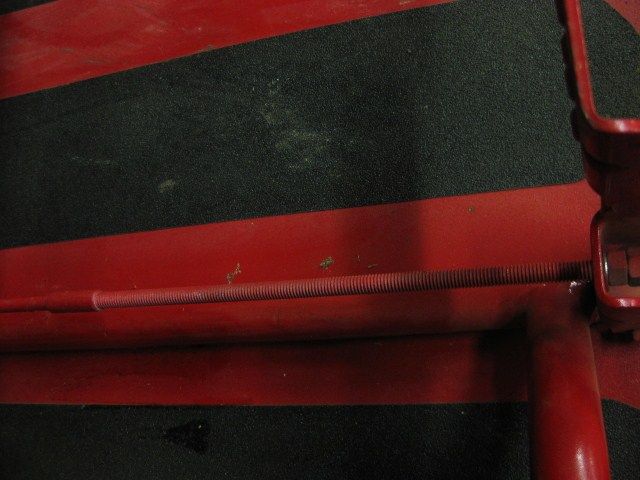 The end result with the oversized operator. The seat is forward about an inch, with the seat all the way back I can't drop the hammer as easy. 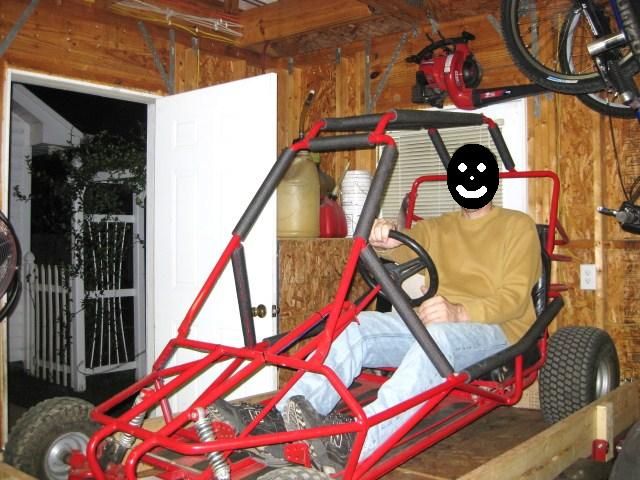 Total cost was about $30 since I already had all the metal. Bought 2 spools of welding wire, 1 can of primer, 2 cans of paint, 5 pieces of pipe insulation & a small roll of grip tape. Thanks for all the compliments! Any questions, feel free to ask. Last edited by Kartjet52; 02-10-2013 at 10:15 AM. |
|
#54
|
||||
|
||||
|
it realy came out well.
__________________
olderthan 2008 tomberline punisher 1500 spring 12g sliders 30mm cv pumper carb uni filter no rev cdi polaris xlt snowmobile shocks for front w/550 magnum springs & blaster fronts on rear and another buggy built working on mods gk-13 white spring 17 gram sliders so far |
|
#55
|
|||
|
|||
|
Wow that looks awesome,now what's your address so I can send you mine lol.you've really got some skills now its time for the wifes.
|
|
#56
|
|||
|
|||
|
Here's a short video of the go cart in action. It corners much better making left turns...
 http://www.youtube.com/watch?v=XiP_JS5u7sk |
|
#57
|
||||
|
||||
|
you need a passenger in it
__________________
olderthan 2008 tomberline punisher 1500 spring 12g sliders 30mm cv pumper carb uni filter no rev cdi polaris xlt snowmobile shocks for front w/550 magnum springs & blaster fronts on rear and another buggy built working on mods gk-13 white spring 17 gram sliders so far |
|
#58
|
||||
|
||||
|
Really nice job Kool video.
Tom |
|
#59
|
|||
|
|||
|
I know, I had a hard time finding volunteers to ride with me.
|
|
#60
|
||||
|
||||
|
I'll Bet you did.
Tom |
|
#61
|
||||
|
||||
|
In your last picture on post #40, are those the coil-overs you posted the link for? How do they do? I'm thinking about getting some for my Punisher, just curious if they bolted right up and if they feel any different. Great looking cart build, you are the man, I wish I had all the fabrication tools you do, I love to do fab work!
|
|
#62
|
|||
|
|||
|
Quote:
Yes they are & yes they bolted right up. They're about 1/4" away from the side wall on the tire because the diameter is bigger than stock. They ride better than the bouncy springs it had. I could tell they dampen from the second I tried them. They work good for riding dirt roads and small bumps. If you plan on jumping the cart i'd go with something better.....Maybe raptor shocks Last edited by Kartjet52; 02-25-2016 at 10:20 AM. |
|
#63
|
|||
|
|||
|
My 3203HD-XL experience is over. Someone offered me $500 for it.
  Not bad since I had less than $100 invested... Maybe it's time to do some frame work with the Yellow 3205. 
|
|
#64
|
||||
|
||||
|
You may have found a new calling.
Tom |
|
#65
|
||||
|
||||
|
That is so awsome, nice job. I have been wanting to widen our baja 150 2006 buggy red. Our 2004 blue 150 dune is 46 inch wide and the 2006 red dune is 41. So when two people sit side by side in the red buggy it is tight. I will post pictures of the project when I start to widen the roll bars, the floor pan I will leave the same. I just bought a welder 6 months ago a Hobart 125 ez wire feed flux wire. I got tired of paying to fix the cracks that always happen on a rough ride. Thanks for the pics it has modivated me.
|
|
#66
|
||||
|
||||
|
That was an awsome job. I have to admit, when I started reading this post, I really didnt see it ending up turning out as great as it did. Outstanding Job brother!
__________________
2006 HH150.....kinda prodigy vari/clutch 11g Rollers/Yellow Main White Brothers Performance Pipe/No Rev CDI/Hot Coil Stroker Crank/BB 180 kit Mikuni VM28 - 35 Pilot - 140 Main A12 cam blaster shocks x4 vapor speedo |
|
#67
|
|||
|
|||
|
Quote:
Quote:
Thanks for the compliments! |
|
#68
|
|||
|
|||
|
I'm back,
Just noticed all the pics are gone and the interest this thread has received! Glad to see this project may have been helpful to others. I've started putting the pics back up, hopefully they stay this time. 
|
|
#69
|
||||
|
||||
|
wow, long time! I was wondering how this turned out/held up, but it looks like it went to a new home.
|
|
#70
|
|||
|
|||
|
Everything is backup (pics). Any info or more pics of the build just let me know. Send me a PM on here, I'll check back every week or so.
Gary. |
|
#71
|
|||
|
|||
|
Its still being used as of a few months ago, it's a little beat up due to a few rollovers and being stored outside but the frame is straight as an arrow. The new owner said he thinks it's due for a new motor.
|
|
#72
|
||||
|
||||
|
I know this sounds crazy, but I've been thinking of doing something like this to my daughters little 110/gk17 for about 2 years now and seeing this post just made me start boiling the old brain bucket again! as if I don't have enough to do!!!

|
|
#73
|
|||
|
|||
|
Quote:
Go for it, make sure to start a thread on the build! 
|
|
#74
|
||||
|
||||
|
I'll hym and haw about it for awhile, but if I do it wouldn't be til next winters garage incarceration!
|
|
#75
|
|||
|
|||
|
I see that this is an old thread, but I did want to thank the guy who wrote this, and those who offered advice. It has given me the push I needed to stretch the frame of my own 3203 that has been collecting dust for years. I have already bought a new Predator engine, axle, sprockets, bearings, ect for this project. I'll start a new thread and post pictures of the project as it goes along and how to resolve the little issues like the shorter crankshaft of the Predator to help others as much as this thread helped me.
|
|
#76
|
|||
|
|||
|
Quote:
Here's a video: https://www.youtube.com/watch?v=sRQOsiOS5DA |
|
#77
|
|||
|
|||
|
awesome job! i just recently picked a 3203 up my self.. what shocks did you get and do you happen to have a link for them? thanks in advance
|
|
#78
|
||||
|
||||
|
If I had those skills I'd be working on a 4-seater conversion right about now!
|
|
#79
|
|||
|
|||
|
Glad to see this post is still alive! Hope it helped someone over the years!
|
|
|