|
|
|
#101
 07-19-2018, 06:13 PM
|
||||
|
||||
|
SYCARMS
Whats your recommended break in break in procedure. Time frames, throttle speeds and what not. I do not have a speedo so lenghths of time work better. I have just seen so many different recommendations wondering how the pro does it. Really don't want to screw it up again I need to be moving on to other parts of this project and making progress not going backwards.
__________________
Where there is a red neck there is a way. 
|
|
#102
07-19-2018, 08:02 PM
|
||||
|
||||
|
Drive 1-2 hours never to exceed 3/4 throttle in the first hour. Drive while fluctuating throttle but again never exceeding 3/4 throttle and fluctuate the rpm's. After the first hour you can gradually increase the rpm's over the 3/4 throttle. In other words drive it normally without killing it the first hour. The leak was not the cause of driving to hard something else caused it. My experience has shown that doing a break in as described you will get another 5-10 psi over driving it hard.
|
|
#103
07-20-2018, 02:47 AM
|
||||
|
||||
|
Ok i will follow that.
I agree that the driving hard in and of itself was not the only cause. I have picked out multiple reasons that the gasket failed 1. I have already identified that the lower jug gasket that came with the kit was very thin. ( By itself would probably still have been ok) 2 I used a coating on the gasket when none is needed 3 the only coating i have ever seen recommended was the spray type copper coat with a 3 hour dry time before assembling and i did not use it 4 I used the brush on copper coat on that gasket. Even when allowed to dry for a bit is still slippery I didn't even give the stuff 30 minutes to dry and did not watch for push out on the gasket as i should have) 5 the torque specs i used were wrong (I did mine to 14 ft lbs and 16 ft lbs is recommended) Driving it like i stole it just sped up the when the failure happened but was not the primary cause of the failure. The new gasket i will be installing is at least 4 times as thick as the failed one. All surfaces have been cleaned completely and the gaskets will be installed with out any coating. The surfaces have been checked with a straight edge to ensure no warping has occurred. Proper torque specs will be used with the 10 ft lbs then 16 ft lbs step up done in cross pattern. After the first hour i will stop and let the engine cool completely and re check to ensure that bolts are still torqued correctly before running again and inspect all gaskets for push out/ failure I will also change the brake in oil at that time. I will then give it another hour following the same break in process and re check and change oil again just to be sure That's when i will be putting a good synthetic for air cooled engines in it and it should be good t go. If everything goes as planned and there isn't any reason it should not now that i will not be sabotaging the job before i start then i can move on to other things.
__________________
Where there is a red neck there is a way.
|
|
#104
07-22-2018, 11:08 PM
|
||||
|
||||
|
Ok so wanted to give an update on where im at.
Got the buggy engine all put back together with new gaskets and went to fire her up. Cranked for a few seconds but before I could get her to fire had a really bad metal on metal sound that came out of no where. I had run the engine over by hand several times before trying to start with no issues so this was something new. Stopped immediately and tried to turn the motor over by hand to locate the sound and had a lot of resistance and a clear metal on metal scrape most of the way through the engine rotation. This is the OMG what now part. Couldn't tell for sure where the sound was coming from and had no reason to think it was coming from anywhere else so I proceeded to tear the top end back down. At this point I was guessing that it was probably an oil ring on the piston has gotten bent and stuck between the piston and cylinder wall. Well I got her tore down all the way to removing the wrist pin from the piston and could not find anything wrong. Now im at the what the heck stage cause the whole top is off but the scrape is still there. To very slowly I rock the piston connecting rod and there is no scrape. Start feeling around on the case and it felt like the scrape was coming from inside the CVT cover. So I pull the CVT cover thinking the worst. Fortunately it was nothing bad. When I put the engine back together I left the shroud off so that I could watch for leaks planning to put it back on once I completed the break in period. Well to make sure I didn't lose the bolts for the shroud I put them back into their holes on the engine. Well the source of my noise and resistance turned out to be one of the shroud bolts on the front of the engine in front of the variator had vibrated enough to tighten its self down and since the hole went through the case the bolt tip ran down until just able to make contact with the back edge of the variator in the back. I was able to back the bolt out and there was lilt to no damage to the back edge corner of the variator. So the good news was it was nothing bad the bad news was I tore the entire top end off the motor again and didn't need to. So where am I at right now Well I got the top put back together again but ran out of time to get the exhaust and CVT cover back on. Yes I used new gaskets again. Thank god I ordered more than 1 set. put the ones I took off up as emergency back ups. May not have needed to change them but didn't want to take the chance. While I had it off I decided to go ahead and paint the cover figured what the heck why not make it look nicer. Unfortunately now my weekend is over so I wont get the chance to finish putting her back together till probably Saturday. Cant wait to get the break in finished.
__________________
Where there is a red neck there is a way.
|
|
#105
07-31-2018, 06:42 PM
|
||||
|
||||
|
Ok break in done with no more blow outs.
Got all the covers back on. She runs awesome. Now going to the wire redo. Hard to check the plug when I got get off to kill it lol. So gonna run the ignition wires and kill switch up to the front. Want to sand blast and paint but the weather has not been cooperating. Super humid and keeps pluging up my blaster. Did a bike tank this weekend. Looked awesome but got super ugly while drying due to the humidity. May have to just bite the bullet and go ahead and get the wireing done while I wait for more paint friendly weather.
__________________
Where there is a red neck there is a way.
|
|
#107
08-01-2018, 12:07 AM
|
||||
|
||||
|
Yes we get rain, snow and cold I live in the mountains in northern Arizona.
If I had consistent humidity it would be ok. The problem is we bounce. Our problem is like happened with the tank this weekend I painted in the morning it rained hard around noon and the humidity went through the roof. The next day no rain just high heat so as the paint dried it ended up looking like the bottom of a mud hole that dried and cracked. Would be better if I could put it to dry some where the temp stays even but I cant. If humidity is steady then temps are always high this time of year and paint comes out nice but if it rains the temp and humidity bounce and it will mess up ay paint job.
__________________
Where there is a red neck there is a way.
|
|
#108
08-01-2018, 02:18 AM
|
||||
|
||||
|
Oh also got the chance to do a full speed run.
Used GPS (I know its not the most accurate ) But according to it I got to 34 mph which isn't bad. Wouldn't mind getting a little more speed out of her but don't want to lose low end grunt in the process.
__________________
Where there is a red neck there is a way.
|
|
#109
08-01-2018, 01:08 PM
|
||||
|
||||
|
Quote:
|
|
#110
08-01-2018, 01:12 PM
|
||||
|
||||
|
Quote:
|
|
#111
08-01-2018, 04:40 PM
|
||||
|
||||
|
Yeah and for what I plan to use it for that's probably just fine but still going to plan on an A12 cam, koso variator with some 12g sliders. Might be able to coax a couple more mph out of it doing that, but It's doing very good right now though. Can't complain about the power or speed. Much better than before. One thing at a time and she gets better all the time.
__________________
Where there is a red neck there is a way.
|
|
#112
08-03-2018, 10:36 PM
|
||||
|
||||
|
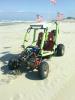
Added pics to the beginning to show the condition she was in when I brought her home.
Ok so been going hard and heavy on the rewire. New 6 ga main battery cables Rear rewire is pretty much done Regulator is pumping out around 15v which is awesome. The heavier wire sure makes a difference. With a little luck tomorrow will have the ignition and kill switch wired in and will be able to start her with a key instead of jumping the solenoid. Then I will be on to lights.
__________________
Where there is a red neck there is a way.
|
|
#113
08-04-2018, 01:26 PM
|
|||
|
|||
|
Amazing how something so simple like correct or plus sized wire helps.
You one upped me with the 6 (I only used 8) but after I done mine it charges more consistently and cranks so much easier. I can still drain it if I don't watch my winch use but it's nowhere near as fast. Got a 4 wheeler sitting in my shop right now bringing back to life but I think once it's done I'm gonna go ahead and put a 11 pole on the buggy. Really test out the wiring.
|
|
#114
08-06-2018, 12:36 AM
|
||||
|
||||
|
Yea I used 6 GA because nowhere around here had any 8 GA at all.
Only 1 place had some 6GA so that's what I ended up using. The rear rewire is done and charging system is working beautifully. The same can not be said for the beginnings of the front. I have to go back through the wiring for the front. All I had run for the front was key switch and kill switch. All with new wire and connectors. Kill switch worked just fine but key switch was a different animal. First it was popping fuses like crazy. I went over everything and could not find anything wrong so bounced up from a 15A to a 25A figuring maybe the bigger wire was just drawing more amps. The 25A held just long enough to melt the key switch connector and the front/rear junction connector. (The front rear connector melting also had the wonderful side affect of causing a direct short to the solenoid and triggering the starter to run non stop till I cut the wires at the back of the connector. Thank god I had cutters right there) Disconnected the front connections and went over everything in the back and verified that the only area that experienced any problems/heat what the key switch lines. So somewhere in the key switch to solenoid wires I did something wrong. Will be going back to square 1 and going over everything again to figure out where I screwed up. (Did I mention that electrical is not my strong suit and I am definitely not in my comfort zone) Haven't had the chance to check and make sure there was no internal damage to the key switch because it all happened right before I had to get ready for work. Im thinking that I got something crossed and have 2 hot wires going to the keyset somehow or that the connectors I was using are not heavy enough to do the job. I don't think it was just the connectors because the ones at the key switch were standard spade type (pretty heavy) while the front/rear connector was the white motorcycle type (pretty light) and it melted both. Also I used the motorcycle type in several places on the back wire harness and none of them are having any problems at all and it was fine with the 15A fuse until I turned the key switch to on then it would pop instantly. Really hoping I didn't screw the key switch up. (Wife would be real unhappy about having to order a part I already replaced) Wont get a chance to touch it again until Saturday but will let you guys know what I find.
__________________
Where there is a red neck there is a way. Last edited by plee911; 08-06-2018 at 12:43 AM.
|
|
#115
08-06-2018, 12:50 AM
|
||||
|
||||
|
The wires in question were from the pigtail on the solenoid I have 2 wires yellow w red stripe and yellow with green stripe.
Ran wires as follows Yellow with green strip went to ground. Yellow with red stripe went to momentary on 3 wire key switch. Ground to on side of on for key switch and hot through fuse to other side of on for key switch. I suppose I could cap and not use the pig tail at all and just run one wire from each post on the top of the solenoid to on and momentary. So when the key was turned to start it would have the same effect as jumping the solenoid. But this is assuming that I haven't damaged the key switch.
__________________
Where there is a red neck there is a way. Last edited by plee911; 08-06-2018 at 12:52 AM.
|
|
#116
08-06-2018, 12:01 PM
|
||||
|
||||
|
If I'm not mistaking the early HH's ign switch used ground circuit for switch. Usually a 5 wire switch will use positive where as the 3 wire uses ground. In other words on a 3 wire system when you turn to ignition or start position the switch will close the ground circuit to complete the circuit where as the 5 wire uses hot to complete the circuit.
|
|
#117
08-06-2018, 06:35 PM
|
||||
|
||||
|
Yeah mine was a 3 wire system. key switch is 3 wires the solenoid has the 2 top posts then has a pig tail from the side with 2 wires. That's the yellow w red and yellow w green stripe wires. I thought the yellow with red was the trigger wire but now I think it was a hot. Since I ran it and a indipendant hot to the hot and momentary on the key switch with a ground it was going hot to hot when I tried to crank it. Now if the yellow w green is also a hot then I had a hot grounded too.
That's why I said if I go from the top posts and do 1 to key switch on and 1 to key switch momentary it wouldn't need a ground at all. Key switch wouldn't be able to shut off the motor but I don't need it to since I'm using a kill switch anyway..
__________________
Where there is a red neck there is a way.
|
|
#118
08-06-2018, 07:16 PM
|
||||
|
||||
|
Lol typing it out I just figured out exactly what I did wrong.
Thanks SYCARMS your reply helped me figure it out to. The system is dc with the key switch originally used to supply power to the entire lighting system. What that means is that I shouldn't have had a ground at all to the key switch it's self. 1 hot should have gone to one side of the key switch on circut the other side of the on circut that becomes hot when key switch is turned on is supposed to split and provide power to lights, turn signals and accessories they have their own groumd. then the yellow w red wire should only be connected to the momentary and yellow w green to ground to complete the solenoid curcut. The way I had it wired I was causing a direct short to ground when I turned the key on. No wonder it was popping fuses and got hot so damn quick. That's great news though cause it means I dont have to change much and as long as i didn't fry the key switch I can fix it in a few minutes this weekend.
__________________
Where there is a red neck there is a way.
|
|
#119
08-06-2018, 08:09 PM
|
||||
|
||||
|
I learned this from an old twidget in aircraft avionics years ago. Go to a NAPA and keep on hand a 5,10,15,20,25,and 30amp circuit breaker in post type. When you are looking for a short use a breaker instead of a fuse. When the breaker pops and cools it will reset itself. It will save $$$ on fuses.
|
|
#120
08-06-2018, 11:54 PM
|
||||
|
||||
|
I had the same thought but unfortunately no where with in 120 miles has them.
Same reason I went with 6 GA wire for the battery cables. I love living in the country away from the cities but its a pain sometimes trying to find what you need. I got some on order though and they should be here in a few days. Now that I know for sure what I did wrong I can get back to getting the rewire done. Since im not planning to have the key switch provide power to the lights and accessories I will need to pick up another fuse link so I can keep the one in the key switch line and have a separate one in the line for lights and accessories. I want to keep them on their own circuit to make trouble shooting easier. If I can stop creating my own issues then things should progress pretty quickly. Will also post pics once I get my new custom electrical box sorted out and mounted. Using a heavy duty plastic ammo can for the box has a nice rubber seal around lid and I can attach it directly to the original electrical plate. Regulator will be mounted outside for cooling but the solenoid and the rest will be mounted in the box.
__________________
Where there is a red neck there is a way.
|
|
#122
08-07-2018, 01:55 AM
|
||||
|
||||
|
I went to Wal-Mart, home depot, Lowes, AutoZone, checker, Napa, car quest and ACE
Got lucky and NAPA had the 6 ga wire but blanked for the breakers. They all said they could order them but no one had any in stock. Was kind of surprised myself that no one had them lol
__________________
Where there is a red neck there is a way.
|
|
#123
08-07-2018, 11:56 AM
|
||||
|
||||
|
The more inventory a brick and mortar business has at the end of year the more taxes they pay so now they only stock what moves off the shelf to save on taxes. So now people found that they can order online get the part to their door in the same time as if ordered from the parts store and they will save the trip back to the store and sales tax so now the stated bitch about loosing the sales taxes through internet purchases which they created by taxing the hell out of businesses.
|
|
#124
08-07-2018, 06:23 PM
|
||||
|
||||
|
Cause and effect.
I do order alot online but only if I can't get it locally or the local price is not reasonable compared to in USA on line. I know the importance of supporting local businesses. But for example last year bought a hunting rifle. The only local gun store wanted $700 for it. I ended up buying from sportsman's because the out the door price was $510. Wanted to support the local little guy but $200 difference for the exact same item and above msrp also is asking to much. Same thing for supporting vendors here. They help support this site provide help here on the forum and are here in the USA so don't mind paying a little more for the part to get it from them even if I can find it a little cheaper from another us seller but I have found several occasions where the supporting vendors price was also cheaper You get what you pay for and so far all supporting vendors parts I have gotten we're as good or better than the original stuff. Now that doesn't mean I have not ordered some stuff from china or ebay but when ever possible I try to buy from the vendors.
__________________
Where there is a red neck there is a way.
|
|
#125
08-07-2018, 08:07 PM
|
|||
|
|||
|
I'm all about supporting local business but I'm the same way with getting the short end here. I live rural so anything local is just about the only thing, they know it, and price like it.
As far as the internet goes don't get mad at me when I order the $20 part you are trying to sell me for $90 that you ordered for $20. I do understand overhead for a business and more than happy to help local guys but I'm not paying 3 to 4 times the price per part. Especially when you have your parts stocked on a visible to the customers shelf still in the ebay shipping boxes you got them in. Even worse every time I call for a part you give me an eta of 2 weeks longer than the dates I'm looking at online.
|
|
#126
08-08-2018, 06:45 AM
|
||||
|
||||
|
Yea I hear ya
They give you a two week time frame so that they can order it have it shipped to them then mark it up. Although I haven't seen that kind of thing from any of the supporting vendors. We only have 1 non Harley only local motorcycle/ atv repair shop and they are crooks that don't know what they are doing. Caused $300 damage to my bike when they changed the front tire and tried to charge me $24 for a spark plug.
__________________
Where there is a red neck there is a way.
|
|
#127
08-08-2018, 12:24 PM
|
||||
|
||||
|
Again here is the problem I'm talking about. Here in my town I have a business who stocks for a rural area where the #1 business is still farming. This business is around 15,000 sq. ft. They carry washers, dryers, refrigerators, mowers, saws, weedeaters, dirt bikes, some plumbing, nuts ,bolts, tractor supplies, auto supplies, trailer supplies, and anything else which would support those products. So you should get the picture of this type of store we are talking about. They have excellent customer support, are a mom and pop operation. Now just about every state a business has to pay a yearly assessment tax. So this particular store last year 2017 paid an assessment on just inventory alone $75,000. Then the assessment on their fixtures alone which include all counters, racks, bins, computers, registers, shop tools, shop racks, fork lift, company truck, even the lights was $67,000. The building was assessed at $45,000. These are all tax which must be paid by March the following year which come to almost 1/4 million. On top of that they collect the sales taxes, have to pay income taxes and to top it off property taxes. How can they afford all these expenses after paying the light bill, phone bill, insurance ,wages, and their mortgage? By raising the cost of the product. And the owner both he and his wife pay them selves 100,000 per year for the both of them who are in their 70's put in 12+ hour days, live in a modest house and drive older cars and the wife still sells real-estate on the side. As with most brick and mortar stores like this most of the equipment and inventory is purchased with borrowed money. This is the reason you see many small business with a store front closing and the ones who are still operating having a streamlined inventory. What you all do not realize is brick in mortar businesses are all but history for this reason cause everyone is buying internet for many good reasons. Internet businesses are not susceptible to these assessment taxes and in most cases do not have to collect sales taxes. But probably next year or maybe sooner the internet will have to start collecting sales taxes not for the state they do business out of but to the states the product is shipped to. This will put many businesses like me out of business since there is no way I could afford to collect and send in these taxes. Just one example is Illinois which throughout the state there are over 100 sales tax rates I would have to figure, do the paperwork and send them their sales tax. That is just one state out of 50. And then what do I do if I am audited by say California. In the meantime States are complaining about loosing the sales tax while putting businesses out by excessive taxation which causes businesses to jump on the internet ban wagon. Now that the states won the right to collect sales taxes and have just about eradicated the small business through taxation their next step is and some states have already begun the process of collecting assessment taxes on any business. My point here is that to blame the brick and mortar business for high prices is like blaming the toilet paper for your diarrhea.
|
|
#128
08-08-2018, 03:21 PM
|
|||
|
|||
|
I live in farm community and know the local hardware stores like that down here.
The local ATV shop sells parts out of store, on flebay, has been a dealer for every chinese bike over the years before the manufacture gets tired of them, and dis-services bikes. His store is a varco shed like you would put behind your house, the "workshop" is a carport. The locals stay far away from him and all of his money is made ripping off out of towners during mud runs. They sell chinese clone parts as brand name factory parts with the factory replacement markup. Has been to court more than once over taking a customers brand new bike back to them with worn dry rotted tires swapped out. Week or two later he has factory pull offs listed on his ebay store. Family is in local government only reason why the crook isn't in jail. Those are the types of business that run people to the internet and make it hard on the good ones. When your dealing with a niche market like atvs it's easy to do. They are the only shop in a one hour radius and with their connections get away with it.
|
|
#130
08-08-2018, 05:00 PM
|
||||
|
||||
|
I agree you don't get service from eBay or Amazon. When I'm buying a part a couple of things come into play.
First is this an important part i e engines or the variator or something like that if it is I'm going to look for a reputable seller selling good quality and then compare prices We've all seen the guy that has the same part at half the price but is it truly the same quality and quality does matter. Now if it's a consumable part quality plays a little smaller role but it's not entirely out of the picture because apart can be consumable but a cheap one you'll consume at three times the rate as a good quality one and therefore end up paying the same price as a good quality one Well some people will say yes but I spend less money right now the reality is you're spending more because you're having to put your time into replacing that cheaper quality part three times instead of just once. And don't get me started on the knock-offs that look like the real thing but are not the same quality. I completely understand the need for businesses to do a markup I consider it a convenience fee. Just like I consider it completely normal 4 the supporting vendors price to be a little higher they don't have to help here but they do and I'm willing to pay for that. It's when the convenience fee is way too high when I go to the internet.
__________________
Where there is a red neck there is a way.
|
|
#131
08-08-2018, 05:28 PM
|
|||
|
|||
|
Quote:
You'll always have the tightwads like me that grew up working on my own stuff and too cheap to pay somebody. Grew up on carbs, taught myself how to tune fuel injection OBD! cars, and then OBD2 when that came out because of it. I do however agree there is 0 service from ebay, amazon, or any of the many other outfits. I know there are many vendors on here that do try to help as much as ya'll can and I don't want to seem like I'm bad mouthing ya'll. There is only so much you can do over a screen or a phone to help somebody green behind the ears and even somebody that has tons of mechanical experience just not in a certain field.
|
|
#132
08-11-2018, 01:01 PM
|
||||
|
||||
|
Well i was right
 Keyswitch still works even though it melted the wires all the way to the switch. Desoldered and replaced old wires replaced the melted connectors and she now has a fully functional key start.  Will be working on settting up the new electrical box tonight . Ill get some before during and after pics and post them here
__________________
Where there is a red neck there is a way.
|
|
#133
08-13-2018, 11:46 PM
|
||||
|
||||
|
Life got in the way so I didn't get to make any progress on the electrical box.
My daughter did however manage to run out half a tank of gas LOL The great news about her running the tank dry is that there were no issues the whole time and the buggy ran great. I shouldn't have to worry to much since I just recently flushed the tank so her running it dry shouldn't cause any problems. Im working a 6 day 72 hour week this week with only 1 day off this coming weekend so I don't know if I will get a chance to do anything other that put more gas in it and check the oil but if I do I will post pics. Priorities now are 1 Finish rewire and get all wires in conduit Strip and paint New tires front and back New seats Once I get that done I will look at variator and clutch upgrades to include new sliders looking at 12g they seem to be about right for the riding and terrain Forest trails with some hills shouldn't be a lot of long steep climbs and wont know for sure what the buggys got for performance until I get a chance to put her through the paces have a big gravel pit near where I live with a lot of varied terrain that I can test her out in and make adjustments. After that I will be pretty much done with her. Ill give her the hunting season to see if she is gonna meet my needs. So far it looks really good im not disappointed at all with the current power and speed but real world testing will tell the tale. If it don't work all that well out in the woods then this winter I will either decide to find a bigger buggy or look into getting a cut case for a bigger piston and start upgrading for more power. I do have one question for the experts. Im running the original carb with the ports matched and I did clean up the intake and exhaust ports on the head. For the exhaust im running a stock exhaust that I cleaned up the casting flaws in the exhaust flange nipple. I keep seeing mentions of people ditching the little round gasket and going to a flange gasket but to do that wouldn't I need to remove that nipple that the round gasket sits on. My exhaust is already gutted so would it be a good idea to remove that nipple to open the exhaust up more. The nipple does seem like its very restrictive but I have seen posts saying don't remove it so im not sure. I know it wont make a huge difference with the light mods I have done but it also doesn't seem like a big job to fix either if it should be done.
__________________
Where there is a red neck there is a way.
|
|
#134
08-14-2018, 08:49 AM
|
||||
|
||||
|
I never had luck with the flange gasket, constantly changing them out for they burn out quicker. You don't want the pipe and runner to match exactly. You want either an offset or slightly smaller runner, this helps to create a small vacuum to help remove the exhaust more efficiently from cylinder.
|
|
#135
08-14-2018, 06:52 PM
|
||||
|
||||
|
Ok so cleaning up the flaws for smoother flow in the flange nipple like I did is the way to go.
I cleared the casting flaws in the intake and exhaust ports of the head and port matched the intake and carb. For the exhaust pipe the muffler was already gutted except for a weird homemade spark arrester that had been wired in that I removed. The exhaust header has a small nipple that sticks out of the pipe that the little round gasket sits over. On that I just cleaned up the ridge that was running down the middle and smoothed it out inside the pipe. Didn't make it bigger. I will plan to leave it alone then. How much power difference is there between the 58.5 mm155cc cylinder and the 61 mm cylinder ? May start picking up the pieces to build a complete spare. After I get things squared on this one of course. Would be a good winter project.
__________________
Where there is a red neck there is a way.
|
|
#136
08-14-2018, 09:07 PM
|
||||
|
||||
|
There will be no difference in a big bore kit without head and cam mods. On average your cylinder in a stock engine will only fill to appx. 55% with air fuel mixture adding a big bore does not allow more mixture. The head and camshaft allows more air/fuel into cylinder increasing the capacity over the normal 55% which creates more power. Take this example, your parents have a 69 nova 350 @ 160 HP. Yow have a 69 Nova SS also with a 350 but @ 370 HP. Both engines are 350 same bore, same stroke. The difference is with the heads and camshaft. The heads and cam allow the same cylinder to fill more with a/f mixture to say 70%. That 20% more volume allows the engine to produce more power since it will have a greater volume of mixture. Your money will be better spent in a performance head and camshaft.
|
|
#137
08-15-2018, 02:57 AM
|
||||
|
||||
|
Ok that makes more sense.
I was already looking toward the a12 cam I will start looking at the heads and see what I can find. Will look at big valve with a professional port and polish job Really looking at the 115 mm variator as well. This weekend I only get 1 day off so plan to work on the wiring some more and get my box done hopefully. If I get the chance I want to start tuning the carb too I noticed on deceleration that I had some popping going on so I need to get the jets switched since that means she is running lean. will do a plug check first from full speed shut down now that I can kill the engine from the seat. But with the 155cc kit uni filter and cleaned up head she should be lean anyway.
__________________
Where there is a red neck there is a way. Last edited by plee911; 08-15-2018 at 05:00 AM.
|
|
#139
08-16-2018, 03:27 AM
|
||||
|
||||
|
SYCARMS
I will definitely give you a call when im ready. Not quite to that point yet just putting it on the to do list. Right now got to get the other things done first. If I tell the wife I want to order a high performance head and cam when I haven't even replaced the rotted out front tires yet she will have a kitten LOL. She is very practical and knows I want this thing ready for the hunt season and she pays attention when I talk about what parts I need and parts I want. Right now the need list is finish electrical and get lights working (In progress) Replace seats Get new tires front and rear Get the new boots on the steering rack (Have parts just got to put them on) Wants are Strip and paint (She thinks it looks ugly) Big valve head and cam Performance variatior with sliders maybe a performance clutch roof rack light bar winch I can slip a want in here and there but have to make progress in the needs in between
__________________
Where there is a red neck there is a way. Last edited by plee911; 08-16-2018 at 03:30 AM.
|
|
#140
08-22-2018, 01:24 AM
|
||||
|
||||
|
Well now I have to rearrange my need list again.
Been running old crappy tires that came on the buggy for a while. One of them disintegrated a while back when first getting the buggy going. I got lucky and found a matching used one at the local scrap yard. The wife wouldn't let me buy new ones at the time because I had not made enough progress towards making the buggy a reliable runner. Well this weekend the other front tire decided to imitate its brother and literally fell apart. So now im stuck with a non mobile buggy till I get some tires. Because im getting new ones I will be purchasing a pair this time. I have seen a lot recommended and have an idea of what I want but would like opinions about tire type. I see 2 choices when looking 3 ply and 6 ply My mind says 6 ply would be a better tire and last longer but want to make sure. Which is better and why? Also as far as tire type Im thinking knobby up front with lugs on the rears Is this the right set up or do you suggest something different? Keep in mind that this buggy will be used for off road trails, and hunting. It will only be used on the street once in awhile. Longest run on street would only be a couple of miles and that wont be until after I get it street legal and get a title for it. Since it never had one that will be a long process and wont happen for some time. I do not plan to ever do any track racing with it. Current tire sizes front 19x7-8 rear 20x10-10 Sizes im thinking of going to Front 20x7-8 rear 22x10-10 Want a little more ground clearance with out having to change rims. If you have suggestions for other sizes that would work please feel free to toss them out
__________________
Where there is a red neck there is a way. Last edited by plee911; 08-22-2018 at 01:41 AM.
|
|
#141
08-22-2018, 12:43 PM
|
||||
|
||||
|
The front won't matter since they are just a steering tires. I run Duro Strikers on the back. These are all terrain tires, however not good in deep mud but I don't think you will be running in mud. Just keep in mind as you increase the height of the tire it will lessen low end and increase top end power. For every 1" in height you loose 1 tooth of large sprocket.
|
|
#142
08-22-2018, 01:43 PM
|
|||
|
|||
|
There is more to tires than just overall size. Look at weight also.
I have 6 ply dirt devils, the size I'm running (23x8-11) is only 14.5lbs per tire. That was lighter than the 20 inch tires on the rear when I got the buggy. Only slightly (I think 2lbs) heavier than the front 18 was. I run the same tire front and rear with different offset rims so I can have one spare. Truthfully I didn't notice any power lost due to such a bigger tire due to being close to the same weight overall. I did go ahead and tune for lower end and added an intake spacer (also helps make power lower) but been thinking about removing the spacer. Overall I do like the dirt devils so far. They have been a good all around tire for me. Last edited by neo71665; 08-22-2018 at 01:45 PM.
|
|
#143
08-22-2018, 05:19 PM
|
||||
|
||||
|
Im looking at something along the lines of
https://www.ebay.com/itm/SunF-All-Te...53.m1438.l2649 and https://www.ebay.com/itm/SunF-All-Te...53.m1438.l2649 These are not what I will be buying just roughly what I was thinking of for tread type and ply rating. I know the fronts are just steering but I see some that are more like lug and I see super knobby. I know some things are picky and perform better with certain treads and didn't know if our buggies were like that Im not planning to go get into a lot of mud but im sure there will be some. Also snow in some places. I dont want to go with deep lugs because when I hit hard pack it will feel like riding a wash board lol I knew about the going too big problem I passed on a brand new set of 25s that popped up on CL for $50 for the rear because of it. im only going up 2 inches on the rear with the 39 tooth sprocket already on it. I was thinking about trying to find all the same size rims so that I have 1 size fits set up but that will have to come later. just didn't know if 3 ply were better for some reason I didn't understand or if people preferred the more lug or knobby style Thats why I asked what and why.
__________________
Where there is a red neck there is a way.
|
|
#144
08-22-2018, 05:48 PM
|
|||
|
|||
|
Ply normally on atv tires is how puncture resist and less plys means they are lighter. Its how many layers of rubber makes up the tire. My terrain also tends to eat/break/tear knobs off tires so I like lugs. Lugs grab better in mud however they are directional where knobs are not.
A trick with directional tires is on the rear you run them correct since you want the tire to grab the ground. On 2wd front you want the ground to grab the tire you run them backwards. You see this on farm equipment where the wheels rolling operate the machine like a hay rake. I personally run all 4 of mine the same direction and have no issues. I ride in the woods a lot over sticks and thorns so thick tires are better. People that race or ride on sand don't care and can run light tires with less plys. Personally I think knobs are only good on manicured dirt race tracks and not much else but thats my opinion. 25s are too big for these 150s. When I got my honda rims the rears had some wore out 25 2 plys on it that I drove around on for a bit (had 24s on the front rims). The little engine couldn't even spin the bald tires over and it just about burnt off the clutch the short time I ran them. Needed one when I got it anyways. The 24s rubbed on the front and my turning radius was huge. 23s are the max I would suggest for a 150 but only if its tuned for them. I looked at sunF tires but seems you either get great tires or they separate right off the bat. I also couldn't get and hard info on actual tire diameter and weight. While I was looking the GBCs I had saved in my cart dropped to $111 shipped (ebay) for 2 so I jumped. Last edited by neo71665; 08-22-2018 at 05:51 PM.
|
|
#145
08-22-2018, 06:37 PM
|
||||
|
||||
|
The sunf were just what I found fast to show the tread style I was thinking of.
Cheap Chinese tires I know Most of the fronts I'm looking at weigh about 10 lbs each. I think the 6 ply are the best choice for me. Don't want a flat out in the woods or in the middle of nowhere in the high desert scrub. Wider spaced knobby for the front so I still get the grip but without the wash board of the lug type. Decient lug type for rear for traction in mud,snow or Sandy terrains. Supper knobby would clog up but give better ride. Deep lug would grip and shed better but make it feel like riding a vibrator on the harder ground. That's my thought process just wanted to make sure that it wasn't flawed.
__________________
Where there is a red neck there is a way.
|
|
#146
08-23-2018, 12:00 AM
|
|||
|
|||
|
You can run lugs on the front as long as they are not spaced out like tractor tires. if they have a solid lug down the middle it will ride on that at higher speeds when the tire expands. it's up to you but I have minor ocd and running 2 different treads drives me mad. Nothing wrong with running the sizes you requested, my ocd keeps me from it.
I don't disagree with knobs on the front just for me I couldn't find any in a 23 inch tire that was as cheap or cheaper than my rears. Again I carry a spare and my ocd kicks in so I tend to stick with one type of tire. I don't want to limp home because I have a "front tire" as a spare in the middle of a ride. It's bad enough I'm running 2 different offset rims but that is about to change with the correct spacers. Last edited by neo71665; 08-23-2018 at 12:03 AM.
|
|
#147
09-17-2018, 03:28 AM
|
||||
|
||||
|
Ok buggy has some new used front tires for now.
Wanted to get new ones but just wasn't in the buget right now. Wife was at a yard sale Friday and they had a set that fit the front and was in ok shape for cheap so she picked them up for me. So the buggy is mobile again. I did finally settle on tires and will be going with ITPs when I get the new ones. Only had a half day off per week for the last while so haven't gotten much else done. Coming up on a 5 day weekend though so I am hoping to get all of the rewire done and post pics. I am hoping to start sanding and get the primer done this weekend as well.
__________________
Where there is a red neck there is a way.
|
|
#148
09-24-2018, 05:44 AM
|
||||
|
||||
|
Well front rewire is coming along. Honey do list was bigger than I was led to believe so didn't get to do as much as I wanted but I am happy to say my head lights and horn are now working. Lights for blinkers are run but haven't had a chance to test yet.
__________________
Where there is a red neck there is a way.
|
|
#149
10-01-2018, 02:42 AM
|
||||
|
||||
|
Ok front rewire is completely done. Mess is all cleaned up and neat.
No blinkers yet because I have to buy some but the wires are there and they test out like they should. Rear light rewire is done. Have to go over the wire diagram for it cause I made a mistake somewhere. When head lights are on low I have a tail light but not when they are on high. Pretty sure I know where the mistake is. Don't have a break light at all but haven't had the chance to see if the bulb is burned out or test if the break light wire is getting power. Got a new spark plug in her and did a throttle chop. Still lean so got to pull the carb this weekend and get a bigger jet in there. Couldn't use the old one anymore because I could not get it clean enough to tell it was reading as ok but new one shows clearly that she is still lean. Im also planning to get the rear electrical box completed so that all the rear wiring is cleaned up. Rode her hard to give her a test for field conditions/riding and ended up bouncing my CDI and solenoid out of their holders. so its time to get the box done before anything gets damaged She is coming along slowly but each thing I fix makes her a little better. Cant wait to sand and paint her tired of her still looking like a yard sale reject. Almost pulled the trigger on a 250 yerf but they had chopped the rear end and cobbled a quad motor into the buggy. It was not done well and they said it had a lot of issues so I passed. Might not of but the original motor was gone and the cut and weld job they did was terrible rear frame looked like freddy kruger had a fun time with it. Would have had to find a replacement rear frame and source a motor then cut all the junk out and weld new frame in would have cost me way to much.
__________________
Where there is a red neck there is a way. Last edited by plee911; 10-01-2018 at 02:45 AM.
|
|
#152
10-01-2018, 05:07 PM
|
||||
|
||||
|
We had a short dirt track near my house, one night late models were running and one driver lost control on turn 2 which has a dip which put him in a spin around turn 3, the left side of the car slammed into the guard rail as he hit the strait. His cage which he built himself snapped in the weld and drove it into his gut. At 32 with 3 kids and one on the way. The widow than sues on grounds that the dip caused the accident and the track knew of the potential of seriously injury Well the track was in it's first season and heavily mortgaged so they filed for bankruptcy and the track closed. All this even though the drivers signed a waiver of liability and track opened 1 pm for test and tune. They all knew of the dip in turn 2, and had raced on the same track for almost the whole season about 20 races but due to one person who on his own will decided to build his own cage, use it in a vehicle reaching speeds of 80mph. in a dangerous sport and the family sues the track.

|
|
#153
10-01-2018, 06:20 PM
|
||||
|
||||
|
Yeah that was my thoughts. It was an angle iron mess that he didn't even take the time to try to make look good the welds looked worse than mine and that's saying something. He didn't even try to clean them up either. Then he told me it was cracking CV joints which means he either has the engine off kilter or the shafts are wrong somehow just way to many unknowns. Then add to that that he cut out cross members to get the motor into the frame but didn't put them back. The whole rear frame was compromised. Wouldnt be Suprised if it was cracked in several places under the paint
__________________
Where there is a red neck there is a way.
|
|
#154
10-01-2018, 11:59 PM
|
||||
|
||||
|
Don't get me wrong I have done things the redneck way plenty of times but usually only to get me home or get through the day.
Once you get it home you rip it apart and redo it right. It can still be a red neck fix but it needs to be as good or better than it was originally. Welds need to be solid and look good not look like an epileptic did the welding job. I am not a good welder. My welds will hold but they are thick and they are ugly. The angle grinder is my close friend. The price wasn't bad at $400 but when I realized I was going to have to cut off pretty much the whole rear end and find a motor with everything for it I realized that the job was way bigger than I am ready to get into and way out of my price range to complete anytime soon. I always have to keep my wife's rule in mind. Projects are ok as long as she can see progress being made. If it sits and nothing happens it will get termed a piece of junk and she will hound me till I get rid of it. This would have been sitting a while with very little to no progress. So I decided to wait till a better condition one comes along.
__________________
Where there is a red neck there is a way.
|
|
#155
10-08-2018, 01:50 AM
|
||||
|
||||
|
Well got the carb re-jet done this week end
went from a 36 pilot to a 38 went from a 114 main to a 125 (it required 2+ full turns on mix screw to run with the 114 and was still lean. set it to 1 1/2 with the 125 and she purred like a kitten) Decided to run it for the week end since my time this weekend was short and check it next week end. Let daughter drive it to a friends house and when she went to come home it wont start. Weather went nuts and it decided to rain/snow for the last 2 days (mother nature is off her meds again) so I couldn't get over there and diagnose what is wrong. Im hoping I just went to big on the jet and it fouled the plug. Because it got stuck at the friends house and the weather was nasty I didn't get the chance to work on the electrical box for the rear either. hoping to rescue it Monday.
__________________
Where there is a red neck there is a way.
|
|
#156
10-10-2018, 01:15 AM
|
||||
|
||||
|
Well I was able to take a jumper pack and rescue the buggy.
Plug looked a little fouled but not enough that I would have thought it would affect starting. Uni filter was drenched because I left the redneck intake 12 inches long and the filter was sitting out the rear in open air. Pulled and blew it out with compressed air till dry She was an evil lady to get started even after cleaning the plug and drying the filer. Im thinking maybe I should go back to the 36 pilot jet and see how she behaves. She ran good once I got her started but man she didn't want to start even with starting fluid and refused to idle with out giving her some gas until fully warmed up. Game plan is to switch back to the 36 main and pull and check the enricher. If its not working like it should and the jet was to big then when cold she would be flooding and that maybe why she didn't want to start even with a shot of starter fluid after sitting for 2 days. Im also going to cut the redneck intake down from the 12 inches (Left it long cause I thought it looked pretty cool with the red UNI filter sticking out the back) to about 7 im thinking. Pretty sure I don't want to go less than 6. I want to move it under the rack because it got drenched sitting out for 2 days in the rain. The rear rack will provide a little cover. Might also pull the valve cover and check my valves. She has had a decent amount of hours put on her since the rebuild and they maybe out of adjustment. Gonna see about hitting the salvage yard and see if I can find a motorcycle muffler to mount to her as well. The gutted one sounds good but I can hear it from too far away witch makes it useless as a hunting/scouting buggy
__________________
Where there is a red neck there is a way.
|
|
#157
10-10-2018, 03:28 PM
|
|||
|
|||
|
An outerwears prefilter will stop a lot of water soaking. If you know anybody that drinks folgers coffee the small tubs make a perfect cover for the uni filter when you leave the buggy outside.
https://imgur.com/a/rNl3Bn3 Just don't forget to remove it before you take off. The buggy will crank but from mid throttle up it's a pig, lol. Last edited by neo71665; 10-10-2018 at 04:03 PM.
|
|
#159
10-14-2018, 09:53 PM
|
||||
|
||||
|
Ok went back down to the 36 pilot jet and she got alot better. Easier to start when cold smother on the idle.
I stayed at the 125 main and did a couple of test runs with the engine warmed up. The plug is completely clean nothing to say its lean nothing to say its rich after multiple long run and throttle chops. Im figuring this means that i am still a little lean but not as bad as before. since before i had clear white ash over the whole plug. Gonna go up 1 more size and see what it looks like. Didn't get much else done weather and wife ran interference. I have decided that i dont like my electrical running under the seats so i am planning to pull the wire harness and re route it up the back and over the bars. I am going to pad the bars anyway and this way i can notch the padding for the wires. This should make my electrical even more bullet proof. I also discovered something else ths weekend. It was muddy everywhere and i did ride a little bit. My whole back got covered in mud lol. So now i know the current fenders are not up to snuff will be looking at buying or building some that cover more of the wheels. Daughter suggested cutting up a 55 gal plastic drum and i like the idea so i will be looking into that. Any other ideas/suggestions are welcome.
__________________
Where there is a red neck there is a way.
|
|
#160
10-15-2018, 07:08 AM
|
|||
|
|||
|
When I put larger tires on mine the little fenders didn't cover anything so I used a 55 gallon drum to make larger ones. My suggestion is don't go overboard. The factory supports on my kinroad are thin tube and I noticed after a few bumpy rides the weight of the larger fenders were bending them slightly. I ended up redoing the supports with solid 3/8th rod. Still not real happy with the rear and thinking of putting a bigger fenders that ties into the swingarm in more than one spot but use some "jeep" metal trailer fenders. I have an old double axle fender that I'm gonna see if I can cut in half and make work when I get back on the buggy.
|
|
#161
10-15-2018, 11:00 AM
|
||||
|
||||
|
You can waste alot of time and never get the proper mixture. There are only 2 ways to jet, one way is with the proper equipment to read the exhaust which the average person does not have. There are only 2 circuits in a carb, idle and main. The main will have absolutely nothing to do with the idle circuit and the idle circuit only has a small transition tie with the main circuit. The idle circuit should never be touched until the main circuit is properly jetted. To do it properly you will need a fairly level 900-1200' run and your plug wrench. You are going to start from a dead stop with engine warmed up then open throttle 100% and travel that 900'-1200' run, at the end of the run with throttle still 100% open you will kill the engine and you will only let off 100% throttle when engine stops. When engine stops you then let off 100% throttle and come to a stop. Pull the plug and read it, if lean increase main if rich reduce the main. Once the proper main jet is determined than you can determine the idle jet. The idle jet will only affect the idle and the slight transition from idle circuit to main circuit. Jetting any other way with the exception of an exhaust analyzer is a total waste of time. The idle circuit by theory always runs richer so including the idle and main circuits to read your plug will give you a false reading.
|
|
#162
10-15-2018, 12:08 PM
|
|||
|
|||
|
My only suggestion to above is when you do your reading runs, carry a 2nd plug. Pull the one you are reading, put it in the box the other one was in, put the 2nd one in, and go sit down in your shop and closely look at the first one to read it.
A lot of people seem to only have the space to do a reading on an open road somewhere and try to quickly read it before somebody calls the cops. They rush through it and don't carefully look. Push comes to shove it never hurts to have a 2nd plug at all times anyways. Last edited by neo71665; 10-15-2018 at 12:10 PM.
|
|
#163
10-15-2018, 06:18 PM
|
||||
|
||||
|
I was using a 400+ ft run but I can extend it out on a different road. 1200 won't be a problem. Other than that I have been following the procedure. I can do another set of runs friday and see what I get. Hoping between now and then that I can find a 55 gal barrel to make some fenders out of.
__________________
Where there is a red neck there is a way.
|
|
#165
10-16-2018, 06:23 PM
|
||||
|
||||
|
Lol yeah tell me about it even for other people that live in AZ I'm usually about 4 hours away. I appreciate the thought though. Worst case I'll hit one of the surplus places they usually have them for $40ish. Will see what I can dig up between now and Friday when I finally get a day off. Hoping mother nature plays nice has rain/snowed for the last 36 hours here.
__________________
Where there is a red neck there is a way.
|
|
#166
10-29-2018, 12:03 AM
|
||||
|
||||
|
So didn't get to do any runs kids took the buggy for a ride and the battery retainer broke.
Battery fell out and was dragged until it broke the connectors on the battery. Fortunately the battery itself was not damaged. It also ripped the solenoid off its retainer and destroyed the rubber boot that holds it. So didn't get the chance until yesterday to rebuild my battery wires had to put new connectors on both wires. The solenoid is zip tied in place for now. It will be getting a new home in the box I still haven't gotten the chance to build. Buggy is back up and running and none the worse for the incident. Did cause me to rethink my battery retention and will be using a metal retainer with a bolt down clamp and rubber buffer instead of just a rubber stretchy one from now on. Kind of frustrating cause the retainer was designed for car batteries and is only a couple of months old and shouldn't have snapped but did.
__________________
Where there is a red neck there is a way.
|
|
#167
12-11-2018, 01:32 AM
|
||||
|
||||
|
Well work, bad weather and holidays have slowed me way down.
Only a few things have happened with the buggy. Head lights stopped working intermittently. This turned out to be the head light switch new one installed and problem is gone. Battery kept going dead while riding thought it was y regulator but it turned out that my primary charging line was not connected properly. Got damaged when battery went for a tumble. But its all good now and I ended up with a spare regulator. Got an impact wrench finally so getting my variator off and cleaned and inspected along with my clutch is high on the to do list. 11 gram sliders and a belt are in the near future. Also I finally got my light pods purchased for my head light replacement. All tested and working but cant put them on the buggy till after X Mas because they are a present but I can say they are WAY brighter than the factory ones and will be an awesome improvement. Everything is kind of slowed down because of the winter weather. Not having a garage or shop sucks lol. The rebuild has held up very well and I have no complaints in that area. Planning on taking another run at the seat rebuild my daughter lead the charge on it the first time and it was a total failure. Im pretty sure I can rebuild them and have them come out OK. Other than that its mainly going to be little things here and there until spring when warmer weather lets me spend more time on it. For now it is running and the kids and me love it. Cant wait to play in the snow with it. As I get things done I will post some pics so you guys can see the progress.
__________________
Where there is a red neck there is a way.
|
|
#168
01-26-2019, 07:53 AM
|
||||
|
||||
|
I sure have enjoyed reading this thread. Did you get to play in the snow Plee? I'm looking forward to your next updates!
__________________
Crossfire 150R 12g Sliders, Yellow Spring and Clutch, Kevlar Belt 35 MPH GPS Speedo Tachometer 28mm Pumper Carb Redneck Intake (6") and UNI Filter HP CDI, Coil and Plug Wire Iridium Plug 1932 AHOOGA Horn A12 Cam P&P Head 58.5mm Piston/Cylinder Big Bore Kit LED Light Bar, Head Lights, See Me Lights Cigarette lighter w/2 USB charging ports Oil Catch can Frame Powder Coated All Nuts, Bolts, Screws and Washers Replaced w/Stainless steel 39 MPH Top Speed 
|
|
#169
01-29-2019, 12:55 AM
|
||||
|
||||
|
Yes as a matter of fact i did.
Have not been able to work on it much has been bitter cold here and work has been 72 hour weeks again. That said we got a good snow storm a week ago and had about 6 inches of wet heavy snow on the ground. I didn't think i was going to be able to play in it because the buggy had been sitting outside uncovered for about 5 weeks with fuel in it. To my surprise it fired right up even though it was super cold and i played in the snow for a couple of hours. OMG it was so much fun. Sounds kind of sad coming from a 37 year old but hey it is what it is LOL. It ran fine all day but this weekend when i tried to fire it up again the buggy wouldn't stay running. I know it is my own fault for letting it sit with fuel in but hey it will only take 20 minutes to pull and clean the carb.' Weather has been getting better here so i may be able to get back to work on the buggy. Im hoping for another snow storm though so i can get a vid playing in the snow to post. As soon as i get something done worth seeing then i will get some pics posted too.
__________________
Where there is a red neck there is a way.
|
|
#170
06-03-2019, 09:07 PM
|
||||
|
||||
|
Havent posted on here in a while but my buggy is slowly coming along and im almost to the point where i will soon be taking it out to the woods.
I got the buggy as a non running project. PO was moving out of state and just needed gone from property. Here is my issue i need to get an OHV tag for it in AZ in order to use it and there is no paperwork on it at all. I have lights and all the required equipment for it to be registered but I am wondering if anyone in AZ has gone through this process and what it entails. The DMV website is less than helpful and trying to get them to answer a question over the phone is like pulling teeth. Anyone with a first hand account of doing this with out even a certificate of origination would be a great help. Looking to get it titled and registered Lights, blinkers and tail lights are almost done. Electrical is almost done actually getting ready to break it down and paint everything but have a couple of mods i want to finish first so i dont mess up the new paint before i have given it a run through the woods lol.
__________________
Where there is a red neck there is a way.
|
|
#171
08-10-2019, 01:27 PM
|
||||
|
||||
|
I just finished reading this thread. Now I gotta know, how is the buggy?
__________________
Crossfire 150R 12g Sliders, Yellow Spring and Clutch, Kevlar Belt 35 MPH GPS Speedo Tachometer 28mm Pumper Carb Redneck Intake (6") and UNI Filter HP CDI, Coil and Plug Wire Iridium Plug 1932 AHOOGA Horn A12 Cam P&P Head 58.5mm Piston/Cylinder Big Bore Kit LED Light Bar, Head Lights, See Me Lights Cigarette lighter w/2 USB charging ports Oil Catch can Frame Powder Coated All Nuts, Bolts, Screws and Washers Replaced w/Stainless steel 39 MPH Top Speed
|
|
#172
09-02-2019, 02:11 AM
|
||||
|
||||
|
I have not been able to do alot with the buggy.
It starts and runs kids drive it all over Still have alot of work to do on it but had alot of other issues come up and am dealing with some health problems as well I love the little buggy and am hoping that now that things are finally starting to get done that i can get back to it and get it finished the way i want it. Havent been able to even get into my work area for the past several months because i had to completely rearrange and everything that had to be moved just got piled up and then the health problems happened before i could get anything put away. Still have some organizing to do but my work area is accessible again as of today. Still have to build seats if i cant talk the wife into letting be buy a set of used razor seats. (Been some real good deals on CL lately but money has been tight) Still have the LED pod lights sitting in the box. Still need to paint the entire buggy after i clear the old paint. I has 4 layers that have to be blasted off. White,silver,red and finally rattle can black on top. No way to get a decent paint job till i get rid of the mess the PO made. I finally got good tires on it though (Not new but excellent condition used so it is safe to ride) Electrical is in pretty good shape just have to get the pod lights wired the way i want. Engine is solid and starts and runs good. (Wish i had a more power but i either have to go to a bored out motor or swap it out) Funding holds that back for the moment Will post some pics as soon as i can get some work done on it
__________________
Where there is a red neck there is a way.
|
 |
|
|