|
|
|
#401
 05-01-2012, 06:27 PM
|
||||
|
||||
|
I think this has to be the longest running yerf front end "development" ever ...
 But i think I finally have it ... But i think I finally have it ...Eliminated welding a tube over the existing rod--no need for it, as a matter of fact, the ball and rod thickness matched pretty close, so after welding the plates onto the rods (couple chunks of angle iron steel) I just had to finish file them to fit over the balls. Now i can drop the shocks into steeper positions further inboard, increasing ride height, but at the same time reducing the effort needed to compress the springs. as it sits now, this is about the stiffest setting. when i move the shocks, it will settle into close to the same position with me in it. Present clearance is 13 at the nose, and 11.5 further back because of the angle of the front end. Found a supplier that has 12 mm high misalignment spacers that reduce the center to 10 mm, something i need to do to get more upward travel out of the arms and also get the rod joints on a better angle by angling the top and bottom of the mount tube a little shallower. It will also let me eliminate a 1/8th or so out of parallel condition between the tie rods and swingarms. after that, this front end is absolutely fini! For ckau, (or anyone else for that matter) some numbers you might find helpful ... stock rack length, added 11 teeth to center it. Gives 1 3/4 turns lock to lock. my swingarm length bolt center to center is 16 inches (all equal length) steering arm is 4 and 5/8ths on center from the spindle center (longer than yours i believe, which is why i likely need more teeth cut) tie rod length is 12 inches from rack end (no hardware on it) to the center of the steering arm mount bolt. heim and clevis add 1 5/8ths. steering arm is 3.5 inches from the axle center to the center of the tie rod end heim (vertical measurement) steering arm is front steer and set for negative ackerman, about 6 to 8 degrees to center Now, after painting these things it's back to the proctology session 
Last edited by x-bird; 05-01-2012 at 06:31 PM. 
|
|
#402
05-01-2012, 07:21 PM
|
||||
|
||||
|
Looks nice- Definitely your design! I'm not picking on you with the next statements but pointing out the obvious when it comes to long term design.
I just don't understand your theory on the clevis being on the steering arm, you can't make an easy toe-in/out adjustment like you can with joints on LH/RH threads,or buy over the counter parts. You'll have to disconnect the Heim or clevis bolt,then reassemble to verify correct adjustment, you only have 1/2 as much threads for adjustment(just the Heim threads). The dust boots are gonna be tough to install over those nuts or remove and there's no place for the small end of the boot to seat.
|
|
#403
05-01-2012, 10:33 PM
|
||||
|
||||
|
No offense etc. taken, I prefer that people point anything out that they see might be an issue just in case someone goes off the deep end and tries to replicate this
 That's why I always try to remember to ask for input and show or mention my goofs. That's why I always try to remember to ask for input and show or mention my goofs. It came down to I just got to *&#)! tired of trying to find what I wanted only to find i'd created a need for something that literally does not exist (not the first time with this either--I'd say i have at least 40-60 hours in online searching and phone calls for unobtanium components) or having to mod the next part in line and so on. Call it the "I've got no time or patience left theory." (today was my 1 day a week off) I knew it created a bit of a pita to adjust, but I'll pretty much set it and forget it. I know how much toe i want, doing camber changes is the same deal, gotta pop the through bolt on the a-arm heim, adjust, reinstall check, repeat til happy, so it's nothing I'm not used to. As far as adjustment length goes, every version i've run since the single arm attempt left me very little adjustment area because of the a-arm length in relation to the stock tie rods. I just made sure i had a few threads (2.5-3) available out of the rod and welded the clevis to a very close to preferred toe-in situation (i put it a few degrees in and have about 5/16ths-3/8ths i can go out with on each side plus about 2 threads at the rack end. What I did today was $7.00 in nuts and bolts. either way the stock rods would not work with what i needed to create-- No one that I could find makes a clevis in that size for the rack end. Yes I could have drilled and bought a tap, tapped it SAE, ordered the clevises to fit that, ordered LH/RH tie rods to match that size, ordered heims LH/RH to match that and new heims for the steering arm ends, and cut and revised my steering arms yet again. Instead, I spent 7 bucks on 2 bolts and 6 nuts, drilled out some scrap, welded it up and am calling it done. Pretty stout too, once the .. uh oh, here we go again ... misalignment spacers are in with cheap 10mm bolts, i'll feel confident i hit my goal. that'll be another $20 spot and some minor grinding, filiing, fitting and finally welded a couple washer stacks top and bottom on the mount tube by the time it's through. Dust boots i'm thinking of trimming back to fit the inside of the heim and leaving it and the clevis exposed. I can push it back, install the clevis, then zip tie it in place. One already has a tear around the small end from re-installing it when i cut the rack teeth. If i want to go the turnbuckle style tie rod setup, i can dump the money at it in the future. I just want to get to work on the rear axle, followed by rebuilding the transmission, followed by the cladding and paint, (or vice versa) followed by final assembly, followed by dealing with the DCNR for a title and registration, followed by a trailer, followed by riding ... sometime in 2013 ....  Did i mention i bought my wife a new used car ...don't know which was cheaper, that or this? 
|
|
#405
05-02-2012, 09:17 AM
|
||||
|
||||
|
I totally understand the "at the moment""with what I got"design with little spending!!!! I do it all the time. Do you have to register this to be able to run the races? No doubt your set-up is going to take a beating, I'm always looking at the long-run when I try to alter a design for a simplified repair, seldom works out for me, but that's what makes this such a fun hobby.
|
|
#406
05-02-2012, 10:35 AM
|
||||
|
||||
|
Dust boots work without cutting, surprisingly the small end does fit over the rack end.
Racing = no registration needed. Pennsylvania has a lot of ATV accessible trail systems, but all ATVs must have a state registration to use them, go karts, golf carts and dune buggies are a big no-no as is any vehicle without a paper title-- it's absolute-no-compromises must-have. MCOS, bills of sale, VINs alone = a completely un-registerable vehicle of any kind in this state. So i'm in the process of having the state declare this as an atv with one of my companies as the manufacturer so that they can issue a VIN and title for it. About 90 percent done with that process. My woods trail also runs on one of our business properties, (used to be my own personal land) and the insurance auditor just came through, saw the trails and basically took a very dim view of personal use even though it's "dormant". I'm also clearing it of 60 percent of its trees right now, so i have no place to ride for awhile. Ax-man Jim's been at it for a few weeks. I may have to get with the lawyers and work up a rental contract with a hold harmless clause. Also considering posting a CL ad to rent land to ride on like hunters do ... whee ....
|
|
#407
05-08-2012, 04:27 PM
|
||||
|
||||
|
Busy day off ...details, details ...
Got my misalignment spacers, the metric ones for the steering arms were a hair off on the ball dimension, so i sat up til about 1 am last night filing them until they worked properly. Misfit likely between two different rod end companies... no biggie, just tired fingers. the spacers for the upper arm fit perfectly, but reduced the through bolt to a 5/16ths where i had the spindle pin drilled and tapped for 3/8ths (overlooked that little detail ...) a few hours of brainstorming, searching in vain for a non-existent part and considering doubled up heli-coils led me to Time-serts and a local dealer who had their Big-Sert kit. Picked that uyp today, drilled and retapped the pin, put the insert in and all is well. The added misalignment spacers get rid of all my bind issues in both directions of travel and playing with the shocks, i can get up to 15 inches of underside clearance up front at unloaded rest if i want. ))) maybe pics later. been hacking up angle iron for the rear axle, dinner time ...
|
|
#408
05-16-2012, 08:18 PM
|
||||
|
||||
|
Now back to our regularly scheduled program .... test drive # 2 went pretty well, managed to pull it all together between shifts and give it about 1/2 hour of thrashing. no time for videoing or pics. two minutes in, made a wrong turn on my overgrown trails, put it in a hole blocked by a 3 foot tree trunk and  used reverse ! used reverse !My cable setup is lousy though and it skips sometimes if i don't hold the lever all the way back. chain loosened at the same time getting out of the hole, which was a good thing, as i took it back to the garage and remembered that i forgot to fill the tranny with gear oil  back tires makes it feel a bit strange in fast or sharp turns, didn't check the air pressure, i'm sure it's just having wide, soft tread back there, making me worry about rolling when it's actually soaking it up pretty well .... May try for some vid tomorrow afternoon on break, then it's time to teardown the swingarm and paint it if no issues show up.
|
|
#409
05-16-2012, 09:08 PM
|
||||
|
||||
|
Glad it's working out so far-I would love to see how those wide a** tires are performing in a turn too.
|
|
#411
05-17-2012, 05:47 PM
|
||||
|
||||
|
sorry, no vid of round 2, set the camera by mistake to the take a picture every 3 seconds mode ...
More typical X carnage ensued ... The axle mod has proven itself despite losing a collar bolt on the first ride. replaced that, tightened it better and nothing came loose. Landed a sort of downhill jump (a little dip area then up a foot and then a good 2-3 foot drop to level ground) off kilter to the passenger side on that side rear tire only and blew the bead. aired it back up and continued .... remember how i said i wanted cheap bolts for the tie rod heim? Well, i have yet to find 10mm x 110mm long "farm" grade bolts. the only thing i had that fit (100 mm clean shoulder, 10mm thread) were 9.8 hardened ones. coming into that same drop area staying a little left to keep it level and on the gas pretty good i found a 2 foot tall 6 inch black walnut stump ... everything's is getting way too overgrown and i've left stumps all over the place. dead on center hit with the left tire ... hard ... bent the aircraft bolt in the spindle, crushed/bent the misalignment spacer there and bent the steering arm, gusset and all. actually kinked the 1/8th wall tubing. The tie rod heim and through bolt? didn't break because it was waaay too strong. LOL going to go with aluminum through bolts there. no two ways about it. the jump was hard enough for me to realize 3 things ... i need new seatbelts--right side keeps loosening. I need a new seat, there's a hard metal bar in the right side, don't even want to look at the bruise i'm sure is there from that landing since i came off the seat 4-6 inches while in the air. I need a new rear rim-- sucker is bent bad. there's a fresh 3 inch deep rut in the ground where it blew the bead. Axle--still on the money and true. front a-arms, still no issues Not a bad test session, still proves my theory on where to put the breaking point. just gotta put something that will break there. Not relishing dismounting that tire. Torch session on the spindle to come. Pic sequence i'm almost positive is the tire-blower. first pic, if you look to the left of the wheel tracks ahead, you can see the stump i whale later on. last pic has to be a fraction of a second after rear tire impact. gotta got to work, laterz all .... Last edited by x-bird; 05-18-2012 at 01:46 AM.
|
|
#412
05-18-2012, 04:25 PM
|
||||
|
||||
|
BTW, checked my manual--pics above are a 3 images in 2 seconds sequence ... ))))
And the damage  Turns out my rear rims are spiderbox front rims, so a new used one is on the way from bmi via e-bay ... bottom of my thigh is still sore! New misalignment spacers on on the way from midwest, only need one, picked up 2 Decided to pick up some 10mm 6061 aluminum rod stock from McMaster Carr and make my own through bolts for the steering arm. gotta torch the spindle and straighten it. That gusset used to be a straight run. I've got about 2.5 inches of clearance between the tire and frame, wish i had a high speed camera shot of the front a-arms at impact. tire hit the frame, nothing i can find on the a-armson either end or mounts, heims etc. that shows anything is bent or damaged other than the steering arm. It hit square on the stump and drove up about a foot of suspension travel then pushed around the stump and past it. buggy never stopped forward travel and barely slowed--just a big slam. 3 weeks ago that was a full tree, now it's hidden in fast growing undergrowth and ivy--drove into it on the gas with no clue it was coming. I think the impact did something in the electrical, I shut it off to survey the damage and it wouldn't restart, just clicks back at the solenoid. even with a charger on it it clicks and then gives an very weak occasional turn-over of the engine. either the ign switch or solenoid is fried, or the battery is internally shorted. It was dripping a bit out of the vent tube afterwards. Honestly despite the sad face, i'm really happy with the rear swingarm build, the jump landing was a brute that would have done much more damage without the added bearing and hub/axle work. The front end is same old story, I need something that breaks easily in that spot. Wish i could say i'd just stay away from the stumps and trees but if i ever get the chance to race this thing, the rocks on the course aren't much different. rear tires hook really nicely, got more understeer up front because of how well they're hooking compared to the turf tires, but it also doesn't want to oversteer out from under me at speed on the wide grass turns like it did with the old tires..... Last edited by x-bird; 05-18-2012 at 05:08 PM.
|
|
#413
05-18-2012, 07:17 PM
|
||||
|
||||
|
Don't feel bad X-bird, I just broke my stock rear spiderbox axle today. I wasn't even driving fast, It was about time for it to go, I got over a couple hundred miles on it, and who knows how many before I bought it. Now, to start working on My spare swing arm and axle build, got to order the parts so I can get it all together by next weekend.
__________________
T.J. Yerfdog Spiderbox, Uni Type air filter with 6" intake, 130 jet, Orange no-rev limit cdi, Red coil, iridium plug, 1500rpm clutch springs, 1500rpm contra spring, 13g sliders, 22" rears, 21" fronts, aftermarket reverse installed, and Trailtech Vapor.
|
|
#414
05-18-2012, 09:11 PM
|
||||
|
||||
|
[QUOTE=x-bird;24229]BTW, checked my manual--pics above are a 3 images in 2 seconds sequence ... ))))
And the damage Turns out my rear rims are spiderbox front rims, so a new used one is on the way from bmi via e-bay ... bottom of my thigh is still sore! QUOTE] Stock front rims on a Spiderbox shouldn't work on an rear axle(no keyway & only 6") Is that what you ordered?
|
|
#415
05-19-2012, 12:26 AM
|
||||
|
||||
|
Looking through their listings of parts for sale i came across and misread 20x10 with tires and then found this lone 8 incher, which is a match to what i have on the rears. I think i mistakenly assumed it was a 10 inch/8 inch combo instead of 8/6. The ones i misread were actually 3203 type rims. either way, i'm good to go with this one.
http://www.ebay.com/itm/350565640976...84.m1439.l2649
|
|
#416
05-22-2012, 07:10 PM
|
||||
|
||||
|
Sooo ... figured a few things out .... wish i had the vid running when i hit the stump.
looks like i nearly drove completely over it before deflecting off of it. the a-arm heim bolt and misalignment spacer that bent had that occur because they hit full upward travel then bound up and bent before the wheel turned and ran off the side of the top of the stump. likely how the frame got the tire marks on it too. I may add another bump rubber in the shock to help limit the upward travel. It's that or put a strap from the upper arm down to the front of the frame. Not liking that idea too much. Cut and threaded a pair of 10mm aluminum "bolts" today for the steering heims. Finished and installed. Made from a 6 ft piece of rod stock from mcmaster carr--going to whip up a few more of them--something tells me i'll be needing them. Did two heat and bend sessions on the steering arm, still needs a 3rd or more to get it usable again--it's still twisted back and in too much and the tie rod and heim is getting into the upper a-arm when turning. for the $20 i spent on the cro-mo tubing way back when, i think i created some pretty indestructible a-arms and spindles. ))) Bent both the rear axle and the rim with the blowout landing. Rotating it with the hub on and a pointer on it, it's wobbling about 1/8th with the rim off as measured at the back of the wheel studs/end of the hub arms. Rim on, it's way worse thatn it should be for that amount. i've put a washer on two of the wheel studs to "balance" the bend back to livable levels for now. A new axle is going to have to be next. Actually i should pull the hub and see if it may even be the hub arms, but i doubt it. removed the tire and am waiting on a replacement rim, once i have that i'll be doing some more riding, but am going to tone it back down again. I tend to really try and kill it to see if this stuff will survive. I know what it needs now, so i actually want to get some use out of it and quit working on it for awhile ... got the sunl to put together yet. I'm liking the looks of that yamaha splined hub i posted in the other thread. Thinking of a pair of pillow block bearings supporting a centrally located internally splined tube with the sprocket on it and a pair of the golf cart axles going into the tube.
|
|
#417
05-22-2012, 07:35 PM
|
||||
|
||||
|
Isn't it amazing how our projects evolve!!!! Always a work in-progress. You're already anticipating the next mod.!!! I do like the idea of the hubs,split axles and the centrally located sprocket/brake disk carrier.
|
|
#418
05-23-2012, 07:27 AM
|
||||
|
||||
|
I figure with a center carrier, mess up an axle -- it's only half the work
 Had to give up on the steering arm, gave it a 3rd bending session last night and i'm still 1/4 too close to the a-arm. tubing compressed too much where it kinked. i could heat and try to hammer it, but it'd likely just collapse. I can bend it all i want, but it's not going to get to where it used to be. Cutting the arm about half-way where it's still straight and round and sectioning in a new end for it. Other issue to resolve relates back to when i flipped the rack. really screwed up the steering layout i'd created. it raised it much higher than my original design, effectively shortened the tie-rods because of the plunge angle it now has and put me into bumpsteer. I'd originally had it dang near dead on center between the arms, with just about zero bumpsteer or camber change. now the rack end and tie rods cross the upper arms and i'm getting about 3 degrees of bumpsteer. Doesn't seem like much when watching the hub, but it's a lot more when the wheel is on. I can make a longer through bolt and make a pretty high stand-off to get it closer to parallel with the uppers, but it's a lot of height to add at the steering arm end. Not so good ... but easy. washers and another pair of longer aluminum bolts ... 15 minute deal. May do that as a trial. Other option, and the one i'm going to probably go with for the long run is to weld a pair of "drop" plates to each tie-rod end (a vertical extension of the clevis i made) at the rack end and drop the rods back to their original position. I have enough extension on the heims in the rack to run them in deeper for the extra tie rod length it will create via the reduced plunge angle. Only worry about that is the pivoting of the heim end in the rack--might give me a bit of wander at the steering wheel. Should have jsut gone with the polish steering ....
|
|
#419
05-23-2012, 11:56 PM
|
||||
|
||||
|
managed patch up the steering arm and get all four paws back on the ground. Put in about 1/2 hour of ride time before the night shift.
Shot some vid, still battling with the conversion process and having it come out with the video and audio in sync or complete, oir not in slow mo .... anyone with experience with a HD hero and NCH (prism converter and videopad or even windows moviemaker) software, please let me know what encoder bitrate settings you're using! This is worse than 6 months of grinding! Can't remember what i used to convert the last vids. Aluminum bolts held up well--don't think i want to deliberately test their shear point.  Can't really feel the bent axle, just not going to catch any air (intentionally) with it until i have something strong enough back there. pulled the hub to check, last 2 inches of the axle has a really visible bend to it. Still have to play with the alignment and shock settings. Stiffened up the front a little too much by moving the top and bottom shock positions out on a shallower angle, dialed in a bit too much pre-load on the springs and had a bit of the porpoising action going on. And of course, i broke it  Throttle cable clamp (the 3203 lock collar deal) slipped on the rod. (thought i ran out of gas Went a little "magilla" snugging it back, felt the bolt give and a minute or two later it snapped when i floored it. No biggie, just a bit of a pain since i'll have to pull the seat to fix it.I had planned on an additional crossmember on the swingarm, but i'm going to hold off until it needs a new axle setup. Gonna squirt it, finish the cladding then put up the pretty pictures....
|
|
#420
05-24-2012, 11:47 PM
|
||||
|
||||
|
Bought NCH's Prism file covnertor (used the trial a few times and it seemed to work well)
did the whole thing with nCH and skipped moviemaker, uploaded easy, 8 minutes for a 5 minute video. overall resolution quality dropped sharply with the upload though. It may have picked up an old clip i started it with and based it on that ...may try and cut it out and see what happens ...anyway, here's some highlights of a few mellow laps ... BTW, you gotta rturn up the volume. meant to kill it only for the first clip but it cut them all way down. http://youtu.be/XwRW0fujK44?hd=1 Last edited by x-bird; 05-24-2012 at 11:53 PM.
|
|
#421
05-25-2012, 12:07 AM
|
||||
|
||||
|
I really enjoyed that video!!! Is the fresh dirt section a small jump? Man- you've gotta get rid of those stumps!!!!!Buggy sounds good too.
|
|
#422
05-25-2012, 01:45 AM
|
||||
|
||||
|
Nice vid, but I couldn't get any sound even turned all the way up except very breif @ the beginning. Metal is right you need to do something about those stumps. NCH is what I used on my vid. The one I posted had sound but the others either have sound and no pic or visa versa. Been having a real bad time with the computer, but as soon as I resolve its issues I am going to purchase something else to do the video's.
|
|
#423
05-25-2012, 05:10 AM
|
||||
|
||||
|
Quote:
The stumps aren't my choice. I normally flush cut--tough to do with all the rocks, but those have to stay for future dozer/backhoe removal when we tear through the hill. I may take out a couple 4 inchers and under. Fresh light brown dirt section was always there, clearing the trees and not riding has let everything overgrow. that spot was where we dug in with a backhoe checking bedrock depth. coming out of the woods, that's a depression with an 8 inch or so lip then a 2 1/2 to 3 foot drop onto the flat. that's what bent the axle and blew the tire bead (the landing is the three pics above) coming the other way it's a 2.5 to 3 foot launcher landing into another rocky rise and immediate corner--pretty hairy at speed. very first clip of the yerf is me doing just that and hitting it's favorite tree head on. New dark brown/black dirt section is the back of a rotten old wood and brush "compost" pile that i trailed in last fall. really soft, too tricky and tight to launch into. I have two other little "technical" rocky corner areas that i've opened up but haven't run through yet, plus the whole backside of the hill with a 20' steep drop to play with. Or if you mean the pile by the shed--that's (was) my watermelon patch ))).... Gotta get something on paper with the biz worked up before i do any more riding in there. Last edited by x-bird; 05-25-2012 at 05:24 AM.
|
|
#424
05-25-2012, 05:58 PM
|
||||
|
||||
|
Remix of vid with the sound boosted and the first couple "impact" clips deleted.
http://www.youtube.com/watch?v=bXUR5042jGc Put a supertanium bolt in the accelerator rod clamp. that's a done deal. Output shaft nut keeps loosening up on the reverse box side. starts giving me fits going into gear. T3, if you read this, I'll definitely be up for some of the nuts, lmk cost, i can give you my addy, paypal? plus i'll toss in a little extra for your trouble. THX! Got an occasional metal bang at the rear end, still think it's the chain tensioner can't find anything else making contact. Going to try and cut down a red urethane firebird control arm bushing for the top side of the swingarm. jam nuts aren't loosening and i'm nto getting a change in the tension. it's not chain skip either. Rode for a good 1/2 hour today, no real issues ...finally. going to set up the jvc on it this weekend so i can see what the suspension is doing, fenders are in the way ...
|
|
#425
05-30-2012, 07:05 AM
|
||||
|
||||
|
Pulled the front fenders to shoot some vid showing the front end "at work" and shot 3-4 vids of putting my helmet on pre-ride and taking it off post-ride LOL. Got out of sync on the buttons!
Rear axle mod has held up well on the driver's side, the passenger side with the bend wants to keep loosening up because of the way the hub is riding against the bearing. Loctited the collar bolts and it didn't loosen up, but it does not have much life left in it. It loosened up during one of the test rides and the splined portion is really twisted and pretty chewed up. I think it would've snapped already if not for the mods i did to it. Finally figured out what's making all the noise at the back -- the rear of the engine ---just the back corner of the trans cover-- is hitting the upper bar on the subframe. i need to take a link out of the chain. I added a urethane bushing up top, no change. My trips to the "yard" yesterday saw me come home with the polaris mentioned in the Sunl thread, an old (late 70s) EZ-GO golf cart and an oddball rear axle/diff supposedly from an ATV. (950 pounds of light iron total) Chopped what i wanted out of the golf cart and trucked it back to the yard. Between the quadrunner, the polaris, the odd rear and the golf cart rear, i think i can come up with a heavy-duty rear axle setup. Was very tempted to add a 1985 Honda CMX250 to the pile. had angle iron instead of rear shocks and bent handle bars, but otherwise was all there and not rusted out at all. chrome on the pipes was perfect. was a shame to leave her l;ay on the pile .... may still go after it (be around 75-100 bucks) Last edited by x-bird; 05-30-2012 at 07:20 AM.
|
|
#427
06-06-2012, 06:49 AM
|
||||
|
||||
|
And some of the final details. I was having issues with the wiring harness length and battery location, so i ran a ground strap from the negative terminal to the frame and added a 10 gauge fusible link connection to the positive "cluster" of wires.
The seat mount bolts go through the floorpan, so i used some tube scraps to make some ramps so they don't hang up on anything. tensioner setup, red spacer is a cut down HO Racing upper control arm bushing from my firebird suspension collection. Now for the bad news. the poor old girl sits in the garage quite lopsided. Was doing some "light" riding, just looping around the house and the rear axle sheared right where expected while making the left over the bump jsut past my little shed. i was probably going 20+. The ground was quite soft thankfully--or not so?? --and the bearing housing (new one) dug in deep--stopping everything instantly follwed by the nerf bar punching in about 6 inches and putting it on the top bar of the cage 3/4 of the way to a full roll. My right belt pulled enough to put me into the ground as well, and when it was going upside down, my right arm got under the top cage bar when it hit the ground. End result for me --6 hrs of ER time, (nothing broken but elbow dislocated and back in in an instant and some pretty smashed muscle) For buggy--sheared axle and blew out the air in the right front shock. No bends or damage to the cage or any other struture or parts. Glad i rebuilt it the way i did. so golf cart axle mod time wiill begin a little sooner than i had hoped ....
|
|
#428
06-06-2012, 07:27 AM
|
||||
|
||||
|
That sucks, but thank God nothing was broken although you will swear several bones were broken when you get the bill.
When going through a rollover arms will fly and end up where they shouldn't be, this is why I swear by arm or at least wrist restraints. My single seaters all have the 5 point harness and soon my 2 seaters will have them. They will save you from neck compressions during rollovers. Glad to hear your OK. That had to hurt. By the way you done an awsome job on the buggy, what did you use for the pannels? I like the way you have them to the inside of the bars.
|
|
#429
06-06-2012, 08:01 AM
|
||||
|
||||
|
Agree with you 100 % on the arm restraints, they've been on my list along with a new seat and 4 or 5-point harness. Dislocated my elbow during my football days and had a SLAP surgery on my shoulder 6 years ago, , i was pretty sure of no breaks but just went in to be on the safe side. Know the pain well lol ...
The panels are 18g steel, leftover sheet from my MGA project. They were a real nightmare to work in, i welded the nuts into the frame without prefitting or cutting anything, which made it harder. used rol-loc discs to give a bit of machine-turn finish in a feather pattern, sprayed them with the new anodized-look paint that's out (shades of low rider) and edged them with rubber and vinyl edging from Trim Gard. the rubber is what they were sized to, but it came with no glue in it (production error). the vinyl is a little wide, i used both but will eventually get around to converting it to all rubber to fit better. Ironically enough, the ride was just a quick test to verify that shortening the chain and adding the urethane spacer got rid of the clanking i'm hearing on some bumps.... it didn't .. it's either the swingarm (a little side to side play in it) or it may have been the axle with a crack opening and closing but still held together by the welded on clamp. i checked the hub for any looseness pre-ride. SOB sheared right at the hub end. Should've just canned it when i saw more twisting going on despite the mods. Last edited by x-bird; 06-06-2012 at 08:08 AM.
|
|
#430
06-06-2012, 09:50 AM
|
||||
|
||||
|
The short and slow rides can be as bad as the long and wild ones. Two years ago at the bash my son and I were on the trail with a group doing about 15mph when at a point the trail made a jog to the right due to some boulders rolling on the trail. As we made the slight jog I caught either a big rock or stump with the right frt wheel. This caused a bump steer in which brought us up an incline causing us to flip the steering wheel spoke smacked my thumb (thought I broke it) which the momemtum put my arm outside of the buggy. I was lucky for I managed to get the arm back in before we hit. The 2 previous years someone had broken an arm and wrist at that same point. My son caught the whole thing on video. We put it on you tube titled polish rollover,to the song bad moon rising. This is when I realised I need the arm restraints.
|
|
#431
06-06-2012, 11:04 AM
|
||||
|
||||
|
the buggy looks great x-bird! Well the sucky axles they put on the spiderboxes are another reason Godfrey probably went out of business. I didn't expect to have to re-build my axle so soon either, but it caught me by surprise.
Oh yeah, another fix I would recommend is on the swing arm, in the back just under the rear of the engine. there should be a bar that goes across the bottom connecting both sides of the swing arm together, without this tubing, after some hard riding the upper part (where the tensioner is mounted and the arch) will start to bend down, and the bearing hangers and bearings will start to spread out. I noticed when I kept having to tighten up my chain, then it got to the point where I couldn't get any tighter because the engine was sinking down in the back.
__________________
T.J. Yerfdog Spiderbox, Uni Type air filter with 6" intake, 130 jet, Orange no-rev limit cdi, Red coil, iridium plug, 1500rpm clutch springs, 1500rpm contra spring, 13g sliders, 22" rears, 21" fronts, aftermarket reverse installed, and Trailtech Vapor. Last edited by T3beatz; 06-06-2012 at 11:37 AM.
|
|
#432
06-06-2012, 12:35 PM
|
||||
|
||||
|
Sorry to hear about the mishap, glad you're not out-of-commision.The buggy looks great. Hope your next mod's provide a longer run time before a breakage though. I love working on them -but I also enjoy playing awhile before repairing it!!!!I like your bone yard of parts as that lends you to new innovations.
|
|
#433
06-06-2012, 02:03 PM
|
||||
|
||||
|
Thanks for the "likes" i was trying to keep the cladding a bit of a surprise. It's really strange to drive with it and the fenders on, can't see the front wheels at all.
i'm out of most work for about a week or so, elbow and arm look like popeye's after a can of spinach. had to pull and tear down one of my deck mower engine's today, no fun lifting that puppy out! If the ground had been hard, i'd likely be in a cast. Tom, if you watch my vids, you see i use a thumbs-out grip on the wheel most of the time. was taught that at 2 of the open wheel racing schools i went through years ago. saves from broken thumbs. my neighbor center-punched a deer on his kawaski 750 and shattered both thumbs and wrists. he was an ind. trucker, it put him permanently out of the driving biz. a cross brace on the rear is on the list, held off doing it until i know what i'm stuffing back there. my one concern is for those putting that in with a bearing mount on it or a bar from the underside---a good hit on the bar the bearing mount is on could end up bending the axle upwards.
|
|
#434
06-06-2012, 02:57 PM
|
||||
|
||||
|
Quote:
__________________
T.J. Yerfdog Spiderbox, Uni Type air filter with 6" intake, 130 jet, Orange no-rev limit cdi, Red coil, iridium plug, 1500rpm clutch springs, 1500rpm contra spring, 13g sliders, 22" rears, 21" fronts, aftermarket reverse installed, and Trailtech Vapor.
|
|
#436
06-07-2012, 11:04 PM
|
||||
|
||||
|
one of these days this is going to be a "hey i rode today and nothing broke ... lol"
couple gimpy pictures .... I'm hoping i didn't bend the shock shaft--it's brand new, but the shock released itself today when i was moving the buggy around to be able to work on it in a week or so. didn't lose oil, i pumped 200 psi into and no change, still in the collapsed position, then at some point dragging it around, it released. did bend the aluminum through bolt and not the steering arm .. small "validation of theory" victory there .... may i never see another stock spiderbox axle .... though i still think a 3203 axle would hold up just fine ...
|
|
#437
06-27-2012, 12:29 AM
|
||||
|
||||
|
Welded up the swingarm and axle mounts on the bench the other day and with the swingarm mounted and the rear end on jackstands, it was an easy install. Was quite
to see all 10 mount bolts drop straight into their holes on the axle plates. That was this (yesterday) morning. As expected, setting up the brakes on the new rear end was the not-so-high-light of my day. Spent the rest of the day trying a couple ways of getting them to work. The polaris trailboss donated its front drum brake cable and balancer box. Initially tried linking them up to the yerf-style master and brake rod pivot, but the balancer wouldn't reach, and bending the mount plate made the pedal motion flex most of the brackets and linkages without actuating the levers. So i chopped my throttle cable routing tab out of the way and screwed the balancer to the frame. After wasting a couple more hours with various brackets, braces and plate extensions/connections, i gave up and cut it all off, then took the girls out for dinner and firefly catching .... aka couple hours to think about brake cables, pivot points etc ... Ended up with a working solution, got rid of the rod and ran the polaris cable to the 3203 brake cable which got moved to the brake pedal. I had to use the polaris's transmission brake cable, which i made sure to cut extra long ... only to realize several hours later i could've taken it straight to the pedal if i had only cut it 4 inches longer  so the brakes finally grab decently, one cable/housing still needs cleaned and the polaris brake arms that are hooked to the drum brake levers still need some tweaking. Also, the "oddball" atv rear i brought home with the rest of the pile is a kawasaki. too narrow to use, also is shaft drive. however it's shock springs are the same diameter and height as my polaris pink ones, so i popped one off to test the rate and they're slightly stiffer and progressive. so those got cleaned up and are going on it. Biggest issues i face once i finish the details is that this thing weighs a TON --not sure the lil ol carter is going to have much life left .... and it's going to have way more oversteer. I may throw a set of the stock tires on GC rims and save the monster meats for the winter (snow) and wet/muddy days.
|
|
#439
06-27-2012, 09:33 AM
|
||||
|
||||
|
You did a great job with what you had, hope it all works out in the end! And just like Tom said the gy6 should have no problem moving your buggy... the Crossfire is a heavy beast and it still moves that thing around pretty easy.
__________________
T.J. Yerfdog Spiderbox, Uni Type air filter with 6" intake, 130 jet, Orange no-rev limit cdi, Red coil, iridium plug, 1500rpm clutch springs, 1500rpm contra spring, 13g sliders, 22" rears, 21" fronts, aftermarket reverse installed, and Trailtech Vapor.
|
|
#444
06-29-2012, 05:00 PM
|
||||
|
||||
|
Finally got her all bolted together and wired up. Goofed on my idler pulley (2 nylon caster wheel "bearings" on a shoulder bolt --from my stockpile of antiscalp wheels for my acrease deck mowers) and accidentally overtightened the nut, locking the bearings. the chain melted through those pretty quickly, so i temporarily subbed in a bronze sleeve with a piece of steel tube over it. A little noisy--you hear it more than the engine in the vid below.
Just a bunch of drive-by clips, wanted some clips to see how the suspension is working. rear shock springs are still a little too soft. if i hit some steep edged bumps and stay on the gas, it goes into a bounce-grab-bounce cycle that's a little "unsettling" Speaking of which, it took quite a bit of riding to start getting some "trust" back in the beast in the corners ... Also have to pull my rack and inspect the teeth, it grabbed and locked two times in a slight left hand turn. the roll-over might have buggered up the teeth. Also weighed her, my guesstimate was intentionally optimistic. I know i porked her out, but get a load of this load ... 637 pounds ... without me ... splits out as 113/117 l/r front and 188/219 l/r rear. I put the non-scaled wheels on boards the same height as the scales (bathroom). fairly level area with a little side slope to the right. Oh, and manual drum brakes are ... fred flintstone ... LOL Takes a good stomp to lock them up, but they work. I have to take a look at my brake pedal for a stronger mount bolt and more leverage. 2:30ish http://youtu.be/MRhJkoGgz40 Last edited by x-bird; 06-29-2012 at 05:08 PM.
|
|
#445
06-29-2012, 06:11 PM
|
||||
|
||||
|
I love this type of vid. Can you say- LEAD SLED!!!!! I see your rear tire coming up pretty easily in a turn- is that acceptable?
Well you/we know the rear end works- good job!
|
|
#447
06-29-2012, 09:36 PM
|
||||
|
||||
|
Man that thing is on the heavy side, but it still moves! good job on the axle, that thing shouldn't be breaking anytime soon.
__________________
T.J. Yerfdog Spiderbox, Uni Type air filter with 6" intake, 130 jet, Orange no-rev limit cdi, Red coil, iridium plug, 1500rpm clutch springs, 1500rpm contra spring, 13g sliders, 22" rears, 21" fronts, aftermarket reverse installed, and Trailtech Vapor.
|
|
#448
06-29-2012, 11:04 PM
|
||||
|
||||
|
Thanks ... there's a host of things to improve (seat, harness, brakes--maybe add fronts--paint the swingarm) only thing really on the list in the near future are to install the bearings i've gotten for the axle Naichi sealed through VXB, replace the metal idler and hose it with some rustoleum.
The rear jacking up a wheel is mostly from me throwing it hard into a turn then opposite locking it. i can bust those rear tires loose, but it's a pretty fine line between sliding and digging in and wanting to go over at mid range speeds. I dropped the air pressure up front from 275 to 195 to compensate for the soft rear suspension, so it eats up the travel kinda fast in the turns. CG is also pretty high --especially considering this was once a 3203 base. I used to have 2 wheels up in air a lot. if i were to put the turf tires on it, it'd swap ends on me real fast. it's more like a drift buggy with those. Despite the failure of nearly every part i bought in the one "package" deal i'm pretty pleased with the engine--thought it was really going to drop off a lot with the weight and brake drag. 13-40 in the trans with 13-31 drive to final --now i jsut need a place to ride, relegated to the flat-lands only, that's my daughter's little loop i was shredding to bits.
|
|
#449
07-02-2012, 01:01 AM
|
||||
|
||||
|
another vid ... mounted the gopro on its nose and took it into a field across the road. trying to get it up to full speed, didn't quite get there but close. the lower section is floodplain drainage with a narrow and steep little washout gully across it. with hte drum brakes, i still didn't have enough room. they need new shoes. also keeps stalling after coming down to idle/stopping from speed, so i have to blip the throttle to keep it running. I haven't touched a thing on the carb since i got it, thinking maybe the idle circuit needs adjusted or cleaned.
http://www.youtube.com/watch?v=EJ2am...ature=youtu.be
|
|
#451
07-02-2012, 11:20 AM
|
||||
|
||||
|
Quote:

__________________
kliff
|
|
#452
07-02-2012, 01:00 PM
|
||||
|
||||
|
Quote:
Garmin (first version of e-trex gps) showed 29.5 as top speed, i think that's a bit slower than it really is. seat of the pants says 35+ a couple. Kliff: "I wanna come play!" You and anyone else are welcome to visit any time, only issue is there's nowhere to ride up here, you guys have all the goods! I checked with the farmer whose fields run right next to this one, (where i go up on the road and turn around) the one i'm riding in is not theirs, security at Dixie doesn't know if they own it but said "do whatever you want there" lol. A developer i know of may be the owner, which would be a downer, because i'm not the type to blatantly trespass repeatedly as tempting as it is to poach rides. I don't want the knock on the door to find a lawyer on the other side. around here, liability issues have everyone locking down their land tight, including my own little woods trail--that's now off limits thanks to the ins. co. I'm doing some deed searching on the field. if it's dixie's, then i've got a place to stretch its legs so to speak. can't get near that speed in my yard. found a couple pay-to-play places kind of nearby, but i don't have a trailer yet. Last edited by x-bird; 07-02-2012 at 01:17 PM.
|
|
#453
07-02-2012, 01:34 PM
|
||||
|
||||
|
Well, I guess a trailer is next your your to do list!
__________________
T.J. Yerfdog Spiderbox, Uni Type air filter with 6" intake, 130 jet, Orange no-rev limit cdi, Red coil, iridium plug, 1500rpm clutch springs, 1500rpm contra spring, 13g sliders, 22" rears, 21" fronts, aftermarket reverse installed, and Trailtech Vapor.
|
|
#454
07-02-2012, 03:09 PM
|
||||
|
||||
|
been working on it for months. trying to get as close to free as i can. found a free pop up camper in the local classifieds magazine, left a message, no reply. probably picked up by the scrappers already. also hitting local storage places, as most of them have flatbed trailers being stored that have been sitting for years.
|
|
#455
07-02-2012, 03:45 PM
|
||||
|
||||
|
I got a Pop up camper that was already stripped down, it also had a spare tire, it was a 6.6 x 10ft. I got it for $150 at a scrap yard, it was listed on craigslist, all I had to do was add a floor, a little paint, and some anchors and it was done. I got it registered as a home built so I could get a title for it cost about 30 bucks and I was rolling. I can fit two 150 size buggies on it in a T configuration.
__________________
T.J. Yerfdog Spiderbox, Uni Type air filter with 6" intake, 130 jet, Orange no-rev limit cdi, Red coil, iridium plug, 1500rpm clutch springs, 1500rpm contra spring, 13g sliders, 22" rears, 21" fronts, aftermarket reverse installed, and Trailtech Vapor.
|
|
#456
07-02-2012, 10:59 PM
|
||||
|
||||
|
getting pretty close to being fully sorted out. going to have to switch from a "pulley" type chain idler to a sprocket. The side plates of the chain have cut through nylon bearings, steel sleeve with a bronze bearing inner, bronze bearing outer with a rubber bushing/steel sleeve inner and the shoulder bolt. even though they all had good free rotation, they only last about 10-15 minutes. NBD, just a little surprising how fast its chewing through this stuff.
|
|
#457
07-23-2012, 06:04 PM
|
||||
|
||||
|
finally back up and running again. put a "new" seat in (read ancient fiberglass M&M racing seat in rough shape). forgot how much "fun" it is to scratch build and fit a seat and support frame. 5 point harnesses are in. Idler sprocket was put in last week, broke the master yesterday. found i was way off alignment wise, so i fixed that. Still have an issue though, the drive and main sprockets are off by about a quarter inch with no way to adjust unless i shift the engine over. Not too much of a problem until i get to the rear tensioner.
New seat is up higher than the last one--may change my rear shock position to soften it and cut my height back there. lowered the front suspension/clearance by about 1.5 inches and it felt much better than my first runs with it. also reclined the bucket more. It's sweet having a set of 5 points locking me in tight! pics tomorrow, gotta go to work ...
|
|
#458
07-24-2012, 09:06 AM
|
||||
|
||||
|
pictures ....
seat install (chopped sentra seat frame, golf club display rack parts and yerf bench sliders) Took a couple fit and alter sessions to get it where i wanted. I had to go higher than the Sunl seat to clear the brake and gas cables. Amazing how much you can feel a little height change in relation to C/G. one of the old idlers--pulley style--what's left of it that is ... new idler sprocket ... air filter stabilizer mount (golf club display rack part) and a little thing that wanted to rearrange my face that i snagged out of mid-air in a corner--hurt the hand a bit, but it could've been much worse! Just a "subtle" reminder that i need to move my front fenders outwards since i added the 2" wheel spacers
|
|
#459
07-24-2012, 10:42 AM
|
||||
|
||||
|
Looks good, what was wrong with the original seat you had in there?
__________________
T.J. Yerfdog Spiderbox, Uni Type air filter with 6" intake, 130 jet, Orange no-rev limit cdi, Red coil, iridium plug, 1500rpm clutch springs, 1500rpm contra spring, 13g sliders, 22" rears, 21" fronts, aftermarket reverse installed, and Trailtech Vapor.
|
|
#460
07-24-2012, 04:04 PM
|
||||
|
||||
|
Sunl seat was too wide, padding was shot. i kept sliding around and ending up on the side bolsters with my pelvis slamming on the metal tube frame inside the seat. last time i felt that pain was running an ACR viper at pocono runnign the banking at top end did the same thing to me--i'd swear i was in the same seat. A couple times some big hits with this thing left me in pain for several days. I'm also trying to get the Sunl back together at some point, so this returns its seat--next item to swap back is the reverse lever.
|
|
#461
07-28-2012, 06:34 PM
|
||||
|
||||
|
some more final detail work.
Rear suspension action has been trial and error settings and spring changes with the previous shock mounts, so I relocated the upper mount using the old a-arm lower mounts. The lower mount is on the other side of the angle iron just above the red spring. The new mounts dropped the center 2/3rds of the floor down about 1.5 inches. I set it so there was still a slight angle to the swingarm unloaded. When thinking about doing this i also realized the swingarm angle was also part of my stalling issue. When i stopped riding for an inspection the other day, shaking the rear of the buggy at idle made it sputter. pressing down on the suspension smoothed it out, so the float level was maxed in relation to the swingarm angle. A quick test ride revealed that the carb cleaning along with the height/angle change has finally resolved that issue. The rear shocks i'm still futzing with, with 120 lb/in. (approx) springs, it sags a little more than i like. They soak up the hits, but i'm afraid bigger hits will max out my travel, which ash been reduced. The "bump stop" for the rear is the upper swingarm frame tubes hitting the ends of the lower center vertical tubes of the rack. I may put rubber caps on those. With the kawasaki's springs that are around 150/175 lb/in. they're too stiff for the rebound damping to deal with. I'm thinking of sticking with the softer springs and maybe upping the air pressure and changing the shim stack. I got these "rebuilt" off e-bay, but i'm not to sure how well they were done. Rigged up the CVT "cooling" feed. Surprisingly, this has some decent suction on it when it's going. a piece of prefilter is under some window screen. My cvt side cover is all one piece with a volute/scroll integral to it, i'm a bit hesitant to bore a big hole in it next to the clutch. I think It gets more heat from the exhaust than it should though, may move the pipe up above and on an upward angle. Think it's time to pull the swingarm and paint her up ....
|
|
#462
07-30-2012, 06:15 AM
|
||||
|
||||
|
The field i've been riding in lately is flood plain drainage, lots of t-storms this week, so i got a surprise bath going through the ditch yesterday. Decided to do some vid of mudding it up but sadly the camera angle (helmet mount) shows a lovely view of the roll cage front top bars .... may try again later today on break.
Finally discovered my "clanging" rear end culprit. the bottom rack stubs are hitting the top of the swingarm frame, hit hard enough yesterday to leave some marks on it. I'm now pretty sure both sets of springs i have are too soft. frame contacts before the shock bottoms out. the kawasaki springs might be passable, i need to open up the shocks and try putting more pressure in them to see what happens. As it stands with them, i get pogo stick spring return with continued choppy bouncing for several cycles after the initial bump impact. i think they need more air pressure and the rebound damping slowed big time. only problem i have with that at the moment is the shocks have the ball/needle type gas/air inlet and not schraeder valves. gave her a bath and now i have one really rusty swingarm! good excuse for teardown and paint.
|
|
#464
07-30-2012, 01:48 PM
|
||||
|
||||
|
I have one of the old fox rebuild manuals that has the shim stack charts. it definitely need both rebound and compression adjustment. Don't want to break into them until i get some schrader valves, extra shims and some new seal kits--i may also add remote canisters to them as it gets pretty hot around the engine.
|
|
#465
07-30-2012, 03:19 PM
|
||||
|
||||
|
That's one of the plus's of rebuildable shocks. I don't know about FOX but I called WORKS on some used shocks a customer brought me for his buggy and needed rebuild. I called WORKS and they told me exactly what I needed to redo the shocks for his buggy.
|
|
#466
08-05-2012, 04:29 PM
|
||||
|
||||
|
Time for rear frame clearance work
First order of the day was to rebuild the exhaust system to make room for the new lower shock mount locations. The old polaris "donated" a front frame section as that was the only pipe that i could find that matched well to whatever exhaust this is (I'm thinking stock carter). After futzing around trying to open up the pipe diameter to make it slip in for clamping/sealing, I said to heck with it and went the fully welded route. End result is a lighter system, got rid of the thick spacer that the "bell" type pipe/clamp locked around--always leaked anyway. Also got rid of the stock muffler hangar setup and used a spare firebird rear swaybar mount --cut that in half and welded in a bolt. Urethane exhaust hangar damper is again from the firebird stockpile. Fired it up , has a deeper "throatier" tone that makes me think i picked up a bit of bottom end, eliminated a couple restrictions and overall, the pipe opens up about 1/8th to 1/4 ID bigger from the stock diameter at the first weld. Part of the issue is the lower rack frame hitting the swingarm upper tubes, so since they were serving no real purpose, i took the sawzall to them. buh bye ... the electrical items arre getting a bit pinched, so that whole mess needs cleaned up and relocated to the upper rack level--fuel petcock also comes real close to the swingarm, so the tank will get raised about an inch. Still have to add a 3/16ths thick corner gussets to the swingarm and weld the new mounts on those. that should hopefully wrap up the rear end of this thing. corner gussets are in thanks to a quick notch session on the spring shackle plates from the Ez-go rear axle mounts. Just gotta cut and drill some shock mounts. they'll be about the same location as the originals, just slightly inboard to clear the roll cage support tubing. Last edited by x-bird; 08-05-2012 at 08:39 PM.
|
|
#467
08-07-2012, 10:06 AM
|
||||
|
||||
|
Still have frame to frame contact before the shock reaches full travel, so i've been cutting this morning. What i found is the entire rack system interferes, so it's been pretty much eliminated. One thing i neglected to check was the height of the rack in relation to a spiderbox style swingarm--from what i'm seeing, those sit up much higher than what i have. also found a spot on one tube where the top of the carb (diaphragm cover) hit the first crossbar. So it's all gone! Have to make up some new rear mounts for the fuel tank.
Another short little test run clip vid. Opened up another ditch crossing. Really miss my rocky woods loop--i have to intentionally run into things for a little suspension action, though there's a set of ruts crossing the one side trail diagonally that gets really interesting when the front and rears track into different ones. http://youtu.be/Xx0cdF01qQs
|
|
#468
08-10-2012, 05:11 PM
|
||||
|
||||
|
Will this be page 6???? LOL
Some before and after of the latest chop session. It actually resulted in a net loss of weight--think that's a first. Yes, my tank hangar is a bit crooked--was a long day and i whipped that up in about 5 minutes. 5/16 plain round stock--actually was an old rope "holder" that you stick in the ground with a coil up top to run the rope through. A little before and after side view Tank hangar and former rack area ....still have to clean up the electrical ..... been on the list forever ..... Ridewise, the shock move worked out. went back to the stiffer kawasaki springs and am getting some kickback again. However, in addition to the 3-position clicker adjuster these shocks have snap ring grooves that set the height of the adjuster. I moved them up two notches on my last try with the polaris springs and left them there when swapping--it's a lot of preload. I figure i can drop them down 2 grooves and adjust up 1 notch and be good to go. Also dropping the tire pressure from 9 psi to 6 helped a lot. (still running a hair over recommended pressure, but the one tire's bad bead has me worried a bit) Last edited by x-bird; 08-10-2012 at 05:16 PM.
|
|
#469
08-17-2012, 08:38 PM
|
||||
|
||||
|
Doing a little riding today. all along the way the back end reacts in faster left turns has sort of bothered me. Feels like something's loose, or tire going down etc. doesn't do it going inthe same type of corner to the right--feels more solid. Kind of has had me on edge as it's the same feeling it had right before the axle sheared.
So i set up the camera on a couple different angles for some static drive-bys to see if there's anything i could spot going amiss. Initially, with the rear tires set at 6 psi, the right one did lose air, so i took them both up to ten and it held. Scratch air pressure off the list. http://youtu.be/dEa3c30GIZ4 everything is tight and holding up well back there. Only thing i can think of that's making it feel that way is the offset diff and the right side having a much shorter axle than the left. I think the right side tire really transfers the power pretty directly, thus breaking the rear tire loose more easily when that side is loaded. The left axle, which is about twice as long, I think is getting some torsional twist in it that's eating up some of the torque and it doesn't break loose going to the right anywhere near as easily. vid starts off with a few slower laps until i got it warmed up. it's a bunch of short clips from about 1/2 hour of riding. appreciate any insights .... BTW--that's some settling around my septic tank kickignhte back end up .... haven't softened up the rear shocks yet. Last edited by x-bird; 08-17-2012 at 08:40 PM.
|
|
#471
08-18-2012, 03:18 PM
|
||||
|
||||
|
The rear of the main frame is super stiff with the 2x2 1/4-wall box tube, 1/8th angle iron and 1/8th base plates I put back there. The only diagonal or side-to-side deflection is in the swingarm bushings, (the rear shocks actually have solid bushings in them) so it will kick up the inside wheel pretty easily--nothing really flexes. Most buggies won't do that because the rear main frame tube and base frame will flex on the diagonal upwards of an inch and a half and eat up most of the inclination to tricycle through a turn.
I'm pretty sure it just puts down the power better through the right tire because of the axle length despite the diff being welded into a locker. My front suspension (camber angle and toe setting) are just eyeballed and if there's a couple degrees of difference up there, that also may be giving it a better bite into the left handers up front and causing the rear to oversteer so easily. That or i've got the whole works racked, but I was pretty religious with my measurements and tolerances building it. My turf is also pretty soft (lots of T-storms lately) and combined with the long grass, I can pretty much kick the back end out at will. If I were to put the spiderbox turf back ont eh rear, that tread plus how short they are compared to the 22s would have me slip-sliding all the way around. Since i have so many golf cart rims I may re-mount them on a set for kicks and giggle runs .... hmmm, got a little time right now before the night shift .....
|
|
#472
08-27-2012, 11:54 AM
|
||||
|
||||
|
Pulled the swingarm off. right bushing is completely shot. Must have been "opening" up in the corners. So that answers that question. Now it's time to figure out what to replace the bushings with.
Also have to work on the swingarm frame. The bottoming out between the swingarm tubes and main frame pushed the top frame tubes to the left, pivoting the engine on an angle. Made my chain misalignment bad enough to cause the chain to break at the master when using reverse. Chop chop time again.
|
|
#473
08-28-2012, 05:17 PM
|
||||
|
||||
|
Ended up cutting the right side engine hangar and moving it to the left to get the sprockets back in alignment. engine was pretty crooked, it must have been progressively getting worse ...
While I have the swingarm off, I decided to go with heims instead of trying to make bushings. My buddy Frank is making up a pair of 1.5 diameter "bungs" to fit inside the box tubes and mount the 1/2 inch heims into. Overall it's going to extend the wheelbase about 2 inches. Once these are together I'll test he swingarm travel to find out if i need to cut anything else out of the way. That's the one thing i didn't test---figured (wrongly) that the shocks would bottom out first based on their total travel. Still need to grind the welds down to get the tube fully seated.
|
|
#474
08-30-2012, 06:15 AM
|
||||
|
||||
|
My "goodies" got delivered last night. Both extensions fitted. Had to trim back the corners of the swingarm pretty drastically. Because of that, the inside corners will get gusseted and the right engine support tube is going to get an added brace tube--just have to fit that with a tack and make sure I can get the engine in/out. I need to clean up the weld seam inside the box tube, then the "bungs" will extend out about 1/4 inch for a weld bead. They're 2 inches long, going to cut them in half to save some weight.
Last edited by x-bird; 08-30-2012 at 06:17 AM.
|
|
#475
09-03-2012, 06:56 AM
|
||||
|
||||
|
It's almost uncanny how these threads coincide with my own project. I'm focusing on the rear swing-arm as we speak. I built the outer bearing supports this weekend. I have considered this swing-arm heim pivot conversion for some time now but not quite got to the point where I got to make a final decision. I'm extremely anxious and got my fingers crossed this works out for you!
So far..Your Lookin Good!
|
|
#476
09-03-2012, 09:09 AM
|
||||
|
||||
|
This is a great thread for the loads of info it offers. It's not just the info of what to do but also the info on what not to do and why. If one pays close attention to these mods you will get so much more out of it, for it is not text book learning but real life experiance. How close are you with your project ckau? Think you'll be making the next Bash?
TOM
|
|
#477
09-03-2012, 02:01 PM
|
||||
|
||||
|
Especially "what not to do" LOL ... Important reminder.... always calculate your shock travel and swingarm travel before deciding to put it all together .... Along with the heim installations is round 3 of chopping and rebuilding the rear frame area to clear the swingarm at full travel. Pics should be coming soon.
|
|
#479
09-03-2012, 05:22 PM
|
||||
|
||||
|
Quote:
Yea, Tom the bash is on for this coming year. I've already given warning I'm not going to be around.
|
|
#480
09-03-2012, 06:05 PM
|
||||
|
||||
|
One tired camper ... more construction at work then destruction and re-struction at home ... now I know why it's called Labor Day ...
Just about got her, still have to install tank and brake cable mounts. Instead of relying on the box tubes to set the bungs, i trimmed them shorter and left the bungs at 2 inches. Used my 5 lb. deadblow to seat the box tubes then set the bungs in on the swingarm tubes so they were sitting square. tacked in the bungs, knocked the tubes off and welded the bungs in from both sides being very careful not to leave a bead taller than the base of the bung inside. With it all set in place 20-1/8th inches dead on from the center of the heim bolt to the leading edge of the axles on both sides. didn't even need to play with the heims, just ran them all the way in and locked them down. Nice stack of washers, eh? I may lay a weld across them all-- real PITA putting those in. Absolute ZERO "wiggle", really smooth travel. Overall it's nearly 3 inches more wheelbase. Now that was easy, the real fun was the change in the area the swingarm travels into with the extra length. The tubes i just cut and welded in about 2 weeks ago had to get move even more outboard--that had to happen no matter what as it was racking the swingarm frame on contact. (My mystery "bang" i've been hearing forever) The next item in the way was the main cross tube. The carb intake neck landed right on it with about an inch and a half of shock travel left to go. Rather than worry about symmetry too much, i just put another diagonal in the rear frame, (been meaning to do that since I built it) chopped the cross bar and tied the corners of the shock frame area into that. I call it the drunken spiderweb. Jacked up to full travel--- at this point the top of the side cover of the engine makes contact with those same tubes i've moved twice. However, the shock mount distance is now 1/2 inch shorter than full compression, so i've finally got it in a safe range. max rear wheel travel is about 8.5 inches.
|
|
#481
09-03-2012, 06:59 PM
|
||||
|
||||
|
Whenever I have to space with washers like you have, once I determine how many I need in a stack I wrap them with electrical tape. This will hold them together like a bushing. Makes for easy install for you don't have washers dropping to the floor and rolling out of reach, one of the many reasons for cussing.
|
|
#482
09-04-2012, 09:24 PM
|
||||
|
||||
|
Got the fuel tank re-mounted. Ping putter display rack was the sacrificial golf shop victim this time ...
Brakes as usual were tedious, had to move the cable stops on the swingarm because of the wheelbase change. and make new clevises to attach to the actuating levers. i've really pushed the length of the polaris cables to the limit. Need to go to a single long cable with a basic saddle type balancer and run the bare cables over a couple small pulley on either side to get them to pull the lever smoothly. Took it for a quick spin, rather numerous quick repeated spins since it was pouring out. the old turf tires a pretty fun for that. Hopefully i can get some time in it tomorrow to really test the travel.
|
|
#483
09-05-2012, 07:52 AM
|
||||
|
||||
|
Just gave it a little test run. Long wet grass and turf tires made it a bit tricky to get turned and straightened up into the little bump with any speed. 30 second vid of the landings.
Rattles on landings are the electrical items and air filter. that stuff's just zip tied for the moment.. For ckau's interest, with the heims, you can feel/hear every little engine vibe through the entire chassis, NVH definitely jumps exponentially. If anything's loose or amiss back there, you'll know it! Overall really major improvement between eliminating the worn bushings and getting full travel. A new seat cover with some good padding in it is on the christmas wish list. the one i have is ancient with dead padding. reg speed http://youtu.be/PmuaXepa7fk Last edited by x-bird; 09-05-2012 at 07:56 AM.
|
|
#484
10-15-2012, 10:56 PM
|
||||
|
||||
|
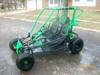
Picked up my axle housing last week and finally treated it to some paint .... had to go "low rider pimp" on it
 Primed and painted the swingarm, cleaned and inspected the engine and put it back together yesterday in a marathon session. Pulled another golf cart rim out of the pile and tubed the bad rear tire and i was one camper ....for all of 5 minutes .... tore the valve stem out of the tube. Primed and painted the swingarm, cleaned and inspected the engine and put it back together yesterday in a marathon session. Pulled another golf cart rim out of the pile and tubed the bad rear tire and i was one camper ....for all of 5 minutes .... tore the valve stem out of the tube. So i swapped to yet another golf cart rim from off the pile (had to cut the stem out of the first for the tube) mounted the tire ..... anndd then ... it doesn't hold air any longer. bead is completely shot.  painful to see a really nice new tire relegated to the pile. trying to find a replacement this week. painful to see a really nice new tire relegated to the pile. trying to find a replacement this week.
|
|
#485
11-12-2012, 09:59 PM
|
||||
|
||||
|
Ended up buying a new tire a few weeks back, the rubicons are pretty scarce, don't think they're in production any longer.
Haven't had too much time to ride lately, took it out after work today and managed to get a video done of all the little ins and outs of my back lot "test" area. Something always broke before i could go all the way around or i didn't have the camera on. I "added" a new part to it -- sort of a hole with a rock wall to get over. Most of the ride has been seen in my other vids, (except the drive over the log and up the back hill where i broke the steering arm on another stump) just looks a lot different with most of the trees gone. I also flush cut my favorite steering arm eating stump--well one of them at least. lol one calamity today was a stall after riding on the golf course follwed by a strong smell of gas--fuel line popped off and since it's gravity fed was dumping out pretty fast, got lucky and nothing went "foomp!" At the end of the vid is the second time I've used the lights, these are Petersen manufacturing driving/fog lights for a truck, got them from my late father-in-law's garage ages ago, still brand new in the box. These are 565-2s, 55 watts, model is no longer made and probably date to the late 80s/early 90s. reflection off the shock reservoirs is tricking the gopro's meter into underexposing -- making it look darker than it really was. http://www.youtube.com/watch?v=rN-wDiE5iZI&feature=plcp
|
|
#486
02-03-2013, 10:11 AM
|
||||
|
||||
|
the never ending thread continues ...
Rear shocks are blown. After all teh work getting the golf cart rear end in and proven bulletproof it's time to rip it out and do something new IRS and MORE power!!! Got the quadrunner's 250 idling, needs some tuning work (valve, carb adjustment) but it does run and doesn't smoke I have a pair of roketa gk29 trailing arms coming my way. Should be a fairly straightforward IRS conversion. Mount the arms and a jackshaft in line with the arm pivots, mount the quad's engine/frame directly to the chassis and either extend the crankshaft (i've already found a correct size/spline adapter) or drive a jackshaft off the engine and put it to it. Once i determine the rear arm travel, it's getting something better than the polaris/fox shocks i presently have back there. i think my range of travel is going to nearly double. 
|
|
#487
02-03-2013, 07:14 PM
|
||||
|
||||
|
Quote:
It's Murphy's law! 
|
|
#493
02-05-2013, 06:13 AM
|
||||
|
||||
|
Quote:
As far as the conversion goes, this has been in my head for over a year now. I got my trailing arms last night--complete with hubs, axles, sprockets brakes and mounts. In total about 100 pounds of metal!! really fair price and all in excellent condition. toughest part is likely going to be making the shift (clutchless 5-speed on the fly) and choke linkages plus finding chains, rims, tires and shocks without breaking the bank. stay tuned. I may throw the sunl shocks on the back end for one last ride this week before i take it all apart and commence with the mayhem.
|
|
#495
02-05-2013, 02:45 PM
|
||||
|
||||
|
Good to hear you got that quad engine running finally.
|
|
#496
02-06-2013, 11:58 AM
|
||||
|
||||
|
That is one tough looking front end on that thing. That is some high quality work X.
__________________
MXR TrailBender 160R SYC Perf head P&P,Matched intake and exhaust, A12 cam, Orange CDI & coil, Motorio pulley, 115mm Variator and lightweight drive face,11gm Sliders, UNI, modded muffler + 200 horsepower  http://www.youtube.com/watch?v=3hx-hEWl10c I'll take your insults as compliments and blame it on your lack of intelligence.
|
|
#498
02-06-2013, 07:24 PM
|
||||
|
||||
|
Thanks guys, a lot of 1 step forward and 2 back on this build. I had a lot of time on my hands last winter that i don't this year. going to take a lot longer to do the IRS, i'll likely have it all laid out and get all the parts gathered before i unbolt or cut a thing on it. It seems that once you get into modding these things in terms of fabrication, they become a never ending project. I never even tapped into the engine side of things except for cvt rollers and springs. i was going to leave this be and build the sunl (it has 1.5 dia tubing) into a 250, but i have so much into this one that i couldn't bear the thought of it ending up sitting once i had a ride with more power.
|
|
#499
02-06-2013, 07:41 PM
|
||||
|
||||
|
Dangit!! Now you got me thinking of doing IRS too. Just too many benefits of IRS to keep saying no.
|
|
#500
02-09-2013, 08:42 AM
|
||||
|
||||
|
jinxed by murphy again. Wanted to swap the sunl rear shocks in to get a couple last rides before i start dismantling, but the seals in those are shot as well. I wonder how many guys ride around with blown shocks and just the springs acting as suspension??? ended up stripping them for their springs (I'm up to 3 different rate sets of springs now) and bump stops. Maybe i'll get the baja running (old gas in the carb) and ride that around. garage needs the buggy shuffle done anyway to set up for the conversion work.
|
 |
|
|


 Can't wait to see some vids