|
|
|
|||||||
| FrankenBuggy Tech Unconventional and Home Built Buggy Tech Forum |

 |
|
|
Thread Tools |
|
#1
 11-20-2011, 11:23 PM
|
|||
|
|||
|
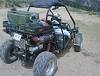
Here is a link to pictures of my attempt to squeeze a SRV540 Yamaha engine into a Honda FL250 frame. I cut the frame and extended it 13", for the exhaust and jack shaft to have some room. I'm going to make it a articulated shock support rear end. I'm using the Honda axel and lower half of the trans as a bearing hanger. Took out the gears and chain then cut the top off the trans and made a cover. Damn it worked! I'm trying to mount the jackshaft now. I had the Yamaha clutches so I bought an SRV 540 axel for the splines, then shortened it to fit in front of the motor. The motor mount is two Parallel rails holding a motor plate that can slide on the rails for adjustments. I'm in the process of mounting the jackshaft. I picked up more steel today, still debating on putting the jackshaft mount on the front or rear of the engine. Front looks better and adds more weight to the front of the engine, but the back has a shorter chain distance. Crap shoot , I'll figure that out tomorrow.
Enjoy the pictures, and comments are welcome. Any suggestion is a great idea, if I use it or not. It will at least keep me on my toes. I'm going on 70, so I know I will forget something. Enjoy RDomke@Comcast.Net https://picasaweb.google.com/1074392...eat=directlink 
|
|
#2
11-21-2011, 12:57 PM
|
||||
|
||||
|
Are you building this for YOU? Ambitious for a 70 year old
 You know the farther you move the engine back the easier the lighter the front get's!!!! Honda really did a remarkable job cramming their engine in such a tight space, it makes it a real challenge to put a larger engine in. So are you going to put a sprocket on the old gearbox going to the jackshaft now? or mount a sprocket on the axle? You know the farther you move the engine back the easier the lighter the front get's!!!! Honda really did a remarkable job cramming their engine in such a tight space, it makes it a real challenge to put a larger engine in. So are you going to put a sprocket on the old gearbox going to the jackshaft now? or mount a sprocket on the axle?Not to steer away from this project- but what type of scooter is that?
|
|
#3
11-21-2011, 01:29 PM
|
||||
|
||||
|
I now consider myself familiar with shoe horning this motor inside things. I am however in every since of the words,"Non-Expert" I will be around if you need any idea's. Studman, well he's the Stud and if he can't fix it, then it ain't broke!
I think you are better equiped to handle the challeges ahead, keep us posted! I like reading about other peoples projects a lot. Link to the service manual, incase you do not have it. http://www.mediafire.com/?jtfk5ddnaq2ndcw
__________________
2012 Polaris RZR570 stock!
|
|
#4
11-21-2011, 10:45 PM
|
|||
|
|||
|
Yes,its for me and the kids (26-48yrs old 6 of them-I didn't always build go karts) :-)
The trans is just a bearing hanger now, am going to add a split bushing and sprocket to the axle soon as I figure out what I need. Right now the jackshaft mount is just kick'n my butt. I have both Yamaha driver and driven clutches, how do I figure belt size if I move them out of spec? Once I find the right position for the shaft I can get a couple of gears and a chain (#40 or #50) not sure yet, then zoom zoom. (watched "Bolt" with the grandkids last Thursday) The Scooter is a 1953 SEARS 811.40. Its 85-90% original. I run it every so often to go get the mail. The grand kids like standing on the floorboard and steering and operating the throttle while we run around our back yard. In the picture right background you can see two of the smaller karts I have, whats not shown is a MANCO INTRUDER that I had outside the fence. If the FL250 ever gets done and runs, I'll be a happy camper. If it does not I guess I'll just have to keep pounding away at it till one of us gives up. Having a great time working on for sure. Back to the Jackshaft tomorrow------------ Thanks RDomke@Comcast.Net
|
|
#5
11-21-2011, 10:48 PM
|
|||
|
|||
|
|
|
#6
11-22-2011, 12:33 PM
|
||||
|
||||
|
The delima your having is easy to solve! You'll need to be able to adjust both engine to jackshaft and jackshaft to axle. I use a basic slot 3/8" x 2"-2-1/2" long for both. That length allows for 3 chain lengths in #520/530. It appears the motor would move towards the rear and the jackshaft would move towards the cockpit- so find where you'd like it to be based off your belt. Mark the frame rails for the pillow bearings (jackshaft) and where the engine plate would be bolted to. Movement of the parts are away from each other. I'm assuming you have a stock belt? If you don't I can give you a link to the cheapest belts I could find.
Any of this making sense?
|
|
#7
11-22-2011, 01:20 PM
|
|||
|
|||
|
I think I do understand, and do need your belt link.
My engine plate does sit on two rails for sliding adjustment. I have four bolts that penetrate down thru the engine plate and pull up two cross bars that grab the engine rails bottoms. At the rear is a long ½” bolt for adjustment. Just working out were the jackshaft can be installed with the hardware I have ( to cheap to buy new clutches). Placing the jackshaft up front is best I'm sure, I was hoping to shorten chain length. I can always install tension idlers if I need to. Can I go out of spec and install a longer belt? If I can, it may be easier to install the jackshaft. I will have no trouble setting the alignment of the clutches, I made a tool for that. The distance between pulleys is my concern now. Keeping it Yamahas 10.63 is hard with the space available. Thank you and please send the belt info. RDomke@Comcast.Net
|
|
#8
11-22-2011, 02:35 PM
|
||||
|
||||
|
You have all the parts- no need for another clutch unless the driven takes a wider or narrower belt- there's ways around that too! Here's the link for a belt:
http://www.parts-unlimited.com/home/...436E51F4A22087 (they sell them by measurements.) Your motor/clutch/driven don't care how long or short the belt is!!You'll need to do a little searching to see what the longest/shortest belt with the right width you can get to know what your limitations are. I much rather have direct adjustment in my chain vs. a chain tensioner(another maintenance item). The diameter of your axle sprocket needs to be known-(likely 50t-60t) that tells you where the jackshaft position is for the shortest chain length. Chain tensioners need space!! so if it's a really short chain-NO tensioner.The shorter the chain the more accurate the alignment of sprockets too. This should help get you thinking about what & where to go next!!! How long are the threads on the engine adjuster bolt?That's your limit of adjustment.
|
|
#9
11-22-2011, 02:46 PM
|
||||
|
||||
|
Just for info's sake- you'll need to mount your disk brake that came off the gearbox back on the jackshaft too- the emergency brake doesn't acually have shoes with brake material.
|
|
#10
11-22-2011, 05:39 PM
|
|||
|
|||
|
Thank you Metalstudman1, with your input I was able to go out this afternoon and make the mounting for my jackshaft. It still needs the adjustment slots but I'm closer now. I'll try and place two pictures at the end of this message. Once you discribed the set up, DAH! What was I finding so hard? I can chalk it up to age, I'm not the sharpest tack in the box anymore. (If I ever was) :-)
Now I must find bushings and sprockets to fit axle/jackshaft/disk brake. The brake was a good thought, I'll be sure to install one. I will use the belt web site info for sure. Now I'm going to try and include 2 pictures. You'll see I just extended the rails and will put lateral support in later. It was like an epiphany when I read you post,, so easy. RDomke@Comcast.Net
|
|
#11
11-22-2011, 06:19 PM
|
||||
|
||||
|
Where are the bushings going? Also the brake can go on the axle or jackshaft whichever provides for the best space. Making a sprocket/brake disk holder/carrier is pretty easy too!!!find a piece of (thick-1/4"-5/16") pipe that has a tight fit for your jackshaft/axle,or something similar for your mounting hub.You'll need to put atleast 2 set screws in it if you have a tap or drill holes (2) and weld a nut over the hole for a set bolt.Next you'll need a piece of plate steel same thickness as pipe or thicker, get hole saws the size of the O.D. of your pipe and 1 about 4"-5-1/2"(big enough for the bolt pattern on sprocket/disk rotor) for your mounting plate. First drill the large hole- if you don't have a drill press use the hole saw basically as a scribe and cut the balance with a grinder(ain't gotta be perfect)-the pilot bit gives you your true center for marking/drilling the bolt pattern of the sprocket/disk rotor. After getting those holes drilled then you can drill the pipe diameter hole.Your pipe/hub can be as wide as you want it, weld the pipe to the round plate,tack it- spin it and check for alignment. Sorry if this info. was already part of your game plan!!!
|
|
#12
11-22-2011, 10:51 PM
|
|||
|
|||
|
The bushings----------
The ends of both the axle and jackshaft are bigger than the center of that shaft. A bushing for a Sprocket is in three pieces, two tapered halves that fit on the shaft with 2 bolt holes thru a flange on each piece, one sprocket mounting piece with a large center hole to install over the larger shaft ends. The two wedge pieces sit on the shaft (any size shaft) the sprocket mounting piece slides over the wedge pieces, bolts are inserted into the wedges and thru the sprocket mount then tightened, drawing the wedges into the sprocket and tighten onto the shaft simultaneously. . BUT, with your idea, I could just split the pipe then make an axle clamp add the gear and brake flanges and save myself a bunch of money.(my wife gives me a little now and then) Damn your good, did not see it till I read it. I may wind up buying the correct pieces, but I'm going to try and build my own first. Won't get to it untill everyone leaves this week end, I'm excited. Will be chafeing at the bit untill I can get to it again. Thanks again FOR YOUR VAST KNOWLEDGE :-)
|
|
#13
11-22-2011, 11:04 PM
|
||||
|
||||
|
I like the wedge bushings, I didn't pay attention to the large ends and narrow center on your shafts.Don't chafe too much- You may need the "hold your mouth just right" muscles for getting lucky making parts!!!! I'm excited for you too!!!!You have a few days to solidify a game plan.
We all know you've just forgotten what I'm suggesting anyways!
|
|
#14
12-17-2011, 05:46 PM
|
|||
|
|||
|
Thanksgiving , and been sick. Just got back outside to play.
I did pick up a Polaris ATV rear end with gears and brake parts. Got them set up on there shafts but not tied down yet. Still doing alignment and have to make a shim to make the jackshaft gear stand square. But I’m working on it. The belt and shocks I ordered are here so I just have to shoe horn it all together. Then mount the cage, rear shocks and make brake fittings and throttle fittings. . Found a muffler (snow mobile mufflers are hard to find in the desert) but it looks like I will have to redesign it, seems to small. Here are a few pictures from today. The welding cart is an old BBQ frame and the engine frame mount is an old porch glider with wheels and lawn mower parts. Just thought I'd mention it, to cheap to throw stuff away. :-) Thats it for now,, have a good holiday season if I do not get online again for awhile. P.S. If anyone has a old muffler lying around that might fit a 540 please get in touch. psps Forgot,, did make my own tie rods. Damn I'm cheap! :-)
|
|
#15
12-17-2011, 07:43 PM
|
||||
|
||||
|
Happy Holidays for you & your family. Hope your health stays good. I know you love your welder-I have a Passport too and it's SMOOTH!!!!! You're gonna have to do better on the "TOO CHEAP" part!!!! Do they have Mini/Micro sprint car (250cc) races in your area? Cheap place to pick-up a 2-stroke expansion chamber if your's won't work.Did you pick-up the rear foot brake master cylinder & lever from the Polaris? Your caliper has a dual line for adding an emergency brake if you wanted to get rid of the stock FL250 drum.
|
|
#16
01-17-2012, 07:06 PM
|
|||
|
|||
|
One month to the day, I'm getting there.
Drive shaft is in and square, with sprocket and brake disk.(from the Polaris) The flanges are not welded to the shaft yet, but when they are I will beable to change sprockets and disks by using the mounting bolts. Using the Polaris flanges (they were to big for the FL250 shaft) I inserted a section of fence pipe I had that fit both the FL250 (drive shaft) and Polaris flange hole for a very snug fit. I kept telling my wife that pile was all good stuff. Jackshaft is in with pully and belt (adjusted) and square. Must run the chain for alignment, then weld drive gear (from Polaris) to jack shaft from FL250. Exhaust IS to small, I know. Going to cut off the outlet then cut or add pipe till I get a good exhaust flow. Its trial and error but should work. I asked all my relatives up north and not a one answered, going to hound them now. Someone there must have an exhaust in their corner somewhere. Will not get back to it before the week end, but I'm getting there. LOVE THIS STUFF :-)
|
|
#17
01-17-2012, 08:29 PM
|
||||
|
||||
|
Nice job so far. Why do you think the exhaust is too small? the expansion chamber looks to be designed for all bottom end torque, that's huge chamber. It does look like you're making good progress on the tough/critical stuff. BTW-from one old fart to another- Can we get the nomenclature correct here?!!! you have a jack shaft and an axle in buggy/karting language- If you were to try and order a drive shaft for a FL250 they'd roll their eyes at you!!!! Remind your wife that every piece of scrap has a potential use and you're trying to do your part when it comes to recycling & keeping the cost down!!! Can't wait for more.
|
|
#18
01-27-2012, 01:28 PM
|
|||
|
|||
|
Engine, Clutches, Jackshaft, Gears Chain-(still on stand) runs like all get out :-)
Carburator leaks like a sieve out of overflow pipes. :-( Must make a carb stand on bench and fix float and needle valve, darn. Getting closer, and loving it. :-)
|
|
#19
01-30-2012, 06:52 PM
|
|||
|
|||
|
Took your advice, installed a cross brace mounted the Polaris hydraulic brake , but did keep the FL250 hand brake. ( In case my main brake install is not reliable.)
Tomorrow I will center the brake disk flange and weld it to the shaft. I will have to tack, tack, then check for wobble and concentric alienment adjust as necessary and finish weld. To get the engine and mounting plate off in one piece (because its all aliened) I had to comealong it to the cross bar in my cage roof then let it down to a rolling table. Darn thing with clutch and plate got heavy. I'm looking forward to getting it together on the ground, and building the cage and spring supports. Enjoy
|
|
#20
01-30-2012, 07:06 PM
|
||||
|
||||
|
Looking good
|
|
#21
01-31-2012, 05:50 PM
|
|||
|
|||
|
I had cut the frame added several inches, built the motor mount frame, reattached the axel. Installed and welded the gear and brake flanges now I’m putting it together to add the shocks. The frame is ½” longer on the left side of the picture. Did not see it before, I thought I had it square. I can even remember adding a shim to adjust it out on that side. I know what I’m doing this week end. Frame hinge, then shock supports.
It rolls great, two fingers to move it around. (Surprised me) With the engine installed and chain hooked up it should do ok too. The cage is not that heavy but seems stout. There is a picture of my other karts for size comparison. Homemade, Manco (from my company when I retired), and the SRV/ Honda. With the extra length it sort of look like a drag rail. I may have to install a reverse, I’m just kicking it around right now. No matter how it goes, runs or not- I'm enjoying the build.
|
|
#22
01-31-2012, 07:49 PM
|
||||
|
||||
|
Your two fingers will be all ten when you add the belt drive & chain drives!!!!The belt will slip, but amazing how much it drags when pushing it around. It is long but if that's what it takes-so be it. Just remember that length when turning hard!!!!It should ride really nice.It's getting closer!!!!!!
Is the Siver Fox running? That's a good canidate for a sled engine too!or my choice Honda TRX200SX engine.
|
|
#23
02-06-2012, 08:39 PM
|
|||
|
|||
|
Here we go again. Yes every thing I have seems to run. Sears 1953 scooter, Sears garden tractor, three go karts and the SRV540 runs like heck but has not gone any were yet.
I had to remove the Polaris brake cylinder and mount the FL250 mechanical system. I did not have enough parts to install the hydraulic system. Soon as I can get to the recycle yard I’ll get more parts for the install. I have started to rebuild the cage. I have it cut down to front mount, overhead rails, and rear seat section. I’m cleaning the old welds, and finding the places that need new metal or reinforcement. The articulated frame now has springs. The spring mounts are welded but my swivel bolts are to long right now. I got my old fat butt up on the frame center section and jumped several times, and it recovered with no hitch or drag. Rolling it around I found that the tie rods hit the wheel rims before they get to the stop point. I will need every bit of turn I can get in those tires to make a decent turn radius. I guess I’ll work on that tomorrow. Got a voltage regulator in today, something else to play with. Found a muffler on auction at EBay for $5.00, shipping was $20.00 but still think I got a good deal, should be here by Friday 10th. This thing may run this month---------------we’ll see. Hope you all enjoy this, I KNOW I DO! 
|
|
#24
02-06-2012, 10:41 PM
|
||||
|
||||
|
Hell-of-a-deal on the muffler!!!! So nice to hear you're enjoying your build as much as I am!!!!
|
|
#26
02-11-2012, 12:47 AM
|
|||
|
|||
|
It stands on its own, and does take two hands (you were right metalstudman1) to push it around.
Toe in seems wrong, FL250 brake does not want to adjust correctly (may have to purchase more Polaris parts for hyd brakes), and working on roll cage. Still need seat, harness, fuel tank, oil tank and make a primer lever for the carb. Oh yes, and wiring, may be next month for a test run. Weather has been great so its a joy to get out and work on it. Hope you all are having fun with your projects. I scan thru every now and then to see whats happening. Till next time----------------
|
|
#27
03-14-2012, 09:32 AM
|
|||
|
|||
|
Here we are again,,
First the kart is articulated, I can take it apart and work on front or back as separate pieces. It also seems to ride smoother too. With the extra 13” I add to the frame, the motor is set lower for better turn stabilization. The motor is mounted on a plate that is held in position by four bolts. Removing the bolts, belt and throttle, gas line and electrical wires I can then remove unit for bench repair. With the motor removed I now have complete access to jackshaft, axel, brakes or chain. Using the Polaris brake cylinder (as suggested above). Have a Suzuki master cylinder for main brake and a Honda master cylinder for emergency brake (all from a bone yard) alongside the original FL250 mechanical brake. Emergency brake is great, but the main finger brake is poop! Still working on the right adjustment for proper operation. Added a roll cage 1 ¼´ x .120 round tube. The old cage was to bent or the wrong material to be safe. The whole install was like a Manco with bolts for easy disassemble for repair. It did increase top weight. From the few drives I have tried the kart seems stable on turns. The steering still has toe in on the right and must fix the brakes. Screams like a banshee, my wife says I must quiet it down. I picked up a Kawasaki 600cc muffler to try and tone it down. It has a large flow thru so should not affect the back pressure to the expansion chamber. Fingers crossed on that, do not need to burn up the engine. Here are a few picture of the cage going to gether. All the build picture are at-------------------- https://plus.google.com/photos/10743...03637526144481 Enjoy Robert :-)
|
|
#28
03-14-2012, 03:20 PM
|
||||
|
||||
|
Looks like a machine!!! You can't talk the wife into shooting a pic of you in the oddy? I doubt you cab roll it over with those tires-man that's some rubber!!
|
|
#29
05-01-2012, 05:53 PM
|
|||
|
|||
|
Hope you are all doing well on your projects
I have not forgotten this machine. Just been busy enough to only look at it and tinker now and then. PLUS the brakes are kick'n my butt. I just can not seem to apply enough force with the finger lever (and I want to.) I thought of repositioning the master cylinder closer to negate the effect of long cable travel. I would rather leave it in the engine compartment. I know the master works good, with a lever I can stop the wheels with no problem. With the finger lever only it just slows down a bit. There is a correct applied force solution, I just have not had the insight to find it yet.(with available parts) I still must extend the roll cage over the engine and find a suitable fuel tank. The way it looks right now if it flipped to its side with most of the weight below chest level it would right it self. I'll finish the roll cage then get my kids here and we will all git on one side and flip it to see if it will come up right. Oh yes and make a secure mount for the seat harness, and a better seat. No matter what, it does scoot, I have not been able to use more then a third throttle in the back yard (1-1/3 acre), looking forward to getting it out of the fence line. Blonco wash is at my back fence line, like a sand highway for karts and ATV's. Till next time Love'n it- lots of fun RDomke@Comcast.Net Last edited by RDomke; 05-01-2012 at 06:00 PM.
|
|
#30
05-01-2012, 07:35 PM
|
||||
|
||||
|
Are you still using the FL250 brake? Have you tried to adjust it yet? There is a cogged ring inside that let's you tighten it down and the pads still won't make contact where there's very little swing in the lever. I had to adjust mine way out to reverse your issue when I hooked it up to a pedal instead of the tiny lever- I'd barely touch the pedal and the brakes were locked up!
|
|
#31
05-03-2012, 08:21 AM
|
|||
|
|||
|
No, am not using the OEM service brake. I took your advice and installed the Polaris brake and disk. Using a Honda master cylinder for service brake and a Kawasaki master cylinder for emergancy brake. I think the problem I am having is not enough cable travel to actuate the service brake. If I use a hand lever to apply pressure to the master cylinder the brakes lock up. I may have to go to a foot brake for more leverage, even a extension I put on the finger lever was not sufficient to lock the wheels.
Here are a few pictures of the system which is still a work in progress. Also a picture of my Kart jack made from a rototiller base, works good. :-) Enjoying the problems, they are making me think. :-) RDomke@Comcast.Net
|
|
#32
05-03-2012, 10:36 AM
|
||||
|
||||
|
I used the same aluminum turn buckle bodies for throttle and brake connectors on some of my other projects too!!!! I do know if that the way the cables route through the steering controls puts really hard bends in the cables, is there a possible kink?
|
|
#33
06-04-2012, 10:59 PM
|
|||
|
|||
|
Lights, tail, head with new wiring and switches. New seat arrived today. Installing steel floor under seat (just incase). Still need larger fuel tank, and BRAKES!!!!!!! Really kick'n my butt on them brakes. I could install foot brake but I just want to see if I can get that handle lever to respond better, its a quest now.
RDomke@Comcast.Net
|
|
#34
06-05-2012, 06:13 PM
|
|||
|
|||
|
A few pictures of the seat install. Do not have it bolted in place, just strap'd down. Jumped in, good forward position, bottom is rather thick causes you to sit high. May have to redesign that install and get it lower. With the lap belt and shoulder harness its a good snug fit for safety
Measured all the cable travel and finger travel today for the brakes. At the steering wheel the travel is .56in, at the master it comes out .06. I'm loosing it in the cable. This week end I will disassemble the cable (I never did) there may be a break in the core causing stretch. Hotter'n heck here, but I have a cooler in my work shop and do everything I can in there. RDomke@Comcast.Net
|
|
#35
06-05-2012, 06:39 PM
|
||||
|
||||
|
That's quite a leaned back seat!!! You look HOT in the pic's!!!! Hope you find the cable issue. Thanks for the update & weather report- I have to work in my shop due to the heat (I got a squirrel cage blowing)
|
|
| Thread Tools | |
|
|