|
|
|
|||||||
| FrankenBuggy Tech Unconventional and Home Built Buggy Tech Forum |

 |
|
|
Thread Tools |
|
#1
 08-06-2013, 01:02 PM
|
||||
|
||||
|
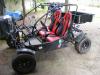
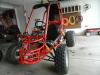
So now I am finally starting on my build, it will be slow going because the new semester is starting (I am an Instructor) and when you have a couple of acres, there’s always work to be done. The reason that I am choosing a different name is because I will be building it from three different vehicles. The three candidates are a Yerfdog for the driver’s tub. A Joyner Sand Spider 650 for the suspension and a Polaris Trail Boss for the engine and transmission.
When I went on the 2 hour drive to pick up the Joyner, my wife labeled it the heap. In truth it was a heap but one that I have ended up a winner on so the laugh is on her (she still calls it the heap). I didn’t want a buggy that big, if I did I would go VW based, but I knew that I couldn’t go wrong for the price. So far I have netted from EBay $700 to go into my build fund and I still have the transmission and other parts to list. So I digress, The Joyner has an A-Arm suspension front and rear with about 9” of travel on both ends. My plans are to graft this suspension to the Yerf main tub and then use the Polaris Trail Boss 250 engine and trans to power the beast  . . I have been doing work on the Joyner to get the suspension ready. My next step will be to take the engine and part of the frame from the Polaris and see how I will start to mate it. But first I need to take the Polaris to the DMV and get it licensed. That is about the only way I will be able to get this thing licensed in this LEFTY state of CA. Don’t tell Johnny Law. Here are some pictures of what I am starting with, just to whet your appetite. Don’t mind the Flintstone Poplar rear shocks  . .
__________________
2005 Hammerhead 150 170cc BBK, PnP Big valve Head, A12 Cam, Uni Filter, Custom Exhaust, 10G rollers, 1500 Contra Spring, 2000 Clutch Springs Just added - 2007 Joyner 250 SV - Let the fun begin 4-Dirt Bikes, Baja Bug and enough toys to keep me in the garage and out of trouble. Last edited by toomanytoys2; 08-06-2013 at 05:01 PM. 
|
|
#2
08-06-2013, 03:01 PM
|
||||
|
||||
|
So my first order of business has been to get the Joyner front suspension up to par. The PO had disassembled many of the pieces and put them back together wrong, as well as using the wrong bolts for the reassembly. I also had a lot of thought about upgrading the Yerf front end vs. going with the Joyner. However, cost wise the Joyner was the most economical route, plus it is a proven design. After doing a lot of searching, I am able to rebuild the complete Joyner front end for about $200. Just the heavy duty ball joints and spindles for the Yerf would be $180. Plus I need to have front brakes for what I plan on doing, so that would have been more $$$.
Now some of the parts that I needed were NLA, so a little searching was in order. My main concern for the front was that it was missing the front axle on one side. I could have had my dad make me one on the lathe (my skills aren’t as good as his), but another forum said that an Arctic Cat part was interchangeable. However, when I ordered the part and tried to install it, there was too much play in the bearings. So I disassembled the other front wheel to compare the parts and discovered that the axles were not the same. The Arctic Cat part had a shoulder on it where the Joyner part did not (see Pics). So I chucked up the AC axle and tuned the shoulder off. The AC axle was still a little shorter than the Joyner, so I had to use a thinner washer between the nut and the hub. Next I had to make some upper shock bushings for the front shocks. The PO had lost them and the stock ones are NLA. In my stash, I have quite a few parts that were destined for my Baja. Luckily I found some shocks that had a Urethane type shock mounts. I was able to press them out and turn them down in the lathe to match the Joyner shocks (se Pics). So now I have the front end in “working: condition. I am still waiting for some parts for the complete rebuild. My next big hurdle is to work out the CV system. My plans for it are to use a Joyner 250 mid axle with sprocket and match it up to the CVs. However, I do not plan on using the Joyner CVs and axles. My plan is to graft the outer stubs and inner spline section to VW CV cups. This way I can get the axles at just about any length and the CVs will be stronger then the Joyner’s.
__________________
2005 Hammerhead 150 170cc BBK, PnP Big valve Head, A12 Cam, Uni Filter, Custom Exhaust, 10G rollers, 1500 Contra Spring, 2000 Clutch Springs Just added - 2007 Joyner 250 SV - Let the fun begin 4-Dirt Bikes, Baja Bug and enough toys to keep me in the garage and out of trouble.
|
|
#3
08-06-2013, 06:16 PM
|
||||
|
||||
|
This should be a good build, and a great ride all said and done. Subscribed and watching

__________________
ASE Master and Toyota Master Diagnostic Certified Buggy Building Trainee '04 Dazon Raider 150 'modded'
|
|
#4
08-06-2013, 06:36 PM
|
||||
|
||||
|
I'm all in for this one. Thanks for doing what I have envisioned.
-34
__________________
 Driver # 34 Driver # 34Head Slimedog: Slimedog Productions 2009 Taotao ATK 150 A: UNI w/custom intake, 125 main/38 pilot, tuned pipe, 9000rpm CDI w/**** adapter, 10g rollers, stock clutch w/2000rpm clutch springs, 2000rpm engagement spring, Orange Hi perf coil w/NGK cable, STI HD1 wheels with Carlisle Turf Master tires, NHL puck shifter knob, aftermarket steering wheel, (roll cage in process of modifications)
|
|
#5
08-07-2013, 10:49 PM
|
||||
|
||||
|
should be an interesting one. the yerf will definitely save some weight over the joyner. ..a lathe, i'm jealous. )))
Mike, where ya' been? --been waiting to see some updates on your other one. If i can keep mine in one piece, maybe i can get down your way this fall.
|
|
#6
08-09-2013, 03:15 AM
|
||||
|
||||
|
A lathe is a really neat tool to have when you are trying to make custom components. Mine is just a little 6" Craftsman that is probably older the I am. If I need to turn something big, I drive across town and use my dad's. He has a big 16". Tools like a lathe are kind of funny. You can get by for years without one using various Redneck methods. However, once you get one, you can't imagine how you ever lived without one.
__________________
2005 Hammerhead 150 170cc BBK, PnP Big valve Head, A12 Cam, Uni Filter, Custom Exhaust, 10G rollers, 1500 Contra Spring, 2000 Clutch Springs Just added - 2007 Joyner 250 SV - Let the fun begin 4-Dirt Bikes, Baja Bug and enough toys to keep me in the garage and out of trouble. Last edited by toomanytoys2; 10-11-2013 at 05:05 PM.
|
|
#7
08-11-2013, 08:42 AM
|
||||
|
||||
|
Would LOVE to have access to a lathe. Would be a pretty expensive learning curve for me, but I'd give it a go for sure. I bet this buggy is going to turn out amazing-you really seem to have a plan and a way to implement it.
-Bird, yea man I've been kickin around. Still working on the buggy-stock jug and head but modded full out otherwise. Modded cage and added the bed-Lovin it so far. Been working on my '83 XL600R a lot recently. Just put on my custom Darth Vader headlamps and cowl;-) -34
__________________
Driver # 34Head Slimedog: Slimedog Productions 2009 Taotao ATK 150 A: UNI w/custom intake, 125 main/38 pilot, tuned pipe, 9000rpm CDI w/**** adapter, 10g rollers, stock clutch w/2000rpm clutch springs, 2000rpm engagement spring, Orange Hi perf coil w/NGK cable, STI HD1 wheels with Carlisle Turf Master tires, NHL puck shifter knob, aftermarket steering wheel, (roll cage in process of modifications)
|
|
#8
08-26-2013, 12:48 AM
|
||||
|
||||
|
And now it is on hold (Dam DMV). In order to be able to drive out here in Lefty CA, you need to have it registered. I had planned on using part of the Polaris frame in the build that had the vin. So I called Sacramento to do a vin check. They told me that it was off the record and that I would need to get the vin verified. So I loaded it up and took it to DMV to get it registered. However, once there, I was informed that it was not off of the record and that I would need to contact the legal owner (back fees here we come)
 . .Another avenue I am thinking about is to get the Yerf registered. There is an engine number, but no vin. I was thinking about making a jig with my metal stamps and stamping the engine number on the frame. Has anyone tried this? I'm not sure what other avenues that I have to get this thing registered so I can start to work. I am really leery about taking anything in that is obviously cut up / modified to the DMV. Any suggestions?
__________________
2005 Hammerhead 150 170cc BBK, PnP Big valve Head, A12 Cam, Uni Filter, Custom Exhaust, 10G rollers, 1500 Contra Spring, 2000 Clutch Springs Just added - 2007 Joyner 250 SV - Let the fun begin 4-Dirt Bikes, Baja Bug and enough toys to keep me in the garage and out of trouble.
|
|
#9
08-26-2013, 06:32 AM
|
||||
|
||||
|
Quote:
|
|
#10
08-26-2013, 12:38 PM
|
||||
|
||||
|
I have to agree with X, even in FL they won't accept anything less than a full VIN without a Certificate of Origin. I know states differ, but I do know FL is one of the more lax states when it comes to titling things, I know this from registering boats older than I am(no hull ID#) and the trailers we pieced together from a few donors, and also from transferring boats and trailers in from states that don't issue titles for recreational vehicles. That was a fun conversation to have. I have this boat that does not have a hull ID, I do not have a state issued title, I do not have a current registration, and a trailer with no tag. Only saving grace is that I still had my old trailer tagged to my name, and they just gave me a new tag.
I asked about registering mine as a home built, or business transfer, and their reply was, make sure you bring the receipts for ALL of the materials involved, so we can tax you accordingly and make sure it is up to snuff. Ain't bureaucracy great?! I think for mine, I will 'come up' with a bill of sale and see what they say.
__________________
ASE Master and Toyota Master Diagnostic Certified Buggy Building Trainee '04 Dazon Raider 150 'modded'
|
|
#11
09-15-2013, 11:50 PM
|
||||
|
||||
|
Got a little time to work on my project this week end. Basically what I am doing is to get the front end and rear end setup they way I want it, then I will graft them on to the Yerf tub. So this weekend was time spent with the torch, cutoff wheels and sawzall to remove excess metal and mounts. There really isn't that much more to do on the front at this time, except to shorten the nose about 1'. The nose has a place to mount a winch, but for the type of riding I have planned, a winch is not needed. So the next step for the nose is to bob it off.
In the rear, I removed all of the motor mounts and some accessory mounts, as well as the skid plate. The skid plate was a royal pain. It was welded everywhere. The next step for the rear is to cut apart the Polaris frame and just use the section that holds the engine and transmission and set it in place to start figuring out where I will mount the Joyner 250 mid axle. However, I am kind of back on hold until I can get my registration scheme figured out. I did have an appointment with the CHP on Friday (the 13th) to try and get a VIN for the Yerf, but as luck would have it the officer had to make a court appearance, so I have another appointment for next Friday. I let you know how that goes. For now, here is the little progress that I have made.
__________________
2005 Hammerhead 150 170cc BBK, PnP Big valve Head, A12 Cam, Uni Filter, Custom Exhaust, 10G rollers, 1500 Contra Spring, 2000 Clutch Springs Just added - 2007 Joyner 250 SV - Let the fun begin 4-Dirt Bikes, Baja Bug and enough toys to keep me in the garage and out of trouble.
|
|
#12
09-25-2013, 02:07 AM
|
||||
|
||||
|
Well got a little bit done on the Pojo dog this week end. It was mostly fitment issues, but now I know that my theory will work. In a past post I was talking with Ckau, and he stated that he would rather beef up American made products then work with the china crap. Boy was he ever right. For those who may have forgotten, I will be grafting on the suspension from a Joyner 650 sand spider onto my Yerf. The most critical part of the whole build is setting up the CV joints in the rear. I have done a lot of work on full size off road cars, but this is my first real build in the mini buggies and I will say up front that the Chinese had their heads up their butts when they designed this rear end. To get the most travel out of a CV system, you want to have equal amount of wheel travel up and down from when the wheels, axles and mid axle are in a straight line. However, in this model of Joyner, they got most of the travel by having the suspension setup with an extreme droop and not much upward travel. This puts the CV joint at an angle that will lead to a premature failure. In fact this is a main complaint over on BN.
To figure out my axle lengths, I stuck a broom (redneck) through both wheel bearings. I then jacked up the broom handle until the wheels and mid axle would be in a straight line. This gave me a ball park figure for the total length of what the CV system would have to be. I then cut my “wood” shocks to the length that would hold the suspension in this position. What my game plan is, is to use the CV cups from the Joyner and weld VW CV cups to them. This way I have many different axle lengths to choose, and I can use a better quality CV. I plan on using Porsche 944 CVs. The inner Joyner CVs are easy to take apart; they just have a C clip that holds them together. However, the outer CVs are a real PITA. To take them apart, you have to get them off of the axle first. However, they are held on to the axle by an internal C clip and it seems that most of the people that try and remove them end up breaking them. So instead of taking a chance, I cut the CVs from the axle right at the cage. This way I could rotate the cage and pick out each ball until they came apart. Then I did some measuring and found that if I can center the rear sprocket, I can use stock bug axles. So my next step is to set the Polaris engine and Trans into the Joyner rear end to see where I will be able to set the sprocket. So, the last two nights I have been cutting apart the trail boss to separate what I need from the rest of the quad. I will be using the majority of the quad frame in order to keep the structural support needed to keep the CVT system lined up. I cut off the upper section of the frame, even though it has a motor mount built in, but I plan on using it to mount the stock fuel tank. I figure that it will be easier to rebuild this section, then to try and fab up the gas tank holder. So my next job is to sit the Polaris engine / Trans into the Joyner to find out where I can place the rear sprocket and then I can start fabing up the CV system. Also, see my picture of my left over parts, if anyone wants anything, I will give them you them for the cost of shipping. I am keeping the front springs though.
__________________
2005 Hammerhead 150 170cc BBK, PnP Big valve Head, A12 Cam, Uni Filter, Custom Exhaust, 10G rollers, 1500 Contra Spring, 2000 Clutch Springs Just added - 2007 Joyner 250 SV - Let the fun begin 4-Dirt Bikes, Baja Bug and enough toys to keep me in the garage and out of trouble.
|
|
#13
09-25-2013, 05:44 PM
|
||||
|
||||
|
My tires and wheels came in today
 . The Joyner hubs are kind of a bastard size. Luckily with a lot of searching and help, I found out that the wheels from an 2000 Arctic Cat would fit. I found a complete set with good tires on the bay for $150 total shipped. They are 23s in the front and 24s in the rear on 12" rims. Personally, I would rather gone a little smaller, but with the Joyner disc brakes, I had to go with a 12" rim. Hopefully my gearing will be close to the same as the stock Polaris. It had 24s on the back, but they are a little smaller then the tires that I got. However, the stock rear sprocket, was a 41 tooth and the Joyner sprocket I found is a 45 tooth. This should get me close, and I can also go down on the countershaft sprocket if I have to. I would really like to keep the gearing as close to stock as possible. That way I can have the low gear for creeping and hill climbing, and The high gear for general driving. . The Joyner hubs are kind of a bastard size. Luckily with a lot of searching and help, I found out that the wheels from an 2000 Arctic Cat would fit. I found a complete set with good tires on the bay for $150 total shipped. They are 23s in the front and 24s in the rear on 12" rims. Personally, I would rather gone a little smaller, but with the Joyner disc brakes, I had to go with a 12" rim. Hopefully my gearing will be close to the same as the stock Polaris. It had 24s on the back, but they are a little smaller then the tires that I got. However, the stock rear sprocket, was a 41 tooth and the Joyner sprocket I found is a 45 tooth. This should get me close, and I can also go down on the countershaft sprocket if I have to. I would really like to keep the gearing as close to stock as possible. That way I can have the low gear for creeping and hill climbing, and The high gear for general driving.
__________________
2005 Hammerhead 150 170cc BBK, PnP Big valve Head, A12 Cam, Uni Filter, Custom Exhaust, 10G rollers, 1500 Contra Spring, 2000 Clutch Springs Just added - 2007 Joyner 250 SV - Let the fun begin 4-Dirt Bikes, Baja Bug and enough toys to keep me in the garage and out of trouble. Last edited by toomanytoys2; 09-25-2013 at 06:02 PM.
|
|
#14
09-29-2013, 03:32 PM
|
||||
|
||||
|
Got a little more done this weekend, once again, mostly trying to see how the engine is going to sit in the frame. Of course there are always thing that you do not see until you start to put the pieces into place. Most of the Polaris conversions I have seen use a trailing arm rear suspension, but my setup is a-arms. There are always two sides of a coin when it comes to suspension design, with the a-arm, you have a very robust system, but it takes up space with the mounting system. The trailing arms take up very little space, but if the trailing arms are not built right, they are susceptible to hard impacts and excessive bottoming can give you negative camber as the arms can twist. Because of my VW background, I am a fan of the trailing arms, I believe that they give better bump compliance, because the wheel moves up and away from the bump. However, since I am running a-arms, the a-arm mounts are playing a huge role in where I can mount the engine. If I was using a standard dirt bike or quad engine with a built in transmission, I would have all kinds of room, but since I am using a CVT system, my choices are very limited.
Both clutches on the Polaris are huge in comparison to a GY6, so between the clutches and the a-arm mounts, I am running into interference issues. Everything is so close, that I would not be able to take off the CVT cover with the engine in the car. This would definitely cause a problem if I ever had to change a belt in the field. So after doing some research and talking with people, I will probably run without the CVT cover. It seems that the Polaris clutches are not that susceptible to dirt and dust, but rather water. Since 99% of the riding I do does not involve crossing water, I plan on leaving the cover off, at least for now. Another problem I ran into is that I cannot center the counter shaft sprocket in the frame. Since I am trying to stay away from using jack shafts, this means that I have to run unequal axle lengths. It looks like a VW bus axle will work for the long axle and I believe that an axle from an automatic squareback will work for my short axle. I’ll find out on Tuesday, when I can go by the wrecking yard and see if they have one. I will hate to buy a set of aftermarket axles and just end up using one of them. I figure that I have a about an inch of play for where I can place the mid axle, so if the squareback axle will work, the next step is to get some pillow blocks and mount the mid axle. Then I can start fine tuning the CV system. After that, build the motor mounts.
__________________
2005 Hammerhead 150 170cc BBK, PnP Big valve Head, A12 Cam, Uni Filter, Custom Exhaust, 10G rollers, 1500 Contra Spring, 2000 Clutch Springs Just added - 2007 Joyner 250 SV - Let the fun begin 4-Dirt Bikes, Baja Bug and enough toys to keep me in the garage and out of trouble.
|
|
#15
09-29-2013, 03:47 PM
|
||||
|
||||
|
Since your in the VW frame of mind, why not think about going semi-trailing arms with a weissach axle style setup like a 928? It would likely free up the rear 3/4 around the engine/trans and maybe give you off the shelf parts to use with an excellent design.
|
|
#16
09-29-2013, 05:21 PM
|
||||
|
||||
|
I agree. A semi trailing arm set up would free up some space around the engine and give you the ride you are looking for. I saw someone do a similar frame up build with a sled engine and heavily triangulated tubular trailing arms. All said and done, it articulated very well, but the builder used unknown donor axles and inferior design(my opinion) but the finished product functioned very well.
IMHO, you are already way ahead of the game with product knowledge about the axles and where to find them. The rest is in execution. I have given the same design some thought, and when and if I decide to do such a build/mod, I think I might look into some of the small car AWD rear axle setups with the small open diff center section. The Matrix rear end comes to mind, and the hubs are pretty cheap from after market suppliers. Whether or not the diff would be used in the build would depend on the engine, but I do like the joyner type center section for the chain drive.
__________________
ASE Master and Toyota Master Diagnostic Certified Buggy Building Trainee '04 Dazon Raider 150 'modded'
|
|
#17
09-29-2013, 10:12 PM
|
||||
|
||||
|
I do like the idea of a trailing arm or semi trailing arm system over the a-arm, but in order to build one it is a ton of work. First you have to decide what type of stub axle that you will run. Then you get the bearings and the bearing carrier to match the stub axle. Next you have to decide how the arm will attach to the frame (usually 2 places). Then you build a jig that will hold the bearing carrier and the 2 attachment points. After that, you can then begin to build the arms. I did do this for my Baja bug. I built triangulated tubular arms as Master described, and just to get the camber and the toe correct in the arms took considerable time by itself. Also, the problem with using any type of “stock” component is the weight issue. Even if you have the aluminum Porsche trailing arms, just one would be heavier than the whole SS suspension combined. So when you are looking at having about 20 HP, every little bit of weight counts. Plus I would still be in the same boat about trying to find the correct length axles.
In a perfect world (and perfect wallet  ), I would have rather started with something like a Joyner 250, that already had trailing arms. However, they do not have the amount of suspension travel as the 650 has. In stock form the 650 has 9” of travel at both ends. With 944 CVs, I should be able to stretch that out a little farther in the back. So even though a-arms are not my most favorite type of suspension in the rear, if I can get the axle lengths figured out, it will be the simplest. ), I would have rather started with something like a Joyner 250, that already had trailing arms. However, they do not have the amount of suspension travel as the 650 has. In stock form the 650 has 9” of travel at both ends. With 944 CVs, I should be able to stretch that out a little farther in the back. So even though a-arms are not my most favorite type of suspension in the rear, if I can get the axle lengths figured out, it will be the simplest.
__________________
2005 Hammerhead 150 170cc BBK, PnP Big valve Head, A12 Cam, Uni Filter, Custom Exhaust, 10G rollers, 1500 Contra Spring, 2000 Clutch Springs Just added - 2007 Joyner 250 SV - Let the fun begin 4-Dirt Bikes, Baja Bug and enough toys to keep me in the garage and out of trouble.
|
|
#18
10-02-2013, 01:57 PM
|
||||
|
||||
|
Went by the VW wrecking yard yeaterday and scored.
. I was able to find the axle I was looking for. The axle came from a VW Squareback with an automatic transmission. These axle are "VERY" rare and I was kind of doubtful if they would have one. Well, I got their only one for $40. Played with it awhile last night and as far as I can tell it will put main sprocket almost centered on the car. I will probably have to lift the motor up a couple of inches, but If I do, it will actually make it easier to make the motor mounts.Now I just have to replenish my buggy build slush fund. So time to sell off some stuff and do some outside work. Got 3 Honda ATC to get rid of, 2 -110s and 1-200. Joyner 650 transmission. Go kart axle and tires and Plastics, Pipes and suspension components from former dirt bikes (I hate EBay for selling). The wife is fine with me building the buggy, she just wants a bigger 5th wheel trailer and doesn't want me to pull too much money from our general funds.
__________________
2005 Hammerhead 150 170cc BBK, PnP Big valve Head, A12 Cam, Uni Filter, Custom Exhaust, 10G rollers, 1500 Contra Spring, 2000 Clutch Springs Just added - 2007 Joyner 250 SV - Let the fun begin 4-Dirt Bikes, Baja Bug and enough toys to keep me in the garage and out of trouble.
|
|
#20
10-02-2013, 06:58 PM
|
||||
|
||||
|
Quote:

__________________
ASE Master and Toyota Master Diagnostic Certified Buggy Building Trainee '04 Dazon Raider 150 'modded'
|
|
#21
10-02-2013, 07:56 PM
|
||||
|
||||
|
I was able to coax my wife out of a few funds though. She let me order some pillow blocks and the additional VW CV cups
 . I have to pay her back when I sell a couple of things, but at least I won't be sitting on hold again. . I have to pay her back when I sell a couple of things, but at least I won't be sitting on hold again.Now the real work will begin
__________________
2005 Hammerhead 150 170cc BBK, PnP Big valve Head, A12 Cam, Uni Filter, Custom Exhaust, 10G rollers, 1500 Contra Spring, 2000 Clutch Springs Just added - 2007 Joyner 250 SV - Let the fun begin 4-Dirt Bikes, Baja Bug and enough toys to keep me in the garage and out of trouble.
|
|
#22
10-09-2013, 12:20 PM
|
||||
|
||||
|
More updates on the Pojo Dog. Over the weekend while playing with engine fitment, I decided to remove more of the engine/transmission cradle. Since I will be fabbing up my own top mount, the existing frame was getting in the way. Luckily the cradle is made from 1” square tubing, so before I cut off the top of the cradle, I welded in a cross support before I removed the top section. Since the cradle controls the alignment of the engine and the transmission, I am doing everything that I can to keep the cradle square and true to its original dimensions.
Also, my pillow blocks and VW CV cups came in the mail on Monday. The pillow blocks are pretty massive compared to the original parts and they are self-aligning as well. The original pillow blocks had a bearing surface that was right about 3/4" wide. However, with the pillow blocks that I got, the bearing surface was closer to 1-1/2”. So I had to chuck the mid axle up in the lathe and turn it down to match the bearings. That was a royal pain in the rear. The metal they used for the mid axle is junk. It looks like they must have machined the mid axle then hardened it at the bearing surface only when they were done. When I first started to make my cuts, the section adjacent to the bearing surface would not cut well at all (about 1/2"), then as I moved away from that section, it would start to cut okay. Even though the metal had been hardened, it really wasn’t that hard, I could still cut it with a file, but even my carbide cutters would hardly cut it well. So in the end I could only remove 0.010” each pass and I had to reduce the diameter by a little over 0.200”. Needless to say, that took a considerable amount of time and patience (danm Chinese metal). So now the really tricky part will begin. So I may not be posting any progress for a while. I have to setup the axles to align the mid axle into its proper location. It’s kind of hard to explain, but it will entail cutting the Joyner CV cups to a specific length, then welding the VW CV cups to them. It’s one of the cases where a picture is worth a thousand words. So when they are done, I will show you how I did it.
__________________
2005 Hammerhead 150 170cc BBK, PnP Big valve Head, A12 Cam, Uni Filter, Custom Exhaust, 10G rollers, 1500 Contra Spring, 2000 Clutch Springs Just added - 2007 Joyner 250 SV - Let the fun begin 4-Dirt Bikes, Baja Bug and enough toys to keep me in the garage and out of trouble.
|
|
#23
10-16-2013, 01:28 AM
|
||||
|
||||
|
Getting a little more done on the Pojo. However, it is mostly on the computer not on the car itself. I have been working on setting up the CV system, and I didn’t want to go about it hit or miss. But first I have to rant, I just got done grading midterms and my brain is fried. Not because of the amount of work, but because the amount of stupidness (is that a word?) and or laziness that I see on a regular basis
 . I tell you this country is going to hell in a hand basket. Okay, rant done. . I tell you this country is going to hell in a hand basket. Okay, rant done.So what I am faced with is some set measurements that I have to account for. The first one is the distance between the rear wheel bearings, this is set at 52-1/2”. Next is the location of the rear sprocket on the mid axle. Measured from the right wheel bearing, the maximum distance is 25-1/4”, but it can be moved to the right for a distance of 24”. Then I have my two axles, the left axle is 16-5/8’ long and the right axle is 15-5/16”. Last, when the mid axle and stub axles align into a straight line, I need a 1/8” gap on each side of the axle and the VW CV cups. So instead of doing a lot of test fitting and cutting, I reverse engineered all of the parts and drew them up in AutoCAD. This way I could move the different parts around until I could get the proper measurements that I needed. When all of the sizing is worked out, the VW CV cups will be welded to the Joyner CV cups. To accomplish this, I had to chuck the VW cups into the lathe and turn down a shoulder so that they would fit into the Joyner cups. If you look at my drawings, you will notice that the Joyner cups are very deep. To get my spacing right, I will have to turn down the lengths of the Joyner cups. Once the spacing looks to be correct, I will weld together the right CV assemblies. Next I will fine tune my spacing on the left axle and weld up this side. For now it looks like I have the spacing figured out. So the next step is to cut some stock to mount the mid axle and tack it into place. Then I can double check my measurements and actually start to build the CV assemblies. The first picture is a drawing of all of the individual components, the second one is how the parts will fit together. The last drawing is my actual spacing and how much I have to cut. Take a look at them and tell me if you see a mistake, or even a better way of doing it.
__________________
2005 Hammerhead 150 170cc BBK, PnP Big valve Head, A12 Cam, Uni Filter, Custom Exhaust, 10G rollers, 1500 Contra Spring, 2000 Clutch Springs Just added - 2007 Joyner 250 SV - Let the fun begin 4-Dirt Bikes, Baja Bug and enough toys to keep me in the garage and out of trouble.
|
|
#24
10-16-2013, 07:43 PM
|
||||
|
||||
|
Got a little time today to get some work done today between my morning classes and my night class. Normally I go in for acupuncture for my back in between classes, but the doc had to reschedule. So that left me a good four hour window to play. I went ahead and made the main supports that the mid shaft pillow blocks will bolt to. Luckily, I had the right size of square tubing in my scrap pile. Right now the supports are just sitting in a general position. After a little more measuring, I will find their correct locations then tack them into place. One thing though, I am definitely going to look into a tubing notcher. I am tired of fish mouthing tubing with a grinder.
On a side note, I was digging through one of my sheds yesterday and found that I already have the 944 CVs. They are used, and I believe that they were showing too much wear for me to put in my Baja. However, they are good enough to at least get me running in my build.
__________________
2005 Hammerhead 150 170cc BBK, PnP Big valve Head, A12 Cam, Uni Filter, Custom Exhaust, 10G rollers, 1500 Contra Spring, 2000 Clutch Springs Just added - 2007 Joyner 250 SV - Let the fun begin 4-Dirt Bikes, Baja Bug and enough toys to keep me in the garage and out of trouble.
|
|
#25
10-18-2013, 12:52 AM
|
||||
|
||||
|
Well a little more measuring and reverse engineering. This time recreating the pillow blocks and how they will mount in the frame. Once again, ran into an unforeseen fitment issue that I hadn’t planned on. My drawings showed that the VW CV cups would have an interference with the buggy frame itself. Once I completed the drawing I double checked the fit, and sure enough, they will hit. It shouldn’t be that big of an issue though, I should be able to put a spacer under the pillow blocks and raise them up a little. Tomorrow, I will be taking the outer Joyner CV cups and the VW CV cups over to my dad’s house. Then I can do a practice fit up, since my lathe is probably too small to set it up accurately.
__________________
2005 Hammerhead 150 170cc BBK, PnP Big valve Head, A12 Cam, Uni Filter, Custom Exhaust, 10G rollers, 1500 Contra Spring, 2000 Clutch Springs Just added - 2007 Joyner 250 SV - Let the fun begin 4-Dirt Bikes, Baja Bug and enough toys to keep me in the garage and out of trouble.
|
|
#26
10-23-2013, 12:16 PM
|
||||
|
||||
|
Okay, now I am stuck and my brain is hurting. The CV system is moving along, but at a slow pace. Last week I took the Joyner stub axle and a VW CV cup over to by dad's and it looks like my idea will work. However, it needs a good centering jig to align them for welding. Since my lathe is too small, he is making the jig for me and I will weld it up at his house. The inner CV cups will be a lot easier and I can do them on my lathe, so I am just waiting on my dad to go much further there.
However, my project may be taking a major turn. My original plan was to mate the Joyner suspension to the Yerf drivers tub. The reason for my thinking was that I want a mini buggy. The Joyner as it sits is really not that much smaller then a VW buggy. However, I want something that can go down most dirt bike / quad trails. Because of the wheels that I got the width of the track is only 3" more then my HH 150, but the whole buggy is a lot longer. If I were to shorten the Joyner driver's tub by 10", It would have the same wheelbase as the Yerf. So now I'm not really sure which direction I want to take. I could move the registration from the Yerf to the Joyner, then fix up the Yerf and sell it for build funds, or keep going down my original path. I believe that it would be easier to mod the Joyner frame then to do the swap, but I am just kind of stuck. I had planned this build to be something totally different, but different is not always the best. Any and all suggestions would be appreciated.
__________________
2005 Hammerhead 150 170cc BBK, PnP Big valve Head, A12 Cam, Uni Filter, Custom Exhaust, 10G rollers, 1500 Contra Spring, 2000 Clutch Springs Just added - 2007 Joyner 250 SV - Let the fun begin 4-Dirt Bikes, Baja Bug and enough toys to keep me in the garage and out of trouble.
|
|
#27
10-23-2013, 05:28 PM
|
||||
|
||||
|
I think you're on the right track with your latest thinking. grafting one to another is always an ordeal of things being close, but not quite right and needing a whole lot of work for a minor item. Honestly, I wondered about your decision to not use the Joyner as the basis from the get go, as I would think that the frame/cage is better than the yerf's. The idea to fix up the yerf and use the money for the joyner is probably the best route. However, i'd look at that tub long and hard to see if you'll have the leg/pedal room and engine/trans room after chopping nearly a foot off it.
|
|
#28
10-23-2013, 05:41 PM
|
||||
|
||||
|
Annnnnnnnddd, just to give you a little more to think about after eyeballing the joyner ....
Fix the yerf up, give it to the wife. Trim the joyner front floor corners off, re-rack it for center steer, set up the pedals as a single seater and suck the ten inches or so out of the front frame stub with half coming from behind the a-arms and the rest from getting rid of the front overhang. I'd reuse the entire front suspension except the shocks and convert the joints to heims. toughest part is pedal room.
|
|
#29
10-24-2013, 01:37 AM
|
||||
|
||||
|
Welll, my wife will end up with the HH150 with the big bore , P&P head and A12 cam. She'll just have to suffer
 . I would need to keep the Joyner as a 2 seater though, some how my 8 year old daughter has caught the need for speed (punch it daddy), so she'll be my copilot. As for the cockpit room, I set one of the Yerf's seat in today about a foot away from the firewall and I still had more room then if I was sitting in the Yerf. This thing has a drivers compartment the size of a Cadillac, and the pedals were mounted up to the front end itself. Nothing is ever written in stone when it comes to these builds, but I am definitely starting to lean in this direction. . I would need to keep the Joyner as a 2 seater though, some how my 8 year old daughter has caught the need for speed (punch it daddy), so she'll be my copilot. As for the cockpit room, I set one of the Yerf's seat in today about a foot away from the firewall and I still had more room then if I was sitting in the Yerf. This thing has a drivers compartment the size of a Cadillac, and the pedals were mounted up to the front end itself. Nothing is ever written in stone when it comes to these builds, but I am definitely starting to lean in this direction.
__________________
2005 Hammerhead 150 170cc BBK, PnP Big valve Head, A12 Cam, Uni Filter, Custom Exhaust, 10G rollers, 1500 Contra Spring, 2000 Clutch Springs Just added - 2007 Joyner 250 SV - Let the fun begin 4-Dirt Bikes, Baja Bug and enough toys to keep me in the garage and out of trouble.
|
|
#30
10-24-2013, 08:48 AM
|
||||
|
||||
|
Quote:
Are those Yellowwood shocks on the back of that joyner?
|
|
#31
10-24-2013, 02:40 PM
|
||||
|
||||
|
Nah, those are just el-cheapo Poplar shocks. For the finished build I will be using some Hawaiian Koa shocks that I have laying around
 . .
__________________
2005 Hammerhead 150 170cc BBK, PnP Big valve Head, A12 Cam, Uni Filter, Custom Exhaust, 10G rollers, 1500 Contra Spring, 2000 Clutch Springs Just added - 2007 Joyner 250 SV - Let the fun begin 4-Dirt Bikes, Baja Bug and enough toys to keep me in the garage and out of trouble.
|
|
#34
10-25-2013, 09:34 PM
|
||||
|
||||
|
Bamboo would ride better.....
__________________
ASE Master and Toyota Master Diagnostic Certified Buggy Building Trainee '04 Dazon Raider 150 'modded'
|
|
#35
10-26-2013, 12:29 AM
|
||||
|
||||
|
I like the idea of Bamboo. It should have a more springy quality to it then what I had planned
 . .Made a little more progress today. I got the Joyner stub axles tacked up to the VW CV cups, will do a full weld tomorrow. Of course, nothing is ever as easy as you plan it to be. Even though I had a jig and tacked them up on the lathe, there was a lot of fudging and hammer tapping to get them lined up true. For those of you that haven't done much welding, the weld itself will almost always distort the shape of the item being welded. So you always make light welds (tacks) until everything is square and true. As you can see in the picture, I had set up some shields to protect the lathe. After every tack, I removed the shields and set up a dial indicator, then tapped on the cup to true it up again for the next tack. In all each cup has six tacks on it. the first couple were fairly light, but got progressively more aggressive once I felt that I had a good true. I 'm not going to show you the tacked up assemblies, because they definitely look FUGLY, but once I get them finished up, then I'll share.
__________________
2005 Hammerhead 150 170cc BBK, PnP Big valve Head, A12 Cam, Uni Filter, Custom Exhaust, 10G rollers, 1500 Contra Spring, 2000 Clutch Springs Just added - 2007 Joyner 250 SV - Let the fun begin 4-Dirt Bikes, Baja Bug and enough toys to keep me in the garage and out of trouble.
|
|
#36
10-26-2013, 12:40 AM
|
||||
|
||||
|
Oh, and by the way, when you see my welds, don't judge me too harshly, they are being made with a flux core welder
 . .
__________________
2005 Hammerhead 150 170cc BBK, PnP Big valve Head, A12 Cam, Uni Filter, Custom Exhaust, 10G rollers, 1500 Contra Spring, 2000 Clutch Springs Just added - 2007 Joyner 250 SV - Let the fun begin 4-Dirt Bikes, Baja Bug and enough toys to keep me in the garage and out of trouble.
|
|
#37
10-31-2013, 01:37 AM
|
||||
|
||||
|
Well been kind of slacking not on the build, but on posting. It has been slow going, due to having to spend a lot of time on the lathe. I have gotten both stub axles welded up and have finished one side of the inner CV cups. The majority of the parts that I have been machining were hardened. So, on my small lathe that meant using Carbide bits and only being able to make small cuts. First I had to turn a shoulder on the inner VW CV cups so that they would match the inside diameter of the Joyner cubs. Then I had to make a centering jig to align both cups. Luckily I had some good turning stock on hand to make this, since it required quite a reduction in size.
Then I had to reduce the width of the Joyner cup to match the axle length. This was a real pain, since not only was it hard, but as you approached the inside diameter it had grooves for the CV balls. So when you have a hard material and voids in it, it is very hard to turn (can we say chipped bits). Once the jig was made however, it welded up nice and true. So now it is time to mock up the passenger side, then I can double check for travel and then determine how much to cut off of the other Joyner cup to match up with my other axle.
__________________
2005 Hammerhead 150 170cc BBK, PnP Big valve Head, A12 Cam, Uni Filter, Custom Exhaust, 10G rollers, 1500 Contra Spring, 2000 Clutch Springs Just added - 2007 Joyner 250 SV - Let the fun begin 4-Dirt Bikes, Baja Bug and enough toys to keep me in the garage and out of trouble. Last edited by toomanytoys2; 10-31-2013 at 11:18 AM.
|
|
#38
11-14-2013, 11:18 PM
|
||||
|
||||
|
Finally got the rear CV setup done in the rear. I did have to end up buying some aftermarket axles though. The stock VW axles do not have very many splines on them, so if things are not 100% perfect, you can get binding and break a CV cage. However, the aftermarket axles have a splined section that is almost 2-1/2” long, so the axles can plunge into or out of the CV if they need to. Luckily I was able to find a used set of stock length axles on a VW forum that were about 1/4th the cost of new ones. However, since I had axles of different lengths, I had to shorten one of them. Cutting the axles was no big deal, just a couple of slow cuts with the chop saw. The difficult part was to cut the slot for the circlip. I had two issues in cutting the slot, first the axles are very hard, and I would have to cut the slot in the splined section. This meant that I had to take one of my carbide bits and grind it to the exact width of the slot. Then I had to make some very fine cuts, so that I would not chip the bit. Sorry no pics. on this process, because I forgot to take the pictures.
Once I got the short axle finished, I assembled the passenger side to check to make sure that the sprocket would be in the position that I wanted. It actually came out better than I had hoped for. I was able to move the sprocket over about 1/2" closer to the passenger side which may be enough to allow me to use the CVT cover. I then tacked in the support tubes for the mid axle pillow blocks. Just in case that something was off, I had spent a little extra on the bearings and had gotten the types that are self-aligning. Then I had to fab up the driver’s side. To do this I had to chuck up the Joyner CV cup in the lathe and shorten it like I did on the passenger side. Since I had moved the sprocket over, I didn’t have to cut near as much off as I had to on the passenger side, so it went pretty quick. I will say that making the last weld on the CV cups was a little nerve racking. When I did the first side, I had some fudge factor, but if I had measured wrong on the second side, once welded, it would either be right or I would be screwed and searching for more parts. I think I must have measured it over ten times before I pulled the trigger on the welder, and once the smoke had cleared, it fit perfectly. As it sits now, I will have 10” of travel available in the rear end. Of course that will depend on the type of shocks that I end up getting. I still have 5 degrees of CV angularity left in droop and could pick up a little more than an extra inch of travel, but for now, I will probably leave it as it is. I don’t really like to push things to the limit and I would have to modify the lower A-arms a little bit to get this extra travel. I also discovered that I will need to get some different CVs, the ones that I have are just a little too worn for my liking. The next step is to determine how to mount the engine. I have the engine and trans. out of the cradle right now so I can clean up all of the extra tabs. Once that is done, I will put just the transmission back in the cradle, line up the sprockets and make up the mounting points. Here are a couple of pictures for you viewing enjoyment.
__________________
2005 Hammerhead 150 170cc BBK, PnP Big valve Head, A12 Cam, Uni Filter, Custom Exhaust, 10G rollers, 1500 Contra Spring, 2000 Clutch Springs Just added - 2007 Joyner 250 SV - Let the fun begin 4-Dirt Bikes, Baja Bug and enough toys to keep me in the garage and out of trouble.
|
|
#39
11-14-2013, 11:35 PM
|
||||
|
||||
|
We already know 10 inches of travel is great, but the way it looks sitting on those blocks...... Well I can see it doing well on some really rugged trails.
Looking good.
__________________
Growing old is mandatory  Growing up is optional https://www.youtube.com/watch?v=NEXoa-8d7qE
|
|
#40
11-15-2013, 06:36 AM
|
||||
|
||||
|
nicely done; at full droop, any issues with the axle and upper arm? Seen a few builds where that was overlooked til it was all together and ... oops. limit strap can always fix that quick.
I take it you've decided on the joyner tub?
|
|
#41
11-15-2013, 12:57 PM
|
||||
|
||||
|
It is actually the lower arm where I start running into clearance issues and it is at full droop when it will occur. All of the mechanical parts clear nicely, even if I were to drop the arms down to maximum CV angularity. However, the tight spot is between the inner, passenger side CV boot and a brace on the lower arm. I won't know for sure how close this space will be until I get some different CVs. My current CVs are fine for mocking up purposes, but there is so much pitting on the inner star, that they do not track right. If it looks to be too close, I could heat up the brace and put a dimple in it, or cut it out and move it about 1/2".
Yeah, I decided to go with the Joyner tub, but I may have to shorten it. I have two car trailers that I built. One is a single axle and the other is a double axle. The double axle trailer was built to haul my Baja bug and my dirt bikes. So my goal is to be able to haul both of my buggies and my dirt bikes at the same time. I can gain about a foot if I bob of the winch mount from the front of the Joyner. Then If I need more room, I will look at shortening the tub itself. I don't think my wife would be too happy about me building a third trailer, and I would really hate to have to extend my current one.
__________________
2005 Hammerhead 150 170cc BBK, PnP Big valve Head, A12 Cam, Uni Filter, Custom Exhaust, 10G rollers, 1500 Contra Spring, 2000 Clutch Springs Just added - 2007 Joyner 250 SV - Let the fun begin 4-Dirt Bikes, Baja Bug and enough toys to keep me in the garage and out of trouble.
|
|
#42
02-02-2014, 06:57 AM
|
||||
|
||||
|
How is the project coming along?
__________________
Growing old is mandatory Growing up is optional https://www.youtube.com/watch?v=NEXoa-8d7qE
|
|
#43
02-02-2014, 10:38 PM
|
||||
|
||||
|
It’s funny that you asked. I have probably done more in the last two days then I have in a month and a half. Since I am an Instructor, I had grand plans for getting a lot done over the Christmas break. However, as soon as the break started, I got the stomach flu. Luckily I got well for Christmas. However, a few days after Christmas, I got pneumonia, so much for plans. The main thing that was holding me back was the rear sprocket. I need to turn it down to match the 520 chain that is on the Polaris transmission. So Friday I went to a motorcycle salvage yard and picked up a used chain to get me going, then on Saturday, I took the sprocket over to my dad’s. My lathe isn’t big enough to spin the sprocket, so I had to use my dad’s. It was rather slow going. What I was afraid of was that the sprocket was only surfaced hardened. However, it appears that Joyner did it right and the sprocket was hardened all the way through.
Today (during the Super Bowl) I started to tear the engine down. Even though it seemed to run good, I wanted to see what type of condition it was in. The engine is in pretty decent shape. The main and rod bearings are good, but it will need an oversized piston. That and new crank seals, should make it a fresh motor (gotta love the 2 strokes). I did have to make a puller to get the flywheel off though. It looks pretty crappy because I was cutting it in the rain and dark, but it got the job done. The next step is to fully gut the motor, then put the cylinder and head on and mount the engine in the cradle. This way I will have the dimensions I will need without the extra weight. Then I can start to make the engine mounts and get the chain lined up right,
__________________
2005 Hammerhead 150 170cc BBK, PnP Big valve Head, A12 Cam, Uni Filter, Custom Exhaust, 10G rollers, 1500 Contra Spring, 2000 Clutch Springs Just added - 2007 Joyner 250 SV - Let the fun begin 4-Dirt Bikes, Baja Bug and enough toys to keep me in the garage and out of trouble.
|
|
#44
02-03-2014, 08:57 AM
|
||||
|
||||
|
Sweet. I enjoy seeing the progress and hope to make my own Franken-buggy one day.
__________________
Growing old is mandatory Growing up is optional https://www.youtube.com/watch?v=NEXoa-8d7qE
|
|
#45
02-03-2014, 05:09 PM
|
||||
|
||||
|
I got those same 'chatter' marks on the sprockets I machined down, and seeing yours done on a correct lathe eases my mind a bit. I tried everything in my power to get them minimized, but they are still there. Oh well, a little dressing with flapper will make them pretty again.
__________________
ASE Master and Toyota Master Diagnostic Certified Buggy Building Trainee '04 Dazon Raider 150 'modded'
|
|
#46
02-03-2014, 09:24 PM
|
||||
|
||||
|
When you have a thin, large diameter piece of metal that is hard, it is next to impossible to avoid the chatter marks. No worries for me, either I will hit it with a flap wheel or the dirt will hide the marks
 . .
__________________
2005 Hammerhead 150 170cc BBK, PnP Big valve Head, A12 Cam, Uni Filter, Custom Exhaust, 10G rollers, 1500 Contra Spring, 2000 Clutch Springs Just added - 2007 Joyner 250 SV - Let the fun begin 4-Dirt Bikes, Baja Bug and enough toys to keep me in the garage and out of trouble.
|
|
#47
03-08-2014, 09:42 PM
|
||||
|
||||
|
Got a little done on the Pojo today (sorry no Pics.) First thing I did was to cut off the tail light holders and some other miscellaneous tabs. I got tired of hitting my head and other body parts, so out came the cutoff wheel and flap disc. I had already gutted the motor, so I put the cases back together, along with the head and mounted it in the cradle. I also now have all of the parts I need to rebuild the engine.
My goal for the day was to get the motor and trans mounted, yeah right. I had collected as many pictures that I could find on how people mount the Polaris setup, but of course I couldn't find one that matched my chassis. So I spent the morning with a bunch of wood blocks and rope trying to get the cradle in the right position. Eventually I had to just walk away from it because frustration was setting in. So I jumped on my old Murray and mowed an acre of pasture. Being away from the project helped to clear up my mind, and I came up with a solution for the front of the cradle. I would weld in a partial floor in the front of the engine cage that would be load bearing. Then I can weld some tabs on it that the front of the cradle will attach to. So I grabbed some thick flat stock and started to cut out the pieces. However, after making the first 5" cut Murphy reared his head and I ran out of oxygen. So it was back to the angle grinder with cutoff discs. Once the pieces were cut I tacked them in with the wire welder. Since these pieces are going to be load bearing and Some of them could only be welded on one side, I dragged out the stick welded. Man do we get spoiled with the wire welders. It has been quite awhile since I have used mine, so the welds aren't the prettiest, but I know I got good penetration. So hopefully tomorrow I can finish up the front mounts, then I will add some pictures. I didn't think that looking at a few plates welded together would harbor much excitement.
__________________
2005 Hammerhead 150 170cc BBK, PnP Big valve Head, A12 Cam, Uni Filter, Custom Exhaust, 10G rollers, 1500 Contra Spring, 2000 Clutch Springs Just added - 2007 Joyner 250 SV - Let the fun begin 4-Dirt Bikes, Baja Bug and enough toys to keep me in the garage and out of trouble.
|
|
#48
03-08-2014, 10:03 PM
|
||||
|
||||
|
It tends to be the best feeling when you get the foundations in place for the rest of your project. I know I have had the same feeling, and while I am superbly proud of the accomplishment, I know it can be hard to explain or relate to the masses.
Also, on the walk away tactic, I use it all the time when I am in the garage, if only to get a refill on my glass of tea, that temporary lapse in concentration normally reveals the error of my ways or the direction I need to be going. Imagine taking a few months off from your project and clear everything out for another project, thats where I am now. So much vision and tenacity right now, but soon, very soon.
__________________
ASE Master and Toyota Master Diagnostic Certified Buggy Building Trainee '04 Dazon Raider 150 'modded'
|
|
#49
03-09-2014, 07:49 AM
|
||||
|
||||
|
of coarse i'm seeing alot of threads here for the 1st time......
hopefully this isnt too late in the build to take into consideration but i was toying w/ the idea of using a polaris 250 in the crossfire because i had one sitting here. i asked rick ritter about the idea at RCR. ritter is where i get all my polaris rebuild stuff from and is renowned in the 2 stroke polaris world. a bunch of us who have done the 400 swaps use him as a valuable resource to get the most out of our 400s. i have developed a working relationship w/ the man, and he is familiar w/ the buggy/polaris swaps and loves the idea.i asked him about the notion of using the 250 in a buggy. he told me the air cooled 250's tend to run hot out of the box in the quad where it's pretty much in the open. he didnt think the engine would hold up well being behind a seat. i asked him because i really wanted to spend the money on the rebuild and use it, and he kind of talked me out of spending the money......money i would have spent w/ him. like i said just a heads up.
__________________
"LUCIFER" JOYNER JD400, CROSSHAMMER 250R, YERF GX150, CROSSFIRE MBX150, BMS 800V-TWIN '16 RZR 900s , '17 ACE 900XC, '99KX250, '94 KDX200, '18 SSR SR170TX
|
|
#50
03-09-2014, 03:54 PM
|
||||
|
||||
|
I appreciate the heads up, but I have also talked with Rick. However, that was after I bought the engine rebuild pieces off of eBay. Since I already have all of the parts, I plan on finishing the build with the 250, so at least it will be a test mule for the rest of the buggy. I also plan on running some air ducts to the engine and the quad I gutted game with the optional cooling fan. I also have a couple of high velocity, low draw 12V fans that I plan on using as well.
The way I look at it is I won't have much money in the 250 and if it works out good, but seems under powered or hot running, then I will look for a larger Polaris quad. Most of these quads seem to have the same basic engine cradle, so if I do have to upgrade, hopefully I can do it with minimal modifications. Ideally, I would have rather started out with something like a Joyner 250 frame and a larger Polaris quad, but what I have practically fell in my lap, so it kind of dictated the direction that I am going.
__________________
2005 Hammerhead 150 170cc BBK, PnP Big valve Head, A12 Cam, Uni Filter, Custom Exhaust, 10G rollers, 1500 Contra Spring, 2000 Clutch Springs Just added - 2007 Joyner 250 SV - Let the fun begin 4-Dirt Bikes, Baja Bug and enough toys to keep me in the garage and out of trouble.
|
|
#51
03-09-2014, 03:59 PM
|
||||
|
||||
|
good deal, i was thinking of the fan/duct thing too if i used it.... i still might, was thing of putting in the crosshammer, but i need to have it rolling by april. think i'm gonna wait for some of your results and hold onto it for now.
__________________
"LUCIFER" JOYNER JD400, CROSSHAMMER 250R, YERF GX150, CROSSFIRE MBX150, BMS 800V-TWIN '16 RZR 900s , '17 ACE 900XC, '99KX250, '94 KDX200, '18 SSR SR170TX
|
|
#53
03-16-2014, 03:27 PM
|
||||
|
||||
|
Got the front engine mounts made, so the whole engine / trans assembly is in the buggy. However, the back end is held up with rope. Still need to make the back mounts/adjusters to hold it in place and tighten the chain. Will have to make a little sub frame first. Picked up a 10' length of tubing yesterday to make it and replace a missing part of the frame. I will be trying out my Harbor Freight tubing notcher for these parts. I have never used it, but I did do some tuning on it as described in this video.
http://www.youtube.com/watch?v=Ty915Z0GrJo Also am really stoked. Went to the swap meet this morning an picked up a Milwaukee Bi-Metal 10piece hole saw set for $25, and only one cutter was slightly used. Really excited to try it out. Have been cutting fish mouths for years with a grinder and would like to see how the notcher works. I'll try and throw up some pics later.
__________________
2005 Hammerhead 150 170cc BBK, PnP Big valve Head, A12 Cam, Uni Filter, Custom Exhaust, 10G rollers, 1500 Contra Spring, 2000 Clutch Springs Just added - 2007 Joyner 250 SV - Let the fun begin 4-Dirt Bikes, Baja Bug and enough toys to keep me in the garage and out of trouble.
|
|
#54
03-16-2014, 07:45 PM
|
||||
|
||||
|
I did the same with some hole saws when I started on the Yerf, and either I am an idiot, or my drill press is junk, but I could never get it to work properly. The time I spent messing with it, I could have just grabbed the grinder and went on my way.
I am glad to see some progress, it seemed like we almost started around the same time, and while we are no where close to being done, the visions are starting to take shape.
__________________
ASE Master and Toyota Master Diagnostic Certified Buggy Building Trainee '04 Dazon Raider 150 'modded'
|
|
#55
03-16-2014, 07:54 PM
|
||||
|
||||
|
Your right on with the hole saws, Lenox are the best. I cannot think of the brand right now but they are the red hole saws I have always purchased. But lately when I buy them even though they say made in USA the teeth will either break off or wear down after a few uses so now all I purchase are the Lenox.
|
|
#56
03-16-2014, 08:50 PM
|
||||
|
||||
|
Milwaukee brand?
__________________
ASE Master and Toyota Master Diagnostic Certified Buggy Building Trainee '04 Dazon Raider 150 'modded'
|
|
#57
03-16-2014, 10:28 PM
|
||||
|
||||
 ive always had good luck w/ milwaukee
__________________
"LUCIFER" JOYNER JD400, CROSSHAMMER 250R, YERF GX150, CROSSFIRE MBX150, BMS 800V-TWIN '16 RZR 900s , '17 ACE 900XC, '99KX250, '94 KDX200, '18 SSR SR170TX
|
|
#58
03-17-2014, 02:08 AM
|
||||
|
||||
|
Today was a success, even though I only spent about 45 minutes working on the buggy. In the first batch of pictures, you can see how I made the front engine mounts. The problem was that I had to make the cradle longer so that I could add the pivot points. Since a butt weld is weak, I ran some round tubing on the inside of the square tubing on the cradle to reinforce the joint. Also at the pivot points, I had included flat washers on either side of the pivot. That way, if things shifted when I welded up the rectangular tubing (it did), I could shift the whole cradle left or right to make sure that the chain stayed aligned. Also, before I seal up the top of the rectangular tubing, I plan on welding in some tubing on the inside. That way the tubing will not crush when I tighten the bolts. My next issue was to construct a sub frame from which the rear motor mounts / adjusters could be welded to.
The main tubing of the frame seems to be too far away from the engine cradle for my liking. It would be difficult to make the brackets for the rear of the engine that did not have a lot of side to side flex. So I decided to build a sub frame that is closer to the engine, so my mounts would be more secure. This is where I got really stoked. I got to try out my tubing notcher and the new hole saws that I got today. All I can say is that I wish I would have bought this setup years ago. Like I said, it took me 45 minutes at the most to make the sub frame (including setup), and this was while I was barbecuing a Tri Tip. I have never used a notcher before, but you can see from the pictures, that it makes some pretty decent cuts for an elcheapo. And the amount of time spent on the whole sub frames was probably the amount of time that it would take to make one tube with a grinder. Enjoy the pics, and if you see any trouble areas, let me know.
__________________
2005 Hammerhead 150 170cc BBK, PnP Big valve Head, A12 Cam, Uni Filter, Custom Exhaust, 10G rollers, 1500 Contra Spring, 2000 Clutch Springs Just added - 2007 Joyner 250 SV - Let the fun begin 4-Dirt Bikes, Baja Bug and enough toys to keep me in the garage and out of trouble.
|
|
#60
03-17-2014, 12:45 PM
|
||||
|
||||
|
Quote:
|
|
#61
03-24-2014, 05:24 PM
|
||||
|
||||
 Finally got the rear motor mounts / adjusters made, so now I know longer need to use a piece of rope or blocks to hold the motor in place. The method that I used was not something that I thought up on my own, but was stolen from other builds, then modified to suit my needs. The main problem that I faced was the relationship between the mid-axle and the pillow blocks to the countershaft sprocket itself. With most of the designs that I saw, the pillow blocks were on the underside of the frame. However, to get my mid axle and CVs aligned with the stub axles and wheels, I had to run the pillow blocks on top of the frame. Due to the diameter of the main sprocket, this meant that the engine / trans unit would need to be fairly high in the frame. If the motor assembly were heavy, this might cause me some concern. However, since I can lift the whole engine assembly (bad back and all), I believe that my Lard butt sitting lower than the engine would offset any high CG. However, since the engine was so far away from the main frame, I did not want to make the rear mounts as long as it would need to be to reach the main frame. I was concerned about torque issues and chain misalignment that may have resulted. That is why I built a subframe half way between the motor and the main frame. This way the rear mounts would be shorter and I could use lighter metal, but still keep the chain alignment constant. Many of the builds that I saw only used one adjuster at the rear. However, I went ahead and made adjusters for both sides. This way I can torque or twist the engine assembly so that I can get the proper sprocket alignment that is needed. Also, just like any part of a build, the second time you make something, it only takes about1/2 of the time. When I made the mounts/adjusters, I allowed for a fair amount of flexibility in sprocket size. Using a gearing / tire size calculator, my gearing as it stands is a fair bit lower, than what the quad came with stock. This may be a good thing, since I don’t know what the weight of the final project will be. However, I built in enough flexibility, that I could go lower or higher in the gearing and still be able to keep the chain aligned and tight. In reality, I am not trying to build a speed buggy. If I can get the same power to weight ratio as my Hammerhead (see Sig) on the first go around, I will be very happy. What I do want from this buggy is something that rides well and can keep up with the slower dirt bike riders in our group. The HH has the power, just not the suspension. Speaking as which, it is time to put the Pojo on hold for a little while. The time for our annual week long Easter desert trip is fast approaching. This means that I need to drag out the dirt bikes, HH and 5th wheel, to make sure that everything is quadrupled checked. You definitely do not want to break down on a ride, and it is no fun to break halfway through the week. I’ll throw up some picks of my toomanytoys as I get them all ready.
__________________
2005 Hammerhead 150 170cc BBK, PnP Big valve Head, A12 Cam, Uni Filter, Custom Exhaust, 10G rollers, 1500 Contra Spring, 2000 Clutch Springs Just added - 2007 Joyner 250 SV - Let the fun begin 4-Dirt Bikes, Baja Bug and enough toys to keep me in the garage and out of trouble.
|
|
#63
04-04-2014, 12:55 PM
|
||||
|
||||
|
Well I shot myself in the foot, or actually both feet. I live on a couple of acres, but I don't have a shop, just a big garage. However, my garage just got filled by two cars that My wife will not let sit out like our previous ones. We have always driven older cars, my wife's Passat was a 99. Well she wanted a diesel, so I found a screaming deal on a 2013 Jetta TDI. It is a little scary for me because I have never had a car payment before. So not only am I loosing garage space, but will have to see how the smoke clears for the POJO build funds. I also just found out that my baby is coming home from the schools paint shop. Because of the cost of the paint, the misses has also decreed that it stays parked in the garage. It is a 1973 VW Squareback. Also because of the painting, there are a few seals that needed to be replaced. I plan on doing a write up of it in another thread. So even though things have changed at the TMT2 house. The POJO will get finished. I have never started a project and left it undone.
__________________
2005 Hammerhead 150 170cc BBK, PnP Big valve Head, A12 Cam, Uni Filter, Custom Exhaust, 10G rollers, 1500 Contra Spring, 2000 Clutch Springs Just added - 2007 Joyner 250 SV - Let the fun begin 4-Dirt Bikes, Baja Bug and enough toys to keep me in the garage and out of trouble.
|
|
#65
04-20-2014, 06:54 PM
|
||||
|
||||
|
Hey T.M.T.,
Did you ever get any of my private messages? Maybe your inbox is full?.... Anyways I am still interested in some of those parts. Let me know. -Nick
__________________
Growing old is mandatory Growing up is optional https://www.youtube.com/watch?v=NEXoa-8d7qE
|
|
#67
11-21-2014, 01:15 PM
|
||||
|
||||
|
I tell you life has sure put a crimp in this build (other projects not health). I just can't seem to find time to get back to it. My first couple of projects were to raise the funds for the build. I rebuilt 2 VW transmissions, one manual and one Auto. Then the wife wanted a redo on the kitchen, and last my favorite car had to go in and get repainted. My other name is multi69s
http://www.thesamba.com/vw/forum/vie...er=asc&start=0 It may sound a little weird, but before I continue my next phase, I need the seats, but I just can't find any at a decent price. Believe me, I vow to finish this project, in fact, if I want to keep going to the desert, I will need to. My older body doesn't bounce very well when I fall on my dirt bike.
__________________
2005 Hammerhead 150 170cc BBK, PnP Big valve Head, A12 Cam, Uni Filter, Custom Exhaust, 10G rollers, 1500 Contra Spring, 2000 Clutch Springs Just added - 2007 Joyner 250 SV - Let the fun begin 4-Dirt Bikes, Baja Bug and enough toys to keep me in the garage and out of trouble.
|
|
#68
11-21-2014, 03:06 PM
|
||||
|
||||
|
Glad to see you're still lurking about --I know exactly what you're talking about -- when i put the buggy before home projects, the crap stacks up at an unbelievable rate. Sitting on 3 cars that were due for inspection in october, got 1 through and am working on the other two while driving them at the same time. Leaves are knee deep, firewood needs cut, split and stored, doors and windows need winterized ... then there's a pile of things to fix and sell ...
Don't know if you've looked at my latest project, but i scored a nice porsche 924 seat for free ... the "price" isn't the better deal with it, it's the width --18.5 inches, kind of an ideal size for a 1 or two seater. Given that the 924s are the ugly stepdog of the porsche family, finding one being parted out with seats for low cost might be easier than you think. The seat is pretty sweet too, if i didn't need it for the latest project, I'd put it in mine. BTW, the SB came out really nice looking. While i like minilites, not to sure if those fit the look --period yes, but the SB lines and those .... hmmmm .... I know of one sitting outside an old garage the next town over .... just what i'd need LOL always had a soft spot for vws 1 beetle, 2 dashers--both diesel, a rabbit and a scirocco in my past .... Last edited by x-bird; 11-21-2014 at 03:11 PM.
|
|
#69
04-24-2016, 02:16 AM
|
||||
|
||||
|
I hate to say this, but I think the POJO is dead. In my whole life (50 + years), I have never started on a project and not finished it. I put some pretty decent time and $$s into this project, but I just don't see finishing it. The main problem is that it is just too big. I've done a lot of measuring, and even though I have two trailers, I won't be able to fit it and my other toys on either of them. Instead, I will be looking for a Joyner 250. I can make it fit on my trailers, plus it is small enough to go down many of the trails that we like.
Thanks for all of your help and encouragement. David
__________________
2005 Hammerhead 150 170cc BBK, PnP Big valve Head, A12 Cam, Uni Filter, Custom Exhaust, 10G rollers, 1500 Contra Spring, 2000 Clutch Springs Just added - 2007 Joyner 250 SV - Let the fun begin 4-Dirt Bikes, Baja Bug and enough toys to keep me in the garage and out of trouble.
|
|
|
|