|
|
|
#1
 12-23-2012, 10:37 PM
|
||||
|
||||
|
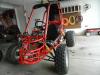
Thinking of swapping in an RM80 2 stroke in place of the GY6 on my spiderbox. Question is, do I mod the existing swingarm, or build a new one?
I see tons of posts about the crap axle, swingarm bushings, and so on, so would it be better to start over with a new design incorporating Heims for bushings, and a bigger, wider keyed axle from a conventional kart and be able to solve a few issues in one swipe. I see a lot of older threads on all these mods, but not one that addresses them all at once, or more than 2 at a time, and those threads are close to a year old now. I know everyone is busy this time of year, but some input would be appreciated on all the proposed ideas. Last edited by Masteryota; 03-03-2013 at 06:33 PM. 
|
|
#2
12-24-2012, 12:13 AM
|
||||
|
||||
|
I think that if I were to us a RM80 motor, I would try it on the stock swingarm first. Even though the 80 is going to have a lot more power then the GY6, is it going to have the type of power that you are looking for in a buggy? My other concern would be the clutch. You are going to be asking the little 80 to pull 3 to 4 times the weight then it was designed for. I'd hate to see you put a lot of work into new suspension only to find out that the clutch might not be able stand the abuse. Also, is it a newer water cooled motor or an older air cooled? You may need to duct in some cooling air for the older motor, or run a fan on the radiator for the newer style.
|
|
#3
12-24-2012, 05:54 AM
|
||||
|
||||
|
i mostly put such choices down to intended use of the buggy first. rough terrain riding? then ditch the swingarm idea altogether if you can. do you want top end speed or bottom end pulling power? again taking that into consideration helps direct both the suspension and engine choices. next comes reverse. if you want it, then look at incorporating a polaris type fnr transmission. keepign the existing swingarm takes enough mod work to alter it for the mounting process, along with beefing up its weak areas, that it's probably just as easy to build a new back end from scratch.
|
|
#4
12-24-2012, 06:04 AM
|
||||
|
||||
|
Quote:
|
|
#5
12-24-2012, 09:07 AM
|
||||
|
||||
|
Quote:
I am redoing the front end first, I know this is the Achilles heel of the spiderbox, and hopefully have this done before July, with that, I will be looking at 18-20" front tires and possibly 22" for the back, this is another reason I was thinking of starting from scratch and incorporating a bigger, longer axle to even out the tracking a bit.
|
|
#6
12-24-2012, 04:01 PM
|
||||
|
||||
|
main reason for ditching the swingarm is if you're going to be doing a good amount rough trails. Mine beats the P!$$ out of me physically because of the type of riding i like. I have a thread entitled "fun" here, gopro helmet mounted vid of 15 minutes of bobblehead X race hell (but i love it so LOL) The swingarm also puts a lot of torsional stress on the frame and through itself on uneven terrain and makes for a buggy with a lot of understeer in the corners.
|
|
#7
12-24-2012, 07:26 PM
|
||||
|
||||
|
Thanks for the input, I don't think an IRS is in my near future unless an engine with at least 40hp falls in my lap, and I can somehow come up with no cost CV axles as well. Thinking more about the stress of the swingarm makes me rethink the idea of heims, and maybe going for a more conventional tube and bushing design but with bronze or nylon inserts. Either way, it will be waay better than the stock design, imo. I am looking for quad engines now, thinking about having reverse makes me all warm and fuzzy inside, maybe its the old age catching up to me, lol.
Any thoughts on converting this thing to a single seater? I'm a big dude, and the stock seats don't fit me well and I might want the extra space for the shifter and such.
|
|
#8
12-24-2012, 07:43 PM
|
||||
|
||||
|
Quote:
|
|
#9
12-24-2012, 10:24 PM
|
||||
|
||||
|
you should be able to install a bucket seat from an import pretty easily; just need to remove it with the slider tracks. Put a pair of box tubes perpendicular between the side framerails and drill 4 holes.
|
|
#10
12-26-2012, 10:44 AM
|
||||
|
||||
|
Looks like I won't be swapping in the RM80 after all, too many compromises on my end, low torque, no lights, kick start, no reverse, etc.. Now I'm looking to quad engines for reverse, and maybe a rebel 250 engine as back up plan. I would like to stick with air cooled for simplicity, but won't turn down a liquid cooled for the right price. Now for the next issue, there are no known motorcycle salvage yards for 250+ miles around NE Florida
 Anyone know a good place for these type donor engines?? Also, I don't want to spend big money. Anyone know a good place for these type donor engines?? Also, I don't want to spend big money.
|
|
#12
12-27-2012, 12:18 PM
|
||||
|
||||
|
I've come to terms with putting a rebel engine on the Yerfie, although no revere, the 5 speed trans is appealing, as long as I don't have to fork over much cash. I see some threads here on doing this swap, but still no finished products. Will keep everyone up to date on it.
@bear, I looked for hours and called several used part places and the best I got was there was one in homasasa at one time, but no confirmed salvage yards. Any one have the thread handy for 'grafting' pipe to the axle hubs handy? I think I will try to retain the stock axle, just modded and flipped to line up the chain(I hope). Also, if anyone knows off hand the size bearing I would need to install in the center of the axle to add some strength, I would be in debt to you all.
|
|
#14
12-28-2012, 07:19 AM
|
||||
|
||||
|
Quote:
'
|
|
#15
12-28-2012, 12:48 PM
|
||||
|
||||
|
I was thinking of going with a 1" or 1-1/4" kart axle in place of the stocker, but was looking at saving $$. That being said, I will most likely build a new swingarm from scratch and go that route, right now I'm trying to find a good engine at a fair price before I do anything else. Anyone dealt with anything made by Hyosung? Looking at a 250cc, v-twin cruiser for cheap, on paper they sound good, but I know better than to go by whats written.
http://www.bikez.com/motorcycles/hyosung_gv250_2012.php
|
|
#16
12-28-2012, 02:24 PM
|
||||
|
||||
|
About a year ago Dirtbike magazine did a review on a Hyosung 125 dirt bike. They semed to think that the engine was very good in quality, but the frame and suspension were sub par.
|
|
#17
01-15-2013, 09:15 PM
|
||||
|
||||
|
Update.
Scored a ATC 200s for the engine, although no reverse, it has a semi-auto 5 speed trans and its air cooled. Looked up the specs for the engine, and it puts out a stout 13.5 hp and 11 ft.lbs. of torque, a far cry over the Howhit. Only drawback is its pull start only, but that just means less electrical to mess with and fail. I'll post pics as soon as I get rolling with the swap. 
|
|
#18
01-16-2013, 10:56 AM
|
||||
|
||||
|
I'd love to see that. I just happen to have a 200 atc also, and I have been thinking along the same lines.

|
|
#20
01-16-2013, 04:10 PM
|
||||
|
||||
|
Quote:
I do have a question, for who ever is savvy with the old honda's. I do not see a regulator anywhere on this thing, but it is wired for a headlight, could I add a battery to the system for auxiliary lighting? Or would I need to incorporate a rectifier/regulator somewhere?
|
|
#22
01-16-2013, 05:44 PM
|
||||
|
||||
|
As for the starter, i've seen a kit that is basically a couple pullies and a longer pull rope.
It routes the pull starter up and overhead into the cab. So all you do then is pull down on the D handle. Not as convenient as elec start, but effective none-the-less.
|
|
#24
01-16-2013, 07:03 PM
|
||||
|
||||
|
I was going to mention xlint's deal, there was a guy selling kits for yerfs/other lawnmower karts, but i think that goes back about 5-6 years. He had a personal webpage up shgowing all his mods and t he pulley system. Might've been one of the guys involved with the old yerfernet ...
Anywho, here's a link to what i was talking about. it's to convert a honda engine to alternator, but one could stop at the stator/regulator phase and have what you want. XXXXXXXXXXXXXXXX Sorry, link doesn't work as a posting. i can get into the guy's site, but it still won't let me complete the url to get the download. if you google: Per-Mag-Alt-Instructions .pdf you should see a site link entitled GETTING THE PARTS - wwwgofastforless.com Click on that and it will auto download the file I was digging pretty deep in stator diagnostics search results when i came across it. I'm pretty good a finding really old not-too-easily linkable archived stuff. Last edited by x-bird; 01-16-2013 at 07:12 PM.
|
|
#25
01-16-2013, 10:23 PM
|
||||
|
||||
|
Thanks X, but I think most of that article is based on converting a old style generator engine to a newer alternator w/regulator. What I have already has a 'lighting coil' but I don't see a regulator/rectifier anywhere on the bike or in the parts manual. If it supports some LED lights up front and a tail/brake light round back, I will be happy. I see on the 3 wheel forums they say its normal for the lights to dim down at idle, which leads me to believe there should be a rectifier somewhere, as its appears to be very similar to my '85 evinrude outboard set up.
|
|
#26
01-16-2013, 10:34 PM
|
||||
|
||||
|
btw, think polaris F-N-R box to get reverse. 325/425s are pretty common choices. as far as the regulator goes, check around on the tucked into the airflow on the underside of the frame under the seat. i haven't really looked at one of those old 3-wheelers in 20+ years ...
Last edited by x-bird; 01-16-2013 at 10:37 PM.
|
|
#27
01-17-2013, 06:47 AM
|
||||
|
||||
|
Quote:
|
|
#28
01-17-2013, 05:35 PM
|
||||
|
||||
|
i have an original first-run trailboss 250 FNR box i took the driven unit off. i'll check the shaft type, can't see why you couldn't convert to a sprocket on one. should be a lot of build threads showing them coupled to different engines.
|
|
#29
01-17-2013, 05:44 PM
|
||||
|
||||
|
Quote:
|
|
#30
01-18-2013, 08:58 PM
|
||||
|
||||
|
Tore into the donor engine today and fixed the recoil start, except it hangs up every now and then. Moving on, I gots no spark. Removed the pulse generator cover on the head, hoping to have bug guts and cob webs blocking the signal, and parts fell out............. It appears the timing pin in the cam either sheered or came loose at some point and 'walked' the rotor out just enough to break the head off of the retaining bolt in the end of the cam. I was able to get the bolt out, but I see some damage to the area around where the pin locks into the cam, and one of the weights on the spark advance is also broken. I really don't want to put another cam in this thing, and pulse generator parts are looking scarce at best.
So, tomorrow I will be tearing into the frame and reinforcing the bulkhead, as my welder parts finally migrated to the house via USPS.
|
|
#32
01-19-2013, 02:37 PM
|
||||
|
||||
|
Are you talking about generic scrap, or bike scrapyards?
There might be some light at the end of the tunnel, signed up with a 3 wheeler forum, and a little searching, found that the cam from an xr200 dirt bike will fit in my atc  and better yet, they are relatively cheap, and even better, looks like they make more power than stock and better yet, they are relatively cheap, and even better, looks like they make more power than stock I found one: http://www.ebay.com/itm/HONDA-XL-200...96b20c&vxp=mtr Still looking for the pulse generator parts......
|
|
#33
01-19-2013, 05:41 PM
|
||||
|
||||
|
generic scrapyards. have a chat with one of the "claw" ops or the yard manager; most yards usually set aside decent structural metal, motorcycles, quads, tractors, golf carts etc. because they know the tinkers will buy them for a little percentage over light iron price.
|
|
#34
01-19-2013, 07:07 PM
|
||||
|
||||
|
Interesting, I was actually going to call one in the hopes that I could score some plate/angle iron for cheap. Did not think about bikes and such being there, I did see some threads on old mini bike forum about a few guys picking up like 9 B&S flat heads for $40 or something.
|
|
#35
01-20-2013, 06:16 PM
|
||||
|
||||
|
If you can make friends with someone at the scrap yards, you can score some great stuff. My neighbor is the yard supervisor at one and through him I got a yerfdog and a Kawasaki Brute force ATV for free. I say free, but he is restoring a car and when it comes to the hard stuff, I am the point man.
I am parting out the yerf, but got the bruteforce going with $200 of ebay parts. I told him that I was looking for any ATVs to do some suspension swapping, but when he pulled into my yard with the kawai in the back of the truck, I just about  in my pants. I saw the independent suspension and thought of what kind of buggie I could build with it, but that got nixed by the wife and kids. Now they use it to cruise around the property and I put a hitch on it and use it for chores instead in my pants. I saw the independent suspension and thought of what kind of buggie I could build with it, but that got nixed by the wife and kids. Now they use it to cruise around the property and I put a hitch on it and use it for chores instead  It is unbelievable what ends up in the scrap yards - good luck
|
|
#36
02-17-2013, 06:43 PM
|
||||
|
||||
|
Small update, waiting on slow shipping on my spindles, so I decided to weld up the roll cage on the Yerf. I decided to add 1 inch to the main bar to make it tall man comfortable. Boy what an undertaking, lol, but I got some progress to report, most of the time I spent notching the tubes to fit by hand, which kinda sucks, thinking of making a trip to HF and pick up a notcher, even though I might only use it a few times. All the tabs are off, and the main bars have a 5 inch slug inside the extension for added rigidity, I know, the materials are not top notch DOM tube, but it sure beats the heck out of the cheap bolt/flat pipe set up from the factory. Got it mocked up, and welded the extensions while I contemplate buying a notcher this week.
Can anyone with a spiderbox tell me what the angle is on the top bar relative to the bottom bar, I had this one taken apart before checking, I know the bottom part is 60 degrees, but the top I think is a different angle, I set the bar back up and got 75 degrees, but want to make sure before welding it up. Last edited by Masteryota; 02-17-2013 at 07:33 PM.
|
|
#38
02-19-2013, 04:59 PM
|
||||
|
||||
|
dunno if this help. I also extended the upper roll cage down tubes to afford some more head room. My upper section is angled so that the rear "basket"( where the tank is mounted) is level with the frame base. The side tubes of the upper roll cage from front to back are also level with the base. It may not appear so because of the angle the picture was taken from.
|
|
#39
02-19-2013, 06:45 PM
|
||||
|
||||
|
Thanks CK, after looking at it more, I see that rack is angled down quite a bit as it sits.
Last edited by Masteryota; 02-24-2013 at 09:13 PM.
|
|
#40
02-24-2013, 09:17 PM
|
||||
|
||||
|
Another day in the books, and got the top main bar secured, along the way, I found it was twisted a bit, which threw me off for about an hour, but with the help of some hefty ratchet straps, I was able to square it up and get it welded in place with just 1-2 degrees difference in the uprights. Even started to add some bracing to the down tubes, mainly for piece of mind, but still, don't want to gamble with this stuff.
|
|
#42
02-25-2013, 10:22 AM
|
||||
|
||||
|
Thanks Tom, I have to try and get as much done as I can before August, I figure if it's least a roller, it will be much easier to move.
|
|
#43
03-03-2013, 06:45 PM
|
||||
|
||||
|
OK, so got the the top bar all squared away and braced in. Added a piece of 1/4" plate across the front section of the main frame, as I see a lot of Yerf pics with the welds cracked right there. I finally got my front spindles in Saturday, and installed them today, I plan on running a 20x7x8 up front, but left enough spacing in case I want to run something wider, if my calculations are correct, I should be able to squeeze a 10" wide tire up there without spacers, just threw a coat of flat black rustoleum on there for protection.
Managed to get one of the cage bars tacked in today, just in time for the temp to drop into the 30's. Moved the bar 2" outwards on the top, and tried to keep the bar somewhat close to perfectly vertical, and added roughly 5" to the front pipe to make it fit. Good thing I decided to scrap the rear loop thing off the back, cause thats where the extra came from, lol.
__________________
ASE Master and Toyota Master Diagnostic Certified Buggy Building Trainee '04 Dazon Raider 150 'modded'
|
|
#45
03-03-2013, 07:48 PM
|
||||
|
||||
|
Heavy is right, but in that area, I don't want to take any chances. I'm slowly realizing that with all the upgrades, this buggy will be a bit heavier than I planned, but should be rock solid.
__________________
ASE Master and Toyota Master Diagnostic Certified Buggy Building Trainee '04 Dazon Raider 150 'modded'
|
|
#47
03-03-2013, 09:28 PM
|
||||
|
||||
|
Yep, those were broken when I bought it, and already got the BD lifetime warranty set. Will be replacing the sheet metal mounting tabs on the A-arms too. When I add up all the add-ons, mods and bracing, this thing should be damn near bulletproof.
__________________
ASE Master and Toyota Master Diagnostic Certified Buggy Building Trainee '04 Dazon Raider 150 'modded'
|
|
#49
03-04-2013, 07:40 PM
|
||||
|
||||
|
Quote:
On a different note, has anyone ever given thought to adding some expanded metal to the lower front frame tubing to protect against the front tires from slinging crap on you? I see some using plastic sheeting, but around here, plastic is crazy expensive for something I might rip off on the trails. Let me see if I can highlight the areas to make it easier to explain. Forgive my horrible paint skills, I'm much better wielding a welder or wrench, I promise.
__________________
ASE Master and Toyota Master Diagnostic Certified Buggy Building Trainee '04 Dazon Raider 150 'modded'
|
|
#50
03-04-2013, 08:31 PM
|
||||
|
||||
|
Quote:
|
|
#51
03-04-2013, 08:50 PM
|
||||
|
||||
|
Not to change the general subject, but they will have to pry them from my cold dead hands. Now that we know where I stand, any thoughts on the expanded metal?
__________________
ASE Master and Toyota Master Diagnostic Certified Buggy Building Trainee '04 Dazon Raider 150 'modded'
|
|
#53
03-04-2013, 10:44 PM
|
||||
|
||||
|
Water, mud, and air I'm not worried about, rocks and sticks I am concerned with. Sheet metal would do, but I want some airflow options as well, and as anal as I know I am, I wouldn't be satisfied with sheet metal sides warped from riding and welding, lol. I do have some concern as to what, if anything, would interfere with adding the metal, namely, would 20x7x8 tires hit the frame and chew the rubber off on the expanded metal.
__________________
ASE Master and Toyota Master Diagnostic Certified Buggy Building Trainee '04 Dazon Raider 150 'modded'
|
|
#54
03-05-2013, 05:45 AM
|
||||
|
||||
|
best thing to do is figure in possible tire size upgrades by jacking it up, pulling the shocks and measuring existing radius in turning position/suspension cycle and seeing what you have clearance-wise. then you'll know what you can do with it and add something that won't interfere. i took the route of welding nuts to the inside top and bottoms of the frame tubes and cutting sheet metal to fit between. definitely made a big difference and i don't take them off no matter what season--little colder up here though. i'd do the same if i went with expanded metal--i'd weld washers to the expanded, nuts to the frame and do them as bolt-ins between the tubes. when you need to work on the front end, (brakes/gas pedals, shocks, a-arms, rack etc.) it's nice to have them be removable. I took my front fenders off for visibility reasons and they need to go back on as i've pitched some pretty nasty chunks off them. -- best reminder to put them on was catching an old rusty, heavy hinge-half in mid air as it went for my face off the front tire.
|
|
#55
03-05-2013, 08:50 AM
|
||||
|
||||
|
Thanks X, you got my gears turning upstairs, found some heavy plastic laying out back of the shop, might just use that to close in the front, I was looking to use it to add some rear protection behind the seats, but may go with mudflaps instead since the rears wont be turning, making it easier to predict the debris field.
__________________
ASE Master and Toyota Master Diagnostic Certified Buggy Building Trainee '04 Dazon Raider 150 'modded'
|
|
#56
03-07-2013, 05:52 PM
|
||||
|
||||
|
Think I got the frame done today, added the passenger side main bar, and 2 cross members. I was originally thinking 2 for the top, but after I got the 1 tacked in, I think it will be fine like it is, although I am thinking of adding 2 tie bars from the top cross bar back to the roll bar, making a V at the roll bar, watchu guys think??
Will be moving on the the front end this weekend, finally.
__________________
ASE Master and Toyota Master Diagnostic Certified Buggy Building Trainee '04 Dazon Raider 150 'modded'
|
|
#57
03-07-2013, 10:36 PM
|
||||
|
||||
|
my main "issue" with most of the mini buggy "cages" is the lack of proper triangulation to prevent collapse. while most will not totally crush down on a low speed roll, going over into a tree or at speed is a pretty scary thought. Once you get the rear suspension/engine in, give some thought to coming down off the back top corners to the rack ends then angling back to the frame to offer more support for a frontal direction hit and roll overs. the kink in the main upright is another good place to angle back and down from to help it out.
otherwise, looking good, beats the hell out of bolt together. I made sure there's no way my head can get through the top of the cage in the event of a catastrophic mess and seat or harness anchors letting loose. check out the dude backflipping the yerf on youtube somewhere south of the border--i still wonder if he survived. Sure enough, When i flipped mine, the junk harnesses i had in it at the time slacked enough for me to have my head/helmet up into the top bars and my arm all the way through past the elbow which got crushed between the ground and bars.
|
|
#58
03-07-2013, 11:02 PM
|
||||
|
||||
|
I was actually thinking of doing support bars to the back rack, but hadn't thought about running another bar back to the frame. Looking at the frame throughout the build, I noticed the main roll bar has almost no bracing besides the roll cage bars, so yeah the idea of running a couple bars diagonally out to the corners had crossed my mind.
As for the top, I was toying with the idea of doing a few bars, creating a ladder looking brace, but I thought it would be overkill and not do much more than 1 well placed bar. Right now I am toying with the idea like Ckau did with his, and brace the bars with additional diagonal tubes, especially on the insides, to help with side roll overs.
__________________
ASE Master and Toyota Master Diagnostic Certified Buggy Building Trainee '04 Dazon Raider 150 'modded'
|
|
#59
03-10-2013, 05:20 PM
|
||||
|
||||
|
Small update today, time change screwed up my sleep schedule, so got a late start. Was able to get some 3/16" plates welded to the bulkhead, and brainstormed some ideas for further frame bracing, about the same time one of my saw horses decided it was its time to go. Yep, that was a bit scary, seeing the buggy, various tools, pipe and plate steel come crashing down. Good thing I wasn't in the way, scared the sh!t out of the neighbors though. So my next endeavor will be constructing a heavy duty rolling table and then back on the front end.
I do have a question for the other spiderbox owners, is it worth bracing the sides of the bulkhead where it bolts to the frame tongue? I was going to, and then stopped, no need adding more weight if it isn't in a failure point. I will, however, be drilling out the holes to accept some 5/8" or 3/4" grade 8 bolts. Also, should I brace the back control arm tabs as well as the front?
__________________
ASE Master and Toyota Master Diagnostic Certified Buggy Building Trainee '04 Dazon Raider 150 'modded'
|
|
#60
03-29-2013, 03:04 PM
|
||||
|
||||
|
Long time no updates. After a minor back injury at work slowed me down to a crawl, I managed to set aside some time to work on my donor engine since I had the pulse generator and new carb sitting on my workbench. Got the cam back in and the ignition components in place, and before I put the carb on, I wanted to see if there was spark after all this. Nope, and when I pull the plug, it comes apart in my hand, with the threads still in the head. It appears someone has siliconed the entire spark plug into the cylinder head, oh joy!
So this exercise has pushed me to go ahead and replace the stock piston with the flat top piston from the 200x model, which I was on the fence about anyways. Since I will ultimately have to take the head off, I might as well snatch it out of the frame, and do it on the bench, and hope the trans is in decent shape, since I won't be able to test it on the bench. This will afford me the chance to go into the clutch and replace the springs like I wanted to do for the added weight of the buggy.
__________________
ASE Master and Toyota Master Diagnostic Certified Buggy Building Trainee '04 Dazon Raider 150 'modded'
|
|
#61
04-13-2013, 03:58 PM
|
||||
|
||||
|
Ok, well I decided to pull the engine out of the 3 wheeler before I tore the engine down, and good thing I did, I figured out what was leaking oil from the front of the case, a crack in the case, likely from someone else having the case halves apart at an earlier point. Now I am pondering whether I should even fix this thing, or find something more suitable, maybe something with a starter and reverse. Oh the hits keep coming.
Didn't get alot done on the frame today either, except beefing up the bulkhead by adding some 3/16" plate to the tab areas, and added 2 more supports for the now welded in roll cage before running out of argon. I did manage to snap a pic of the broken off spark plug in the hole, the shiny part in the middle of the hole is the ground strap still in there with the threads.
__________________
ASE Master and Toyota Master Diagnostic Certified Buggy Building Trainee '04 Dazon Raider 150 'modded' Last edited by Masteryota; 04-13-2013 at 04:41 PM. Reason: wrong part description
|
|
#63
04-13-2013, 04:43 PM
|
||||
|
||||
|
What do you think Tom? Should I bother with the case, or move on and find something else? I really was hoping to not tear into another engine right now( have rm80 apart and honda gx200 needing a heli coil in the plug hole).
__________________
ASE Master and Toyota Master Diagnostic Certified Buggy Building Trainee '04 Dazon Raider 150 'modded'
|
|
#64
04-13-2013, 05:05 PM
|
||||
|
||||
|
If it had electric start and rev I'd say fix it, but me personally would not put an engine in without electric start or reverse. I drive mine like I stole it so I have the 5 point harness in mine and could not or I should say do not even want to think if I had no reverse where I'd have to unbuckle, get out and push it. There are plenty of instances where I need reverse.
|
|
#65
04-15-2013, 11:13 AM
|
||||
|
||||
|
Well I might be up poops creek here, metaphorically at least. I am not finding much for sale for less than my first born, so I think I will have to fix this one as I am now on a time constraint with us moving in august. I think I'm going to try some metal epoxy first, and see how it holds up, worst case scenario, it still leaks and I have to go into the case. I have made the decision to build a swingarm from scratch, seeing as mine is going to need EXTENSIVE mods to do what I want. If I happen on a better option along the way, it shouldn't be too difficult to change it up.
__________________
ASE Master and Toyota Master Diagnostic Certified Buggy Building Trainee '04 Dazon Raider 150 'modded'
|
|
#66
04-15-2013, 04:34 PM
|
||||
|
||||
|
I thought you had an old quadrunner out in the back forty? 5-spd, elec start reverse, 250cc.
if you decide to build a swingarm, take a look at N1kogr's latest build thread, he made a nice simple set of chain-drive trailing arms that wouldn't be difficult at all to replicate.
|
|
#67
04-15-2013, 05:13 PM
|
||||
|
||||
|
Nope on the quadrunner, I do recall someone else saying that though. I looked at one at a boneyard, but they wanted like $500 and it smoked like a chimney.
I was thinking about IRS, but I think I will keep this one simple and square. Was looking at the old swingarm, and what I am going to run for an axle, and the engine mount locations, and to add the support I want for the axle bearings, I would all but chop that one up to get where I want. In the short of it, I will go wider, as to allow for more bearings and have them spaced apart equally(planning on using 4 pillow blocks), and boxing in the main tube will allow me to easily add another brake later, if needed. I am really kicking myself right now, I tossed out a 1986 TRX200sx about 6 months ago in the move, and that would have been the perfect engine for this buggy. If I can scrounge something up better suiting my needs, I will consider it, but at this point, I need to keep moving forward to hit my deadline.
__________________
ASE Master and Toyota Master Diagnostic Certified Buggy Building Trainee '04 Dazon Raider 150 'modded'
|
|
#68
04-21-2013, 06:38 PM
|
||||
|
||||
|
Got part of my front end mocked up/partially finished today. First broken weld today as well, was trying to use some plated 1/4" plate cut from a motorcycle hitch bracket, need less to say, no penetration and its alot softer than I had imagined. Cut new ones from regular 1/4" plate, and oh so much stronger. Bulkhead bolted down with oversized grade 8 bolts(3/8" up top and 1/2" for the sides). I know I said I was going with heims up front, but with the time constraint and budget dwindling, I cleaned up the bushings and will use them for now, although I am considering using something different than bolts running through them. Anyone know the hardness of 1/2" round stock?? I am betting it isn't even close to grade 8.
Wanted to get a wheel on the front, but didn't have enough bearing grease to install the hubs. Oh well, there's always next weekend. I do have one other question. I opted for the Latest Rage brand 11" replacement steering rack, and it has heims for the inner tie rods. They want me to use their outers @ $28/ea. I am thinking of chopping the stock inner joint off the sleeve, and welding a clevis on the end and popping a heim on the spindle end. Would it be a safe idea to make my own clevis, or outsource one? It would likely be 3/16" steel if I make it myself, and would it be beneficial to opt for a lower grade bolt on the clevis to help not destroy the inner heim and rack?
__________________
ASE Master and Toyota Master Diagnostic Certified Buggy Building Trainee '04 Dazon Raider 150 'modded'
|
|
#69
04-22-2013, 06:13 AM
|
||||
|
||||
|
most rod stock is "farm" grade to grade 3 at the highest. a couple pieces of 3/16 plate is fine to make a clevis with--same way i did it. i put the "weak" point in mine by making my own bolts from 10mm aluminum at the tie rod to steering arm point. when i had regular bolts in there, a stump shot completely wasted my 1 inch gusseted tubular steering arm. The idea has proven itself in the rough stuff i've done 3 replacements "in the field" takes about 2 minutes and haven't sustained any damage to the arms etc.
|
|
#70
04-22-2013, 07:26 PM
|
||||
|
||||
|
Thanks X, how did you go about making the bolts from aluminum? I was thinking some nice soft stainless steel or an aluminum pin and hitch pin set up for quick changes, but I might opt for the spindle end to put the breaking point of the front end now that I think about a shaft tied to the wheel bouncing around near my feet

__________________
ASE Master and Toyota Master Diagnostic Certified Buggy Building Trainee '04 Dazon Raider 150 'modded'
|
|
#71
05-15-2013, 09:16 PM
|
||||
|
||||
|
Random updates, little by little getting things nailed down. So far I have the front end reassembled, rack mounted, spindles extended for new tie rod mount, with shocks disconnected, we have ~12 inches of travel, and that maxes out the working angle of the BD ball joints. I have mocked up the front end with the stock rear shocks(12") and still have room for another 1.5". Will be scraping the tie rod sleeves and making my own with heims at the end.
Removed and stripped the swingarm today. Boxed in and braced, ready for bearing #3, as soon axle arrives, will start on boxed ends for bearing #4 and #5 on the outsides. Mocked up a simple strut the same length as the Blaster shocks for mock up, might drop the rear an inch or two, still thinking it over. Placed the 200 honda engine in the swingarm, and boy do I have work to do, first off cutting and rerouting the drivers side top bar to clear the recoil cover, and chopping the upper most mount bar out to clear the carb. Gasket kit and replacement case half are in hand, and will order piston kit after I check the cylinder out.
__________________
ASE Master and Toyota Master Diagnostic Certified Buggy Building Trainee '04 Dazon Raider 150 'modded'
|
|
#73
05-18-2013, 05:48 PM
|
||||
|
||||
|
Quote:
Looking good, make sure you have the rack oriented correctly or you'll be joining the Polish Rally driver's club with me and a couple others )))
|
|
#74
05-18-2013, 06:40 PM
|
||||
|
||||
|
Believe me, I measured about 18 times before pulling the trigger on the welder for the mount, I was having some trouble with the inner heims not being at the same angles on both sides, but after removing the bellows, I came up with a simple solution of putting 3/8" flat washers between the rack gear and the outer bellows clamp spacer, and now they are perfectly vertical waiting on the clevis's I'm going to make once the outer heims arrive. I did have to make some modifications to the steering column to fit around the now welded in roll cage.
I checked with my local Fastenal, and turns out they can get me aluminum fasteners in all different sizes, so I will load up on some bolts for the inner and outer rod ends, I figure that would be easier than breaking heims, although I made sure to used the same heims for both the inner and outer tie rods. On a separate note, I was able to machine down some scrap 530 sprockets using the brake lathe at the shop, its a slow process, but effective. Also, I need clarification on polish rally, I am assuming turns only one direction??
__________________
ASE Master and Toyota Master Diagnostic Certified Buggy Building Trainee '04 Dazon Raider 150 'modded' Last edited by Masteryota; 05-18-2013 at 06:43 PM.
|
|
#75
05-19-2013, 04:15 PM
|
||||
|
||||
|
if you have your rack upside down, or switch from front to rear steer on the steering arms and don't change the top to bottom position of the pinion, you end up with "turn wheel steering wheel left, wheels turn right ..." I had mine set in so beautifully geometry wise only to hop in and jsut about cry when i test the turning radius--- polish rally club moniker also comes from my days working the scca pro rally series as a course sweep and chase driver ... buddy who now co-drives for a mid level pro was my nav and i'm a bit dyslexic sometimes in my reactions shall we say ...gave ourselves a few fun moments up in por, wellsboro and tiadaghton ...
|
|
#76
05-19-2013, 07:25 PM
|
||||
|
||||
|
Ahh, I see. No worries there, the rack is a simple design, very similar to the stock spider rack, except it is completely centered. The only thing that really concerns me is the bump steer and the final ackerman angle with making the mods to the steering knuckle. If nothing else, I'll just steer with the throttle.
__________________
ASE Master and Toyota Master Diagnostic Certified Buggy Building Trainee '04 Dazon Raider 150 'modded'
|
|
#77
05-19-2013, 08:40 PM
|
||||
|
||||
|
I guess I need to me a member of the Polish Rally club. It wasn't in a car, but a boat. My dad and I built a 20' stern drive boat and we didn't realise that we hooked the steering cables backwards. It was definately an intersting experience, especially for the first time pulling up to a dock and trying to load it on the trailer.

__________________
2005 Hammerhead 150 170cc BBK, PnP Big valve Head, A12 Cam, Uni Filter, Custom Exhaust, 10G rollers, 1500 Contra Spring, 2000 Clutch Springs Just added - 2007 Joyner 250 SV - Let the fun begin 4-Dirt Bikes, Baja Bug and enough toys to keep me in the garage and out of trouble.
|
|
#78
05-27-2013, 12:36 PM
|
||||
|
||||
|
I finally got the front end completed(I hope), and here is a pic of the final tie rod set up wih the centered rack design. I know it isn't perfect and it does have some bump steer, but I don't think its as much as stock. I do wish to incorporate some ackerman into the spindles at some point. In hind sight, I should have used the 8" rack but it would have cost me a lot of turning radius versus the 11" unit.
I began to mock up the engine into the swingarm yesterday, and started making mods, but nothing significant yet. Today I began my engine work, since I am like the only person working today..... So far it doesn't look too bad, I'll brush the cylinder and see how it looks, and try to replace the cracked case half today. The upgraded clutch springs should arrive tomorrow, and maybe have the engine ready for the piston kit by the weekend.
__________________
ASE Master and Toyota Master Diagnostic Certified Buggy Building Trainee '04 Dazon Raider 150 'modded'
|
|
#79
06-07-2013, 10:01 PM
|
||||
|
||||
|
Update- Will be slowing down on the build for a bit, till I get finances figured out, do have the engine almost ready, as soon as parts arrive.
I may opt to reinstall the original axle for now and may or may not hook up the engine as I already have the materials to make the mounts. Still up in the air though.
__________________
ASE Master and Toyota Master Diagnostic Certified Buggy Building Trainee '04 Dazon Raider 150 'modded'
|
|
#80
06-26-2013, 06:28 PM
|
||||
|
||||
|
Almost have the engine back together and ready for mount fabrication. Meanwhile, working on the swing arm and getting the ride height and swing arm angle sorted out for the correct engine angle. Chopped the original go and stop pedals up and used them for the upper mounts, they were just the right spacing apart to not use them, and the lower from good ol' 1/4" plate. These are blaster shocks, measured at 13.5" eye to eye. Managed to get one mounted, and modified the original swing arm bushings to work by staking the swing arm portion enough to create a tight fit, and found some copper washers from work that should keep the bushings in place(they were sliding in the swing arm, otherwise in good condition), I know its not the best option.
__________________
ASE Master and Toyota Master Diagnostic Certified Buggy Building Trainee '04 Dazon Raider 150 'modded'
|
|
#81
06-26-2013, 06:40 PM
|
||||
|
||||
|
you're probably want to take a grinder to the upper shock mounts to carve recesses between each hole to clearance the shock body if you want to use the other positions. That and the spot just ahead of the lower shock mounts on the swingarm is an area you'll want to reinforce against cracking. keep at it ...
|
|
#82
06-26-2013, 07:49 PM
|
||||
|
||||
|
Quote:
I will work on the reinforcements too, but in general, where do the cracks usually start, inside, outside, cross member?
__________________
ASE Master and Toyota Master Diagnostic Certified Buggy Building Trainee '04 Dazon Raider 150 'modded'
|
|
#84
06-27-2013, 05:33 AM
|
||||
|
||||
|
Thanks, I am still unsure of the tubes are going to stay, I modded one already to clear the pull start cover, and have to cut the cross tube out to clear the intake. Once I get the engine completed, I will decide what to chop, and what I can keep.
__________________
ASE Master and Toyota Master Diagnostic Certified Buggy Building Trainee '04 Dazon Raider 150 'modded'
|
|
#85
06-29-2013, 05:33 PM
|
||||
|
||||
|
Got the oil cooler taps in today, finally, and I gotta say, it was pretty simple, and relatively inexpensive.
I used 1/8" 90 degree to 1/4" barb fittings found at any hardware store. I had planned on using a brass plug of the same size to block the passage in the middle, but it wasn't long enough to fully seal off the opening. I decided to use an 8x1.25mm bolt instead, as I had them lying around and I already had the taps. I did go all the way through the case, and that means no going back, unless I want to buy another case, or get really creative about plugging the holes. I am/was nervous about the fittings, and the amount of aluminum left around the threads since these are tapered fittings, but I followed the instructions I found for the old Derale kit online, and they seem to fit rather well. I decided on a whim to run the cooler towards the back of the swing arm, mainly to avoid kicked up debris. Added the last pic for any doubts about my sig line.
__________________
ASE Master and Toyota Master Diagnostic Certified Buggy Building Trainee '04 Dazon Raider 150 'modded'
|
|
#87
06-30-2013, 01:01 AM
|
||||
|
||||
|
Looks good,
In the long run, I'm sure that you will be glad that you did it. I can see why you would have been nervous to do it. Did you use a drill press, or did you just eyeball it with a hand drill?
__________________
2005 Hammerhead 150 170cc BBK, PnP Big valve Head, A12 Cam, Uni Filter, Custom Exhaust, 10G rollers, 1500 Contra Spring, 2000 Clutch Springs Just added - 2007 Joyner 250 SV - Let the fun begin 4-Dirt Bikes, Baja Bug and enough toys to keep me in the garage and out of trouble.
|
|
#88
06-30-2013, 07:55 AM
|
||||
|
||||
|
Quote:
Quote:
__________________
ASE Master and Toyota Master Diagnostic Certified Buggy Building Trainee '04 Dazon Raider 150 'modded'
|
|
#90
07-06-2013, 09:20 PM
|
||||
|
||||
|
Well, I have the engine mounted in the swing arm, what I thought would take a few hours has taken 1.5 days, and still need tweaking.
The first pic has what I had planned to use for the exhaust, but obviously I will be doing something else, lol. I do have a question, this engine has 5 mounting points, two in the front lower case, one on the very bottom rear, one at the top of the case at the very rear of the case, and one more on the head. Since I have to fab all the mounts, I was wondering how many would be sufficient, and still allow for relatively easy engine removal, if needed later. I have 3 mounted so far, and had a fourth, but it was almost impossible to remove the engine, so now its been removed. The second pic shows the 4 mounts on the lower case, the red ones are mounted, the removed 4th mount is the green one. I did run into another issue, the frame in front of the engine will need to be cut and clearanced to clear the valve cover when the suspension articulates. Also, it might get a little warm in the passenger seat. I may consider cutting them out and moving the engine back a bit, but I fear I may not have enough room for the jackshaft 
__________________
ASE Master and Toyota Master Diagnostic Certified Buggy Building Trainee '04 Dazon Raider 150 'modded'
|
|
#91
07-06-2013, 10:35 PM
|
||||
|
||||
|
I think that the 3 bolts that you have would be fine as long as you use a head stay. You could make a crossbar that is removable, so engine removal would still be easy. I threw in a picture to ponder. Weld on some little stubs to the swing arm with flanges on top. Then make a crossbar that would pickup the head stay and bolts to the flanges. The crossbar would be removable (4-bolts) and then you would have full access.
Something to ponder 
__________________
2005 Hammerhead 150 170cc BBK, PnP Big valve Head, A12 Cam, Uni Filter, Custom Exhaust, 10G rollers, 1500 Contra Spring, 2000 Clutch Springs Just added - 2007 Joyner 250 SV - Let the fun begin 4-Dirt Bikes, Baja Bug and enough toys to keep me in the garage and out of trouble.
|
|
#92
07-06-2013, 10:42 PM
|
||||
|
||||
|
Actually, since you mentioned the head stay, I still have the abnormally long bolts for the rear mounts, and the cylindrical aluminum spacers that made everything fit in the ATC frame. I might be able to just weld some tabs to the top and run the bolt through everything, but again, I already have interference on the head, I don't want to make it worse.
I had planned on making a cross bar for the 4th case mount, but realized the carb and exhaust would hit it. I guess the real question is, which is more important, the head mount, or securing the other case mount?
__________________
ASE Master and Toyota Master Diagnostic Certified Buggy Building Trainee '04 Dazon Raider 150 'modded'
|
|
#93
07-07-2013, 12:12 AM
|
||||
|
||||
|
The reason for so many mounts is for frame support. If you pulled the engine from the ACT frame you would have noticed just how flimsy the frame is. The engine is more of a frame support as per the frame being the engine support. Two mounting points should be sufficient but make sure you pick the strongest points. Another option is to extend the engine carrier allowing more seat to valve cover distance. Extending it at the front mounting points to the main frame will not effect the jackshaft.
|
|
#94
07-07-2013, 07:08 AM
|
||||
|
||||
|
Thanks Tom, I did notice how 'pieced together' the ATC frame looked when I pulled the engine, thats partially the reason I decided not to chop it up and use it. The thought of extending the swing arm had crossed my mind, but since I put so much time into the shock mount locations already, I would like to retain their location, which would have to be moved if I changed the length of the swing arm.
I am going to reexamine what I have done, and see if something does't hit me in the face this morning.
__________________
ASE Master and Toyota Master Diagnostic Certified Buggy Building Trainee '04 Dazon Raider 150 'modded'
|
|
#95
07-07-2013, 02:08 PM
|
||||
|
||||
|
What I have learned form dirt bikes is that the head stay is a fairly important mount. If the bike starts to vibrate more then it used to, the first thing to check is to make sure that the head stay bolts are tight. One thing to remember, is that the motor is constantly trying to rotate in the motor mounts. When you have a long cylinder / head arrangement, the head stay provides a long leverage point to help stop the rotation. Generally the mount for the head stay does not have to be super beefy, but it does need to be tight. A piece of 1" square tubing would be plenty to support the head.
__________________
2005 Hammerhead 150 170cc BBK, PnP Big valve Head, A12 Cam, Uni Filter, Custom Exhaust, 10G rollers, 1500 Contra Spring, 2000 Clutch Springs Just added - 2007 Joyner 250 SV - Let the fun begin 4-Dirt Bikes, Baja Bug and enough toys to keep me in the garage and out of trouble.
|
|
#96
07-07-2013, 08:25 PM
|
||||
|
||||
|
I took Tom's advice and extended the swing arm as safely as I could, by 1.5", and it gave me some more clearance, but still not enough for more than about 2 inches of articulation. I know I have to move/modify the lower shock mounts, or buy some longer shocks
 I would like to avoid any more main frame modifications, if it is possible. I would like to avoid any more main frame modifications, if it is possible. I decided to take a step back from the frustration that is the swing arm, and look at the exhaust and wiring and see what could be done with the muffler and wiring, and where to mount things.
__________________
ASE Master and Toyota Master Diagnostic Certified Buggy Building Trainee '04 Dazon Raider 150 'modded'
|
|
#97
07-07-2013, 10:28 PM
|
||||
|
||||
|
really don't want to be the bearer of bad news .... but you might as well get used to the cut it off and re-do it part of modding these things.
When i converted my 3203 to the 150/swingarm, I ran into the exact same deal. i thought i was smart and laid it all out, chopped up the frame and made a "window" for the engine. thought it came out pretty nicely .... put it all together and found the swingarm hit one of the tubes--had more travel than i expected ... chopped out and moved a tube and found the carb hit the rack then ... chopped out the rack and then found out .... you get the pic... throughout all that i went through 2 shock length variations and about 3 or 4 different upper and lower shock locations and two different size shocks. now with the IRS, i had to chop up that same tubing i moved twice yet again ....  best to get into a tack it and test it mode to reduce the cutting/grinding work if it doesn't pan out. Is there any way you can set the engine back further on the swingarm? There's also the idea of making a set of dropped and extended swingarm mounts. one final thought --- and i doubt you'll go for it, but i'd love to see someone do it ... set the swingarm up with limited travel--2-3 inch range--run and engine like you have to a fixed center sprocket carrier and run lower a-arms and sliding u-joint shaft with another short stroke shock set. Last edited by x-bird; 07-07-2013 at 10:33 PM.
|
|
#98
07-08-2013, 12:46 AM
|
||||
|
||||
|
The process you are going through is the norm. Someone with designing skills will have travel and clearances all figured out before doing the mods. The setup you are working with is probably one of the more difficult ones to work with since the carrier is part of the suspension. A buggy with rear control arm suspension would be so much easier since what you bolt the engine to does not move. It will take some time to figure things out. As X-Bird said is correct, you just have to have patients and work the kinks out, in the end with lots of patients, and planning it will be well worth the effort. This is your first frakenbuggy so these things are to be expected. What is learned with this one will make the next one much easier.
|
|
#99
07-08-2013, 05:51 AM
|
||||
|
||||
|
I appreciate the support, and yes, I will be tack welding things in from now on. I thought about cutting the mounts back out, since I traced the issue with the engine not being square to the front mounts warping when I welded them in, but I seriously doubt just moving it back will help very much. I know the end all of my woes is to simply cut the center bar out of the main frame, and move it up around 3 inches, and that would make the rest much simpler. In fact, thats what I will likely do, I was just hoping for an easier alternative.
@x-bird, that design seems hella complicated, and although interesting, you are right, I will keep mine as simple as possible at this point.
__________________
ASE Master and Toyota Master Diagnostic Certified Buggy Building Trainee '04 Dazon Raider 150 'modded'
|
|
#100
07-11-2013, 03:54 AM
|
||||
|
||||
|
Master,
I feel your pain and have definitely been there before. I remember one of just a few of my design failures. On my Baja Bug, I had redone the rear suspension for long travel and had installed custom shocks and shock mounts. I had driven it many miles on the road and had also taken one trip to the desert with it. All seemed to be working good until a trip to the Pismo sand dunes changed things. On the first day of a 3 day trip, I sheared off the upper shock mount. Just to get through the trip, I had to buy a stock length shock and find the correct bolts to mount it $$$. Then knowing that the other side would probably fail also, I had to cut everything off when I got home and redesign it. The problem is that we are back yard engineers. We don't have the resources to measure everything to the nth degree and throw it into a program like Solidworks to study the movement and the stresses. Don't let it get you discouraged. You will get it sorted out.
__________________
2005 Hammerhead 150 170cc BBK, PnP Big valve Head, A12 Cam, Uni Filter, Custom Exhaust, 10G rollers, 1500 Contra Spring, 2000 Clutch Springs Just added - 2007 Joyner 250 SV - Let the fun begin 4-Dirt Bikes, Baja Bug and enough toys to keep me in the garage and out of trouble. Last edited by toomanytoys2; 07-11-2013 at 03:57 AM.
|
 |
|
|