|
|
|
|||||||
| Other tech issues For all other technical issues. Think frame, suspension, steering, brakes, etc |

 |
|
|
Thread Tools |
|
#1
 02-04-2012, 08:27 AM
|
||||
|
||||
|
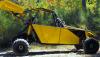
REAR AXLE CONVERSION
. Axle- Asuza flex proof,42” long,1” dia. 1,3/8”x2” step down from gokartgalaxy. #1411-42 http://gokartgalaxy.com/deluxe_flexp...teel_axles.htm Sprocket and disc rotor hubs. 2 of these http://www.*************/item/4-Bolt-...ub-AZ2286-5767 . A minimum of two of these 1” Bearings # H92010W and 3 hole flangetts for 1” bore # 400165 From http://www.*************/shop/?shop=1&cat=260 These will make up the wheel hubs. 2 of these Set screw shaft couplers #6412K45, 1”bore,3” long, 2”OD come from http://www.mcmaster.com/#standard-sh...plings/=g2woku You will need 8 of these http://www.*************/item/2-Piece...20-600130-3236 And 2 of these. http://www.*************/item/Wheel-H...box-05728-4852 Setting the axle and bearings/ flangettes is pretty straight for-wards. Note: you may want to make up the hubs before installing axle. It may be easier to do the alignment and welding if the axle is up at eye level. The 2 piece locking collars are used on both sides of the bearings and the sprocket and disc hubs. The collars serve two purposes, One- to keep the axle and hubs centered and positioned.(no side to side play) Two- to keep the 1/4x1/4 key stock positioned. It’s best to get lengths of key stock then cut them for the full length of the hub key-ways. Shorter lengths will move side to side and cause premature wear . The hubs will get floppy over time. Hang the bearing, slide the hubs over the axle , hang the axle checking foe equal side to side distance, position the hubs for chain and caliper alignment and lock down the collars. Use red lock tight on all set screws. Make double sure everything is correctly positioned. Once that lock tight sets, you will have to heat the set screws to break them loose. Don’t forget to put in all the key stocks!!! Ask me how I know this! Making the wheel hubs is the most involved part of this deal. (see pic. ) . Cut the stock hubs so you have 3” of flat area to weld against the shaft couplers. I used a cutting disc on a drill press. Adjusted the table to the correct hight, placed the hub flat on the table then spun it against the cutter to get a square cut. This gave me a reasonable square /straight surface to position the coupler against.. Drill out the center hole of the hub to ¾. (this simply removes all the splines). This also gives the shoulder needed to hold the hub tight on the step down axle. Slide the coupler and hub over the axle to get everything aligned then spot weld. Remove the assembly to finish welding. You don’t want to get that axle hot! That’s about it! Clean up the welds, do a little paint, put the whole deal together and your set to go. Shurlock nuts have held my hubs on fine for years. Go one step further and get some 1” inner dia. Thick wall PVC pipe. Cut lengths to fit on all the bare areas of the axle to serve a spacers between all the locking collars. This will further help to keep the whole assembly positioned and also protects the axle from nicks and dirt. Even if you should sling a set screw, which does happen, the pipe keeps everything in place. I have had to take a file to a axle to smooth off nicks when trying to get a bearing to slide off. Get the PVC lengths correct ,you can assemble everything loose . Tightening the hub Shurlock's will take up any slack. Then tighten all set screws. When tightening the flangettes on the hangers the flangetts can shift and tighten out of alignment .(the tolerances are not that close. After hanging the axle , spin it while tightening the flangettes to check for binding. You may have to tighten and loosen the bolts several times to get it spinning freely. you can go further to totally bullet proof the system by boxing in the original hangers, adding another set of hangers and bearing out at the wheel hubs and also adding a center hanger. The outboard hangers support the ends of the axle . The center support aids axle flex and chain skip. 
|
|
#3
02-04-2012, 06:52 PM
|
||||
|
||||
|
Quote:
|
|
#4
02-06-2012, 03:03 PM
|
||||
|
||||
|
,subscribed!! Thanks Ckau.
could we just get this kit for the bearings? http://www.*************/item/1-Beari...ole-400400-711 I guess this will also be good if we plan on putting int the center bearing to aid in axle flex also, it comes with nuts, bolts, and hangers. Are the stock spiderbox bearings 1" bore, just wanting to know if I have to order an extra set of flangettes and a bearing for the center one. would this hub be pretty close to the stock sprockets bolt pattern and it looks beefy. http://www.*************/item/Hub-wit...or-600253-6500 lastly... what did you use to convert your break lines over? is it better than stock? if you have a thread with this mod in it can you post a link? thanks again! 
Last edited by T3beatz; 02-06-2012 at 03:32 PM.
|
|
#5
02-06-2012, 05:51 PM
|
||||
|
||||
|
Yes that kit will work. The flangettes wil fit the stock yerf hangers . the stock yerf bearing are 25mm so they are a touch too tight for a 1" axle. the hub would work, it's the same bolt pattern as the sprocket and disc rotor.
The SS braided brake lines.. I honestly don't have a clue what they come from . They were included in a of a grab bag bunch of stuff I bought at auction at the closing of a motorcycle dealership. it was a Harley dealer so I asume they come from some harley model. I ran rigid line around the swing arm to do away with the rubber brake hose and used those section of braided for the floating sections, the caliper and the swingarm pivot point. Can't tell if it works any better but it's a lot stronger and dependale.
|
|
#6
02-06-2012, 06:58 PM
|
||||
|
||||
|
Cool, thanks again for the help. I plan on doing this in the next few weeks are so. First thing I want to do is the Heim joint mod, that I shall be doing by this weekend if I find the correct bungs to use.
|
|
#8
05-28-2012, 02:59 PM
|
||||
|
||||
|
hey Ckau, what did you use to drill out your Hubs to mount on the 3/4" step down on the 1" axle.
Right now I'm debating on doing that or just buying a set of the 1" keyed hubs from bmi with the 4x4" bolt pattern. I Think I have a set of rims with that bolt pattern that will fit my tires. http://www.*************/item/4-x-4-W...wn-260053-5972 the hubs don't look too heavy duty, but I'm sure I can add a few gussets to stiffen them up a bit.
__________________
T.J. Yerfdog Spiderbox, Uni Type air filter with 6" intake, 130 jet, Orange no-rev limit cdi, Red coil, iridium plug, 1500rpm clutch springs, 1500rpm contra spring, 13g sliders, 22" rears, 21" fronts, aftermarket reverse installed, and Trailtech Vapor.
|
|
#9
05-28-2012, 05:20 PM
|
||||
|
||||
|
Quote:
|
|
#10
05-28-2012, 06:41 PM
|
||||
|
||||
|
cool, I might just do that then... I still have not ordered all my stuff yet, I'm just trying to get a list together so I only have to pay for shipping once from each place.
If I go with the 4x4" hubs the price will be about the same as ordering the keyed couplers from mcmasters after shipping, so price is not the issue, it's durability.
__________________
T.J. Yerfdog Spiderbox, Uni Type air filter with 6" intake, 130 jet, Orange no-rev limit cdi, Red coil, iridium plug, 1500rpm clutch springs, 1500rpm contra spring, 13g sliders, 22" rears, 21" fronts, aftermarket reverse installed, and Trailtech Vapor.
|
|
#11
05-30-2012, 01:24 AM
|
||||
|
||||
|
You guys think this axle is any good are would it twist? Support shouldn't be an issue If I did the extra bearing hangers, I just wouldn't want it to twist from to much torque. I was thinking about going with the 45" one.
http://www.*************/item/1-Live-Axle-4000-717 Along with this hub... http://www.*************/item/Wheel-H...ore-260050-762
__________________
T.J. Yerfdog Spiderbox, Uni Type air filter with 6" intake, 130 jet, Orange no-rev limit cdi, Red coil, iridium plug, 1500rpm clutch springs, 1500rpm contra spring, 13g sliders, 22" rears, 21" fronts, aftermarket reverse installed, and Trailtech Vapor. Last edited by T3beatz; 05-30-2012 at 01:41 PM.
|
|
#12
05-30-2012, 04:40 PM
|
||||
|
||||
|
Quote:
Those hubs? - see pic. I think it's the same BMI hub. I knocked out the studs and redrilled it for the sprocket gear! It didn't last long. The two pieces of metal in the foreground is the keystock sheared lengthways. The hub center split open. The axle was fine but the hub can't handle the torque.
|
|
#13
05-30-2012, 05:52 PM
|
||||
|
||||
|
I think this is the hub you split open.. http://www.*************/item/4-Bolt-...ub-AZ2286-5767
this one is the actual wheel hub that I linked. http://www.*************/item/Wheel-H...ore-260050-762 I plan on adding gussets on the back side to beef it up. but that's only if I go with that cheap axle... I'll probably just bite the bullet and go with the 42" flexproof with these hubs.. http://www.*************/item/4-x-4-W...wn-260053-5972 only if BMI carried the flex proof axles in stock! I can save on the shipping. I would use the stock hubs and just do it the way you did but I have a set of 4x4" rims laying around that should fit my tires. I also don't own a 3/4" drill bit and a new one cost about $20 bucks, add that to the cost of the keyed couplers and that's about $50 bucks extra, when I can just get the hubs for $15 bucks each from BMI. Oh yeah, BTW, turns out those shocks on the front of your single seat buggy your building are not bad at all... I don't know if you checked out my thread but a simple mod makes them much better. T.J.
__________________
T.J. Yerfdog Spiderbox, Uni Type air filter with 6" intake, 130 jet, Orange no-rev limit cdi, Red coil, iridium plug, 1500rpm clutch springs, 1500rpm contra spring, 13g sliders, 22" rears, 21" fronts, aftermarket reverse installed, and Trailtech Vapor. Last edited by T3beatz; 05-30-2012 at 09:24 PM.
|
|
#14
05-30-2012, 08:01 PM
|
||||
|
||||
|
Your right , I was using a different type hub. My mistake for not paying close attention to the picture! I can see where the costs add up real quick so stick with your plan.
I missed the thread about the shock mod. where is it? It would be great if they work as well as they look. I have yet been unable to get a rolling chassis At the rate I'm moving on this it may be a while before I get the chance to try those shocks.
|
|
#15
05-30-2012, 09:25 PM
|
||||
|
||||
|
here is the thread about the shocks. http://www.buggymasters.com/forum/showthread.php?t=2985
I think I'm gonna play it safe and go with the 42" flexproof I want something that's gonna last and be able to take the abuse. I don't know about the standard 1" from BMI, but you've been running the flex-proof for some years so I'll trust your word over none at all. lol
__________________
T.J. Yerfdog Spiderbox, Uni Type air filter with 6" intake, 130 jet, Orange no-rev limit cdi, Red coil, iridium plug, 1500rpm clutch springs, 1500rpm contra spring, 13g sliders, 22" rears, 21" fronts, aftermarket reverse installed, and Trailtech Vapor. Last edited by T3beatz; 05-30-2012 at 09:50 PM.
|
|
#16
05-31-2012, 09:38 PM
|
||||
|
||||
|
Well, I bit the bullet and purchased everything last night... I decided to just go with the BMI 4x4" hubs, but everything else is pretty much what Ckau listed. Now I just have to head on over to the metal supply place and grab some scrap to beef up the swing arm and make the bearing boxes.
__________________
T.J. Yerfdog Spiderbox, Uni Type air filter with 6" intake, 130 jet, Orange no-rev limit cdi, Red coil, iridium plug, 1500rpm clutch springs, 1500rpm contra spring, 13g sliders, 22" rears, 21" fronts, aftermarket reverse installed, and Trailtech Vapor.
|
|
#17
06-08-2012, 11:53 AM
|
||||
|
||||
|
You won't be sorry, when I was building my Yerfie, I followed ckau's instructions, and came out with a super strong unit, that will be much cheaper to service in the future. It's a great mod for a stock or hopped up Yerfie!
__________________
kliff
|
|
#18
06-08-2012, 01:36 PM
|
||||
|
||||
|
Yeah, I'm working on it now... The bearing boxes are a little challenging but I'm sure I can work something out. The hangers BMI sells are not as long on the top as the stock hangers, the top bolt hole sits very close to the top edge, so there is less room to weld up there. I'll post pics when I figure something out.
__________________
T.J. Yerfdog Spiderbox, Uni Type air filter with 6" intake, 130 jet, Orange no-rev limit cdi, Red coil, iridium plug, 1500rpm clutch springs, 1500rpm contra spring, 13g sliders, 22" rears, 21" fronts, aftermarket reverse installed, and Trailtech Vapor.
|
|
#19
06-09-2012, 07:01 AM
|
||||
|
||||
|
Quote:
The BMI hangers will work but you run into a clearance problem with the through frame caliper mounting bolts. The top of the support box can be angled down, no problem but you won't be able to remove the bolts should it be necessary. The stock yerf hanger have holes in the correct location to slide the bolts out. Open these holes out a touch then you can slide a deepwell socket in to access the bolt. The 3 hole bearing mount configuration is different in the BMI with the orintation of the axle removal slot. This means you are forced to disassemble the whole axle and slide the axle out from a end rather than dropping the whole unit out from the bottom if you have to remove it. A BMI hanger for the center support is not a problem you can cock the axle at a angle after the 3 hole bearing flangettes are loose to drop the axle.
|
|
#21
06-09-2012, 10:23 AM
|
||||
|
||||
|
Yep, I think I have it figured out, I just got some 1x1.5" tubing and kinda extended the frame into a small box. I angled the outsides in so that when the 8" rim is on, the box sits just on the inside of it. As far as the break caliper bolts I just put them in before I welded everything up, they wont be coming out but there is enough space for me to get to them, and they can slide out about 1" or so to remove the caliper.
I'll post some pics later, I have to go to the ZOO with the family...
__________________
T.J. Yerfdog Spiderbox, Uni Type air filter with 6" intake, 130 jet, Orange no-rev limit cdi, Red coil, iridium plug, 1500rpm clutch springs, 1500rpm contra spring, 13g sliders, 22" rears, 21" fronts, aftermarket reverse installed, and Trailtech Vapor.
|
|
#23
06-09-2012, 10:40 PM
|
||||
|
||||
|
Well, here are a few pics of what I have so far, some parts just tacked on... The swing arm is pretty beat up pealing paint and rust, but I'm gonna get it all sanded down and painted once I'm done. It was my spare that I had out in the shed, got it free with the buggy.
You can see in one of the pics my solution to the caliper screws... I just put them in and welded the frame around them, I can still get to them because I don't plan on putting a top on the box. Also in one of the pics my solution for the short hangers was to just carve a slot out in my tubing, it shouldn't effect the integrity of it and I can get a socket around it or something in there to hold it while I tighten down the bolts. If I really wanted to get fancy I could have got some 5/16" threaded couplers and welded them in there, and then I would only have to worry about screwing it from the outside (still in the back of my mind). Oh yeah, my welding is sub par! lol I do good sometimes but sometimes things just don't come out pretty, plus that flux core stuff leaves a lot to be cleaned up! nothing a simple wire wheel and my drill can't fix, As long as the welds hold I don't care.
__________________
T.J. Yerfdog Spiderbox, Uni Type air filter with 6" intake, 130 jet, Orange no-rev limit cdi, Red coil, iridium plug, 1500rpm clutch springs, 1500rpm contra spring, 13g sliders, 22" rears, 21" fronts, aftermarket reverse installed, and Trailtech Vapor. Last edited by T3beatz; 06-10-2012 at 01:33 AM.
|
|
#24
06-09-2012, 11:29 PM
|
||||
|
||||
|
That's cool T3, I just got 2 spare swingarms with motors from BMI, so I think I'll be headed down that same path eventually!
First I have got to get the Crossfire's engine together and get it motivating.
__________________
'07 Baja Reaction '05 Yerf 3206 Front end hangin' on by a shoestring  '07 roketa gk-17 -Chassis work in progress! '08 Crossfire 150R - It lives at last! 
|
|
#25
06-10-2012, 01:23 AM
|
||||
|
||||
|
I would make sure you have that front end together before messing with the back... both are weak as hell stock, but the front is a little cheaper to beef up than the rear.
take the engine off of the yerf, if it runs... put it on the crossfire. Get it running and out of the way then move on to the Yerf. Just tackle it as one big project.
__________________
T.J. Yerfdog Spiderbox, Uni Type air filter with 6" intake, 130 jet, Orange no-rev limit cdi, Red coil, iridium plug, 1500rpm clutch springs, 1500rpm contra spring, 13g sliders, 22" rears, 21" fronts, aftermarket reverse installed, and Trailtech Vapor.
|
|
#26
06-10-2012, 09:19 AM
|
||||
|
||||
|
Quote:
 The one on the Yerf is actually in decent shape. I'm just need to work on one thing at a time-too many irons in the fire right now!
__________________
'07 Baja Reaction '05 Yerf 3206 Front end hangin' on by a shoestring '07 roketa gk-17 -Chassis work in progress! '08 Crossfire 150R - It lives at last!
|
|
#27
06-10-2012, 09:37 AM
|
||||
|
||||
|
Quote:
__________________
kliff
|
|
#28
06-10-2012, 10:50 AM
|
||||
|
||||
|
Looking good-I like the HEAVY duty bearing holders!!! I don't like how you trapped the brake bolts!! I know you're aware & don't really see an big issue right now, but I've had stripped bolts and bent bolts in my calipers(actually snapped the end of the bolt off)- I'm always looking at worst case scenario- YOU NEVER KNOW WHAT WILL HAPPEN!!!!!
I understand you're in a bit of a hurry to get it ready for the bash too.
|
|
#29
06-10-2012, 02:26 PM
|
||||
|
||||
|
yeah, I don't like them being trapped like that either...but, it's all I could think to do with what I have on hand. I'm gonna probably just remove them in the future and build a new caliper mount so that I won't need the long bolts.
__________________
T.J. Yerfdog Spiderbox, Uni Type air filter with 6" intake, 130 jet, Orange no-rev limit cdi, Red coil, iridium plug, 1500rpm clutch springs, 1500rpm contra spring, 13g sliders, 22" rears, 21" fronts, aftermarket reverse installed, and Trailtech Vapor.
|
|
#30
06-10-2012, 03:03 PM
|
||||
|
||||
|
i don't know how tight you have them "trapped" but you could rethread the caliper side and go with grade 8 allen-head socket bolts. much narrower head. Nothing's available to fit the present threading in that type of bolt.
|
|
#31
06-10-2012, 04:45 PM
|
||||
|
||||
|
Don't even know if that will work... they are not coming out without being cut out, and getting long enough bolts to reach the caliper back into that space would be impossible unless they make bendable bolts.
Here are a couple more pics, I threw some paint on it and got the axle mounted up. Didn't do a lot of clean up work with the welds... still a lot of splatter, but what the heck wont see it much anyway, plus the dirt will be covering it soon. lol The hubs for the sprocket and brake rotor are ok, they are not steel, I think it's some sort of High grade aluminum, I hope it holds up. They were direct bolt up solutions, no drilling required, and they look to be a little more tougher than the ones Ckau originally used.
__________________
T.J. Yerfdog Spiderbox, Uni Type air filter with 6" intake, 130 jet, Orange no-rev limit cdi, Red coil, iridium plug, 1500rpm clutch springs, 1500rpm contra spring, 13g sliders, 22" rears, 21" fronts, aftermarket reverse installed, and Trailtech Vapor.
|
|
#32
06-10-2012, 08:10 PM
|
||||
|
||||
|
Quote:
If you have more than one hub check to see if they are made identical , meaning is the key way slot in the same position on all these hubs. it would be sweet to use a pair to sandwich the sprocket between. This would only work if the key way slots lined up when the hubs were placed back to back. These would definitely give the support needed to keep the sprocket in place.
|
|
#33
06-10-2012, 08:21 PM
|
||||
|
||||
|
Where did your rear sprocket come from? yours has cut outs.I'm always looking to shed a little weight where ever I can. My sprockets are solid and I planned on drilling them to lighten up a touch but that sprocket would save some time and trouble.
|
|
#34
06-10-2012, 09:06 PM
|
||||
|
||||
|
I have two of the hubs one for the sprocket and one for the brake rotor, they are both identical. The bolt that goes through the hub should hold it in place, and I also have a locking collar on each side to help. They are 1" thick at the center of the hub where the thick part is.
The axle sprocket is one of the 39T ones, I bought it from Highrpmracer they go for about $21.00, that's when they are in stock. I was gonna do the double sprocket thing on the axle, 1 31T and 1 39T back to back, but my bolts were to short so I said screw it, maybe down the road. Now I'm trying to decide weather to add gussets to the back of the wheel hubs are not... They are built pretty tough, but I don't want to risk anything.
__________________
T.J. Yerfdog Spiderbox, Uni Type air filter with 6" intake, 130 jet, Orange no-rev limit cdi, Red coil, iridium plug, 1500rpm clutch springs, 1500rpm contra spring, 13g sliders, 22" rears, 21" fronts, aftermarket reverse installed, and Trailtech Vapor. Last edited by T3beatz; 06-10-2012 at 09:10 PM.
|
|
#35
06-10-2012, 09:32 PM
|
||||
|
||||
|
That set-up looks awesome, if my set-up fails I'm going with those hubs,axle and sprocket/brake carriers. WELL DONE!!! keep us up to date on the performance.
|
|
#36
06-10-2012, 11:59 PM
|
||||
|
||||
|
Thanks guys, It's coming together great... If I knew the axle bearings had lock screws on them I wouldn't have bought so many lock collars, I have a couple left over. I was gonna put one on each side of the outside bearings too, but I made the box extend all the way up to the wheel hub (that's why the angle, so it wont rub the rims), there is less than 1mm gap between the hub and the bearing. So I don't have to worry about the key slipping out, there are 5 bearings total and each one has 2 locking grub screws on each so the axle is not shifting any time soon.
In the pics you can see about how thick the sprocket hub is, the lock collars on both sides are touching the hub. The center bearing is to help support the flex of the axle from the tension on the sprocket during hard acceleration (per Ckau). Also in one of the pics how close the outside bearing is to the wheel hub. In the last pic the top view, The 42" flexproof axle is the perfect length it puts my 22x11x8" wheels in pretty much the same spot as I had with the 1.5" extensions on both sides (probably just a little bit further). I also put the angle at the top near the chain tensioner for extra support in that area as well, just like Ckau, I've had failure in that area on my last swingarm, found a few cracks and bent tubing. oh and putting the engine back in scrached the paint up a bit, but oh well, a touch up here and there will get it good enough.
__________________
T.J. Yerfdog Spiderbox, Uni Type air filter with 6" intake, 130 jet, Orange no-rev limit cdi, Red coil, iridium plug, 1500rpm clutch springs, 1500rpm contra spring, 13g sliders, 22" rears, 21" fronts, aftermarket reverse installed, and Trailtech Vapor. Last edited by T3beatz; 06-11-2012 at 12:51 AM.
|
|
#38
06-11-2012, 03:17 PM
|
||||
|
||||
|
Yeah, I was thinking about doing that (post #34) but the bolts I have on hand are to short, and I was to lazy to go to the hardware store.
__________________
T.J. Yerfdog Spiderbox, Uni Type air filter with 6" intake, 130 jet, Orange no-rev limit cdi, Red coil, iridium plug, 1500rpm clutch springs, 1500rpm contra spring, 13g sliders, 22" rears, 21" fronts, aftermarket reverse installed, and Trailtech Vapor.
|
|
#39
06-11-2012, 08:58 PM
|
||||
|
||||
|
Well I just got back from the first test drive after the Mod, and I'm happy to say nothing broke. I didn't do any trail riding, I just stuck to the streets, I still have to do a little tweaking of the engine and make sure every thing is nice and snug. I think my output shaft from the engine is warped, my reverse gearbox has a wobble to it, I have to look into that. I'll order a new one to have as a spare just in case.
__________________
T.J. Yerfdog Spiderbox, Uni Type air filter with 6" intake, 130 jet, Orange no-rev limit cdi, Red coil, iridium plug, 1500rpm clutch springs, 1500rpm contra spring, 13g sliders, 22" rears, 21" fronts, aftermarket reverse installed, and Trailtech Vapor.
|
|
#40
06-11-2012, 10:49 PM
|
||||
|
||||
|
ckau tipped me off to the output shaft bearing going bad on mine. definite audible whine overtop of the engine noise. Reverse had a good wobble to it as well. When i took it all apart, the bearing had enough play in it to allow the shaft's gear to ride on angle on the next gear. Saved me from an el-grenado of the transmission. the area that rides on the bearing also seemed a little worn so i got a replacement shaft from Tom/SYC. Not an exact fit, but a little shim work and it all came together.
|
|
#41
06-11-2012, 11:27 PM
|
||||
|
||||
|
Cool thanks, I'll look into that... I have a spare engine so If I have to I'll just steal the bearing from it. Any special tools needed before I open it up?
__________________
T.J. Yerfdog Spiderbox, Uni Type air filter with 6" intake, 130 jet, Orange no-rev limit cdi, Red coil, iridium plug, 1500rpm clutch springs, 1500rpm contra spring, 13g sliders, 22" rears, 21" fronts, aftermarket reverse installed, and Trailtech Vapor.
|
|
#42
06-12-2012, 08:44 AM
|
||||
|
||||
|
for the tranny, you'll just need the spanner type wrench for the clutch bell. Quit using impacts on it!
 really! really! If you don't have one, took me 5 minutes to fab up one with some 1/4 plate. drill a hole big enough for the socket to fit through, then two smaller holes to match the holes in the clutch bell. Nut two bolts into those to protrude into the bell and it's done. The variator fan has a different spacing, add another hole and it's a dual-tool. To pop and reinstall the bearing, you should use a bearing/seal driver. Other than that, it's really simple. Also make sure the lock nut on the end of the shaft (reverse box retainer) isn't loosening up on you. I have to tighten mine every ride. (PM me, i still can't find those dang things around here!) Last edited by x-bird; 06-12-2012 at 08:47 AM.
|
|
#43
06-12-2012, 12:40 PM
|
||||
|
||||
|
why no impacts on the clutch bell?
I don't have any special tools for the output shaft bearing, I may have to do it the old fashion way. Now that I have the movable axle sprocket I can get rid of some of the spacers on the shaft and I can have more of the reverse gearbox on the splines and the nut can go down more on the threads.
__________________
T.J. Yerfdog Spiderbox, Uni Type air filter with 6" intake, 130 jet, Orange no-rev limit cdi, Red coil, iridium plug, 1500rpm clutch springs, 1500rpm contra spring, 13g sliders, 22" rears, 21" fronts, aftermarket reverse installed, and Trailtech Vapor.
|
|
#44
06-12-2012, 02:32 PM
|
||||
|
||||
|
people get hung up on the ease of using impact guns, air or electric and forget that it's nothing more than a hammering action on the fastener and threads. impacts are fine for large, heavy duty fasteners that are put on with high torque values and for rusted items. The clutch and variator nuts are not high torque, have limited thread width and should be put on and taken off with hand tools and set to correct torque. if there's a way to do it with hand tools, that should always be the first choice. impacts are a last resort. if you look close at the threads in either the nuts, or on the shafts, if you've been using an impact, you'll start to see very sharp edges on the threads. one day you'll tighten it and the threads will give up. if the shaft threads go away, it's a wasted crank or clutch shaft.
The bearing/seal drivers are nothing more than aluminum or plastic discs that have a driver handle that goes in a hole in the center to hit with a hammer allowing square pushing on the bearing or seal to avoid getting it jammed in its race. good item to have, any auto parts store has them, usually 6 different size discs per set and not at all expensive. I probably have 4 or 5 sets of the things floating around .... otherwise, an appropriate size socket on an extension is what most people tend to use.
|
|
#45
06-12-2012, 04:52 PM
|
||||
|
||||
|
Quote:
|
|
#46
06-13-2012, 12:41 AM
|
||||
|
||||
|
I got some more riding in today after tweaking the engine a little, and everything went great. I took it easy for a mile or two, then I turned it up a notch trying to get something to break, but everything held together. I checked to make sure all the hubs were holding up, and they were as tight as when I first torqued them down.
Now on to a little cosmetic work and I should be good to go for the Buggy Bash (knock on wood).lol
__________________
T.J. Yerfdog Spiderbox, Uni Type air filter with 6" intake, 130 jet, Orange no-rev limit cdi, Red coil, iridium plug, 1500rpm clutch springs, 1500rpm contra spring, 13g sliders, 22" rears, 21" fronts, aftermarket reverse installed, and Trailtech Vapor.
|
|
#47
06-14-2012, 01:56 PM
|
||||
|
||||
|
I was on surplus center today looking at sprockets and it seems that if you have the 1" axle you have a great selection of sprockets to choose from.
I'm thinking a bout picking up a couple to try out. https://www.*************.com/item.a...ame=powerTrans https://www.*************.com/item.a...ame=powerTrans
__________________
T.J. Yerfdog Spiderbox, Uni Type air filter with 6" intake, 130 jet, Orange no-rev limit cdi, Red coil, iridium plug, 1500rpm clutch springs, 1500rpm contra spring, 13g sliders, 22" rears, 21" fronts, aftermarket reverse installed, and Trailtech Vapor.
|
|
#48
06-24-2012, 07:44 PM
|
||||
|
||||
|
Just got back from the Buggy Bash and it was a blast! the Axle held up perfectly, Nothing went wrong, not one tool had to touch my buggies rear end! If you have ever been to St. Joe state park you know that some of the trails there are not easy and if your buggy is not built strong it will break apart... my brother learned this, he still has the stock front ball joints and as we were loading up to go we noticed that one of his has completely pulled out from the tabs!
I did have a minor roll over and pulled a side of the factory welds apart on the rack, but 10 mins with a welder and it was good as new. Soapkart was there and we all took a long ride at dusk on one of the longer trails in the park (the perimeter trail), it took us about 30+ mins to get through it. T.J.
__________________
T.J. Yerfdog Spiderbox, Uni Type air filter with 6" intake, 130 jet, Orange no-rev limit cdi, Red coil, iridium plug, 1500rpm clutch springs, 1500rpm contra spring, 13g sliders, 22" rears, 21" fronts, aftermarket reverse installed, and Trailtech Vapor.
|
|
#50
06-25-2012, 10:00 AM
|
||||
|
||||
|
I have a few vids, I still have to get them uploaded to youtube, then I'll post some links.
__________________
T.J. Yerfdog Spiderbox, Uni Type air filter with 6" intake, 130 jet, Orange no-rev limit cdi, Red coil, iridium plug, 1500rpm clutch springs, 1500rpm contra spring, 13g sliders, 22" rears, 21" fronts, aftermarket reverse installed, and Trailtech Vapor.
|
|
#51
06-30-2012, 09:02 PM
|
||||
|
||||
|
Well, I'm back at it again... everything is holding up great. So I decided to go with the dual sprockets... 39T and a 31T, I go to take the axle off and it's a pain in the but! The wheel Hubs are kinda hard to get off because the keyway has got them jammed on... this goes for the sprocket and break hubs too. I got all the locking collars loosened up and tried to tap the axle out and kinda stripped the threads a little so now I have to try and get that straitened out so I can just put it all back together. I'm probably gonna just roll with it the way it is until I can figure out how to get it apart. I may have to loosen up all the flangettes some more and see if that will help.
Right now I'm taking a break, I have a nice 3/4" laceration above my right eye because a huge horse fly was bothering me while I was working and I hit my head on the swingarm trying to dodge it.
__________________
T.J. Yerfdog Spiderbox, Uni Type air filter with 6" intake, 130 jet, Orange no-rev limit cdi, Red coil, iridium plug, 1500rpm clutch springs, 1500rpm contra spring, 13g sliders, 22" rears, 21" fronts, aftermarket reverse installed, and Trailtech Vapor.
|
|
#52
06-30-2012, 09:57 PM
|
||||
|
||||
|
Any damage to the swingarm?
 Just kidding!!! Just kidding!!! - Those battle scars aren't fun!!! Have you tried to drive the keys out? or can you? - Those battle scars aren't fun!!! Have you tried to drive the keys out? or can you?
|
|
#53
06-30-2012, 10:02 PM
|
||||
|
||||
|
Quote:
coat the contact areas of the hubs and bearings a coat of grease or better use "anti-seize". Avalible at most any auto parts store. It's does what the name implies, it keeps metal surfaces from bonding due to pressure. Cut lengths of PVC pipe to cover all exposed portions of the axle. This will keep the axle clean and free of rust and nicks. your bearings and hubs will slide off much better. It will make the next diss-asembly a whole lot easier. Use new keyway stock. The old keys are slightly distorted and twisted from the strain and are prone to fail. It's best to get keyway stock longer than the hub slots and cut it full length of the hubs. the more contact area the better and the keys won't bind as bad when run full length Last edited by ckau; 06-30-2012 at 10:09 PM. Reason: adding to post
|
|
#55
06-30-2012, 10:27 PM
|
||||
|
||||
|
Quote:
After that I went in to the nurse to get patched up.I'm definitely gonna coat this thing in something once I get it apart, and I'm also gonna do the PVC thing. I guess that's my plan for the next couple days. I ordered extra keys, so I'll get em all changed out. I also noticed on the sprocket hub where the key is at it is twisted a tad, nothing major, but something to keep my eye on... I'm gonna order a spare hub just in case, I may have to double up for extra strength (Hub, sprocket 31T, spacer,sprocket 39T, then another hub all sandwiched together like Ckau suggested). I would have done all this before I put it together in the first place, but I was in a rush to get it all going for the bash.
__________________
T.J. Yerfdog Spiderbox, Uni Type air filter with 6" intake, 130 jet, Orange no-rev limit cdi, Red coil, iridium plug, 1500rpm clutch springs, 1500rpm contra spring, 13g sliders, 22" rears, 21" fronts, aftermarket reverse installed, and Trailtech Vapor. Last edited by T3beatz; 07-01-2012 at 12:01 AM.
|
|
#56
07-02-2012, 08:32 PM
|
||||
|
||||
|
I still have a lot of work to do... for some reason when I push my buggy around the 8000rpm mark it feels as though it's gonna fall apart. It's not shaking badly it's just that the engine is revving so high and there's this harmonic resonance that just doesn't sit right with me. I think it's got something to do with the 39T sprocket, I'm not moving very fast about 26-27mph but the engine is roaring, that's why I would like to put the 31T on it also.
__________________
T.J. Yerfdog Spiderbox, Uni Type air filter with 6" intake, 130 jet, Orange no-rev limit cdi, Red coil, iridium plug, 1500rpm clutch springs, 1500rpm contra spring, 13g sliders, 22" rears, 21" fronts, aftermarket reverse installed, and Trailtech Vapor.
|
|
#57
07-02-2012, 08:47 PM
|
||||
|
||||
|
Have you tried a simple drive sprocket change for better top end yet?
|
|
#58
07-02-2012, 09:32 PM
|
||||
|
||||
|
I have a reverse on it and that's the 16T one. I don't think anything is gonna break, but ya never know! I'm probably just gonna do what needs to be done and add the 31T to the axle. I might even add a 36T one and split the difference if I have enough room. one of these... https://www.*************.com/item.a...ame=powerTrans
Then I'll have 3 different gears to choose from, the 31T for speed, the 36T for average riding, and the 39T for towing or extreme conditions. I'll have to keep an extra chain on me because going from the 31T to the 39T requires extra links. I probably could get away with just adjusting the tensioner with the 36T going from the 39T.
__________________
T.J. Yerfdog Spiderbox, Uni Type air filter with 6" intake, 130 jet, Orange no-rev limit cdi, Red coil, iridium plug, 1500rpm clutch springs, 1500rpm contra spring, 13g sliders, 22" rears, 21" fronts, aftermarket reverse installed, and Trailtech Vapor. Last edited by T3beatz; 07-02-2012 at 09:34 PM.
|
|
#59
07-02-2012, 10:53 PM
|
||||
|
||||
|
have you checked your sprocket for runout while it's mounted on the axle in the swingarm? normally a little bit isn't noticeable and will be taken up by the chain slack, but you might be hitting chain speeds at that rpm that make the "tight" portion of the sprocket's rotation give an extra pull on the axle and engine.
|
|
#60
07-02-2012, 11:15 PM
|
||||
|
||||
|
I don't think the sprocket is very true... if you know what I mean. mounted on the hub it seems as though it is not 100% centered. That could be my problem. Switching to a different sprocket will let me know.
__________________
T.J. Yerfdog Spiderbox, Uni Type air filter with 6" intake, 130 jet, Orange no-rev limit cdi, Red coil, iridium plug, 1500rpm clutch springs, 1500rpm contra spring, 13g sliders, 22" rears, 21" fronts, aftermarket reverse installed, and Trailtech Vapor.
|
|
#61
07-03-2012, 05:46 AM
|
||||
|
||||
|
you can true it up by putting the buggy on stands, taking the chain off and setting a pointer of some sort right next to the teeth. rotate it to find your high/low spots, loosen the bolts and snug them lightly, then tap the sprocket where needed until it's as good as it can get, then tighten. takes a lot of unnecessary strain off the output shaft as well.
|
|
#62
07-03-2012, 06:52 AM
|
||||
|
||||
|
Is the chain bad?They can get tight spots when they go bad like a chain saw,lose here ant tight their.
__________________
http://www.youtube.com/watch?v=IUgir...ature=g-t=2668 FABRICATION ITS HARDER THAN YOU THINK
|
|
#63
07-03-2012, 11:09 AM
|
||||
|
||||
|
thanks X-bird, I'll give that a try.
No, Roy, the chain is good... it's loose, I have extra ones too just in case.
__________________
T.J. Yerfdog Spiderbox, Uni Type air filter with 6" intake, 130 jet, Orange no-rev limit cdi, Red coil, iridium plug, 1500rpm clutch springs, 1500rpm contra spring, 13g sliders, 22" rears, 21" fronts, aftermarket reverse installed, and Trailtech Vapor.
|
|
#64
07-03-2012, 12:54 PM
|
||||
|
||||
|
FYI- when I set the sprocket on an axle- I straight edge the drive sprocket to get it close, then I rotate the axle slowly and watch the chain on both sprockets to verify it's riding square on the teeth-I've had to set mine "what looks out-of-alignment" to get the chain true. Watch to see if the chain enters the sprocket on one side of the sprocket and exits the other side of the sprocket, find the neutral point from there- I also listen for the sound of the chain rolling smoothly over the teeth too. You can "hear" a chain that is out-of-alignment & too loose or tight.
|
|
#65
07-03-2012, 03:01 PM
|
||||
|
||||
|
chains and sprockets are so much easier than asym TCs ))) I'm talking about the off center alignment that makes the chain tighter and looser through the rotation. that's a driveline killer. i used to spend a good 1-2 hours setting up the chainrings on my bikes. I went through a set front rings on a monthly basis (aluminum).
|
|
#66
07-03-2012, 07:52 PM
|
||||
|
||||
|
Yeah, I think that is part of my problem... that sprocket is off center by maybe 2mm (just guesstimating). The problem, is that the hub sits flush with the inside of the sprocket, basically it's hubcentric, so I will have to do some grinding on the hub to get it centered. I'm gonna just order a new sprocket hub and see if that helps also.
this is the hub... http://www.*************/item/Hub-wit...or-600253-6500
__________________
T.J. Yerfdog Spiderbox, Uni Type air filter with 6" intake, 130 jet, Orange no-rev limit cdi, Red coil, iridium plug, 1500rpm clutch springs, 1500rpm contra spring, 13g sliders, 22" rears, 21" fronts, aftermarket reverse installed, and Trailtech Vapor.
|
|
#67
09-06-2012, 10:49 PM
|
|||
|
|||
|
I just ordered all the parts for my axle conversion. My wife has renamed my buggy to "Money Pit". I'm sure it's not the first one to get this designation. I'll add some pics as I go but shouldn't vary far from ckau's and T3beatz's work. Thanks!!!
|
|
#68
09-06-2012, 10:58 PM
|
||||
|
||||
|
Cool, whats wrong with your axle now? Or are you fixing the problem before it starts.
__________________
T.J. Yerfdog Spiderbox, Uni Type air filter with 6" intake, 130 jet, Orange no-rev limit cdi, Red coil, iridium plug, 1500rpm clutch springs, 1500rpm contra spring, 13g sliders, 22" rears, 21" fronts, aftermarket reverse installed, and Trailtech Vapor.
|
|
#70
09-07-2012, 07:19 AM
|
||||
|
||||
|
Yep, that sounds about right. Good luck on the conversion, it's not too bad of a job.
__________________
T.J. Yerfdog Spiderbox, Uni Type air filter with 6" intake, 130 jet, Orange no-rev limit cdi, Red coil, iridium plug, 1500rpm clutch springs, 1500rpm contra spring, 13g sliders, 22" rears, 21" fronts, aftermarket reverse installed, and Trailtech Vapor.
|
|
#71
01-19-2013, 10:47 PM
|
|||
|
|||
|
Where has the time gone? I'm just now getting the pieces welded together. I added a center carrier, extended the outer hubs and converted to double bearings, added hitch pin for light pulling and added a piece of angle to help support the rear motor mount.
Last edited by SoapKart; 01-19-2013 at 10:51 PM.
|
|
#72
01-19-2013, 11:42 PM
|
||||
|
||||
|
looks good man, you should be good to go for next season... I have a lot of work to do on mine. I hit a Polaris going about 20mph, bent up the front box, had to by a new one. The Polaris is fine, not a scratch, but my poor spiderbox took a beating.
I have a little work to do on the engine also, I want to get a little more HP out of it, so I'm thinking about going with a simple BBK.
__________________
T.J. Yerfdog Spiderbox, Uni Type air filter with 6" intake, 130 jet, Orange no-rev limit cdi, Red coil, iridium plug, 1500rpm clutch springs, 1500rpm contra spring, 13g sliders, 22" rears, 21" fronts, aftermarket reverse installed, and Trailtech Vapor.
|
|
#74
01-20-2013, 11:21 PM
|
||||
|
||||
|
I plan on making it... got to worry about things at home right now, the old lady wants to move to Colorado to be close to her parents by the end of the spring. I don't want to go, things are going good here but she is not happy. It is what it is... hopefully everything will work it self out for the best.
I didn't get any pics, it was pretty bad, the front end was twisted up... the driver side front tire hit his rear passenger side tire and basically the A-Arms pulled the box apart from the frame. the Tie rod ends broke, and the spindle got bent up pretty bad. I got most of it fixed up, I just have to change the box out now, and work out the tie rod end situation.
__________________
T.J. Yerfdog Spiderbox, Uni Type air filter with 6" intake, 130 jet, Orange no-rev limit cdi, Red coil, iridium plug, 1500rpm clutch springs, 1500rpm contra spring, 13g sliders, 22" rears, 21" fronts, aftermarket reverse installed, and Trailtech Vapor. Last edited by T3beatz; 01-20-2013 at 11:24 PM.
|
|
|
|